


16
Digital Input (DIGITAL IN) Terminal
Setting
When you use the digital input terminals, you have to register what
components are connected to which terminals (DIGITAL IN 1/2/3/4).
Before you start, remember....
• There is a time limit in doing the following steps. If the setting is
canceled before you finish, start from step 1 again.
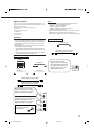
On the front panel ONLY:
To set the DIGITAL 1 terminal
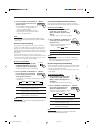
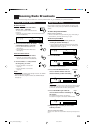
1. Press SETTING repeatedly until
“COAX DIG IN” appears on the
display.
The display changes to show the current setting.
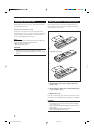
2. Press CONTROL UP 5/DOWN ∞
to select the appropriate digital
terminal setting.
• Each time you press the button, the display changes to
show the following:
1 DVD “ 1 CDR “ 1 TV (or 1 DBS*) “ 1 CD “
(back to the beginning)
*
If you have changed the source name from “TV SOUND” to
“DBS,” “DBS” appears (see page 13.)
When the DIGITAL 1 terminal is set, the
DIGITAL 2/3/4 terminal is automatically set as
follows:
When the DIGITAL 1 is set to “DVD”
2 CD 3 TV (or DBS*) 4 CDR
When the DIGITAL 1 is set to “CDR”
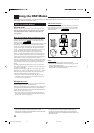
2 DVD 3 CD 4 TV (or DBS*)
When the DIGITAL 1 is set to “TV” or “DBS”
2 DVD 3 CD 4 CDR
When the DIGITAL 1 is set to “CD”
2 DVD 3 TV (or DBS*) 4 CDR
*
If you have changed the source name from “TV SOUND” to
“DBS,” “DBS” appears (see page 13.)
Selecting the Analog or Digital Input
Mode
When you have connected digital source components, you need to
select the input mode correctly according to the connection you
made.
Before you start, remember...
• The digital input (DIGITAL IN) terminal setting should be
correctly done for the sources you want to select the digital
input mode for. Without setting this digital input terminal
correctly, you cannot change the input mode from analog input to
digital input even if you follow the procedure below.
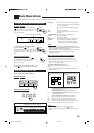
On the front panel:
1. Press one of the
source selecting
buttons (DVD, TV
SOUND/DBS, CD,
or TAPE/CDR)*
for which you
want to change the input mode.
Note:
*
Among the sources listed above, you can select the digital input
only for the sources which you have selected the digital input
terminals for. (See “Digital Input (DIGITAL IN) Terminal Setting.”)
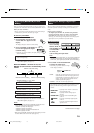
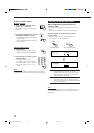
2. Press INPUT ANALOG/DIGITAL
to change the input mode.
• Each time you press the button, the input
mode changes as follows:
AUTO: Select this for the digital input mode. The receiver
automatically detects the incoming signal format.
(The DIGITAL AUTO indicator lights up on the
display, and the digital signal indicator for the
detected signals also light up.)*
ANALOG: Select this for the analog input mode.
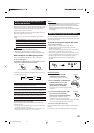
* The followings are the analog/digital signal indicators on the
display to indicate what type of the signal comes into the
receiver.
DIGITAL AUTO
: Lights up when “AUTO” is selected as
the digital input mode.
ANALOG
: Lights up when the analog input is
selected.
LINEAR PCM
: Lights up when Linear PCM signals
come in.
DIGITAL
: Lights up when Dolby Digital signals
come in.
: Lights up when DTS Digital Surround
signals come in.
DVD VCR
TV SOUND/DBS
CD TAPE/CDR
SOURCE NAME
FM/AM
DVD MULTI
PHONO
SOURCE NAME
CONTROL
DOWN UP
S
T SETTING
DIGITAL 3 terminal setting
DIGITAL 2 terminal setting
DIGITAL 4 terminal setting
Notes:
• When shipped from the factory, the DIGITAL IN terminals can be
used as the digital input for the following components.
• DIGITAL 1 (coaxial): For DVD player
• DIGITAL 2 (optical): For CD player
• DIGITAL 3 (optical): For digital TV broadcast tuner
• DIGITAL 4 (optical): For CDR
• When using the DIGITAL 4 terminal for the CD recorder, you need
to select “CDR” as the source name. (See page 13.)
INPUT
ANALOG/DIGITAL
INPUT ATT
ANALOG
AUTO
(Digital)
Continued to the next page.
EN10_22.RX-7010&7012R[B]_f 01.1.9, 5:23 PM16