


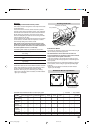

29
English
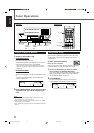
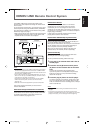
The COMPU LINK remote control system allows you to
operate JVC’s audio components through the remote sensor
on the receiver.
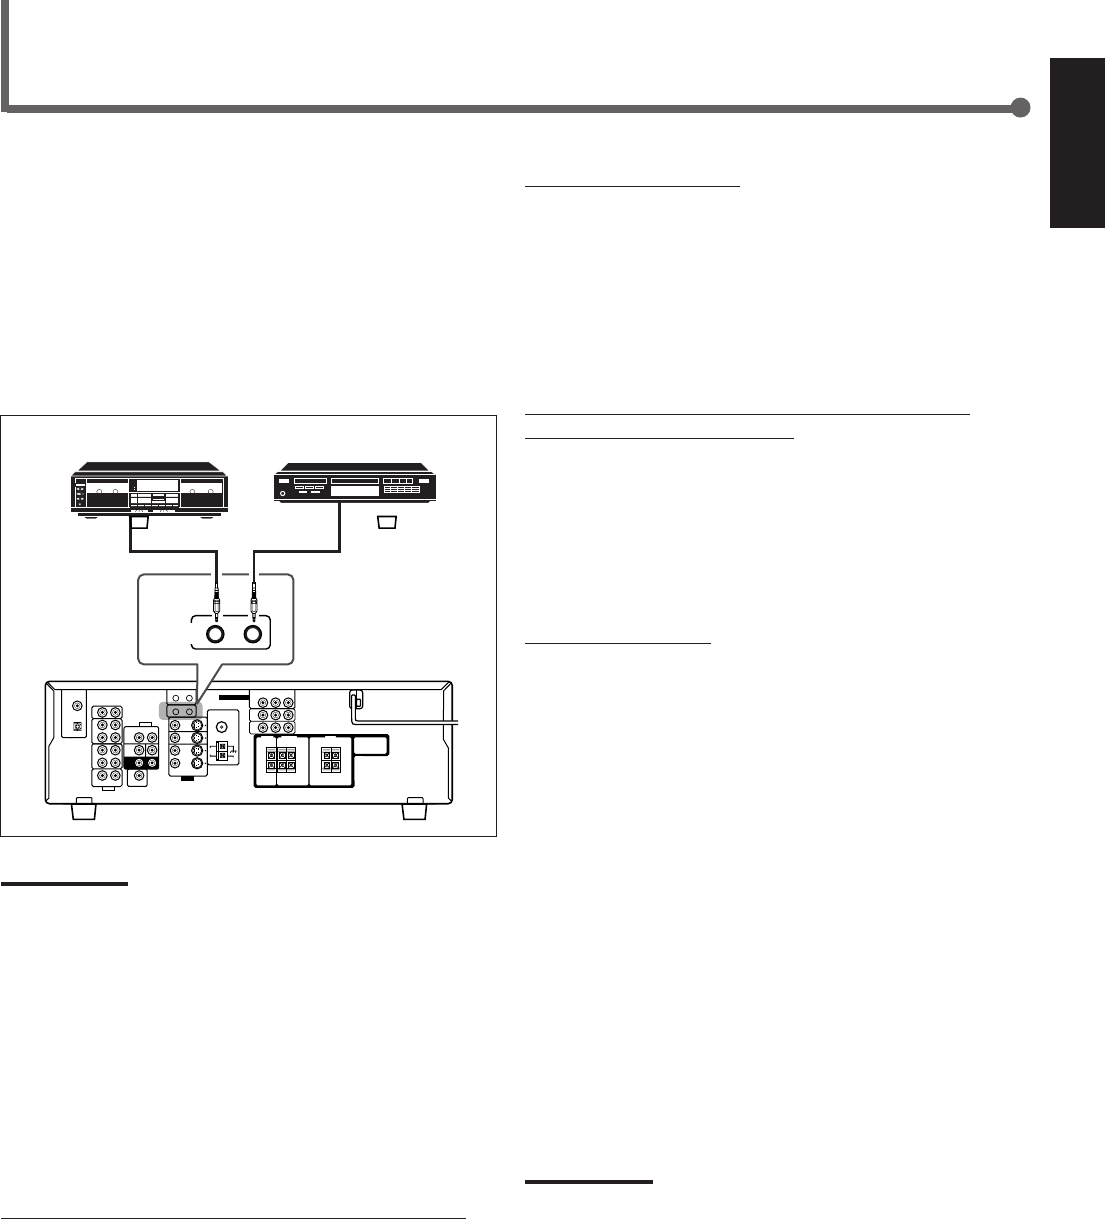
To use this remote control system, you need to connect JVC’s
audio components through the COMPU LINK-4 (SYNCHRO)
jacks (see below) in addition to the connections using cables
with RCA pin plugs (see page 7).
• Make sure that the AC power cords of these components are
unplugged before connection. Plug in the AC power cords
only after all other connections are completed.
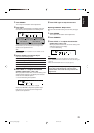
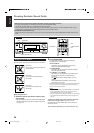
Cassette deck CD player
Rear panel
Notes:
• There are four versions of the COMPU LINK remote control system.
This receiver is equipped with the fourth version—COMPU LINK-4.
This version adds systematic operations with the CD recorder to the
previous version—COMPU LINK-3.
• If your audio component has two COMPU LINK jacks, you can use
either one. If it has only one COMPU LINK jack, connect it so that it
is the last item in the series of components.
• To operate the cassette deck or CD recorder using the COMPU
LINK remote control system, set the source name correctly.
(See page 12.)
• Refer also to the manuals supplied with your audio components.
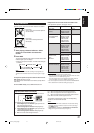
This remote control system allows you to use the four
functions listed below.
Remote Control through the Remote Sensor on the Receiver
You can control the connected audio components through the
remote sensor on the receiver using this remote control. Aim
the remote control directly at the remote sensor on the
receiver. For details, see pages 32 to 34.
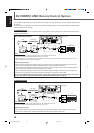
COMPU LINK Remote Control System
COMPU LINK-4
(SYNCHRO)
Automatic Source Selection
When you press the play (3) button on a connected
component or on its own remote control, the receiver
automatically turns on and changes the source to the
component. On the other hand, if you select a new source on
the receiver or on the remote control, the selected component
begins playing immediately.
In both cases, the previously selected source continues
playing without sound for a few seconds.
Automatic Power On/Off (Standby): only possible with the
COMPU LINK-3 and COMPU LINK-4
Both the CD player and cassette deck (or CD recorder) turn
on and off (standby) along with the receiver.
When you turn on the receiver, the CD player or cassette deck
(or CD recorder) will turn on automatically, depending on
which component has been previously selected.
When you turn off the receiver, both the CD player and
cassette deck (or CD recorder) will turn off (standby).
Synchronized Recording
Synchronized recording means the cassette deck starts
recording as soon as a CD begins playing.
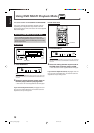
To use synchronized recording, follow these steps:
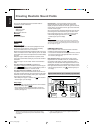
1
Put a tape in the cassette deck and a disc in
the CD player.
2
Press the record (¶) button and the pause
(8) button on the cassette deck at the same
time.
This puts the cassette deck into recording pause.
If you do not press the record (¶) button and pause (8)
button at the same time, the synchronized recording
feature will not operate.
3
Press the play (3) button on the CD player.
The source changes on the receiver, and as soon as play
starts, the cassette deck starts recording. When the play
ends, the cassette deck enters recording pause, and stops
about 4 seconds later.
Notes:
• During synchronized recording, the selected source cannot be
changed.
• If the power of any component is shut off during synchronized
recording, the COMPU LINK remote control system may not operate
properly. In this case, you must start again from the beginning.
EN28-40_RX-60_5030[C]f 02.12.24, 18:4129