


14
English
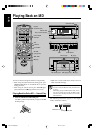
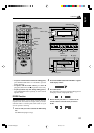
Recording a CD — Synchronized Recording
This is the easiest way of CD recording. Setting the recording
mode, you can start playing back an entire CD and recording
it onto an MD simultaneously.
1
Repeat the steps 1 and 2 in previous section.
2
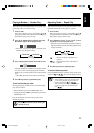
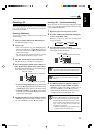
Press REC MODE button behind the sliding panel
to select “SYNC REC
>
MD.”
Each time you press the button, the recording mode
changes as follows:
3
Press SET button to start recording.
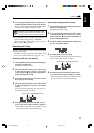
Recording starts automatically, and information change
in the display window as follows:
Each time you press DISPLAY/CHARA. button,
information switches between the remaining time and
elapsed time with the current track number alternately.
While synchronized recording
You cannot use pause function until the recording
finishes.
4
Press 7 (stop) button (on either the CD player or
the MD recorder) to quit recording as required.
“WRITING” appears in the display window, and you
can remove the MD by pressing 0 (eject) button.
• When all the tracks finished recording, CD player
and MD recorder will automatically stop.
To record a single track during playback
Press REC MODE button to set “SYNC REC>MD”
mode, you can record a current track during playback.
The playback of the current track is stopped, and the
same track starts playing back from the beginning
again. At the same time, the MD recorder starts
recording the current track.
• When the current track is recorded, both CD player
and MD recorder automatically stop.
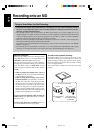
Recording a CD
When recording a CD onto an MD, you can record the entire
CD or the particular tracks manually and using the
synchronized recording.
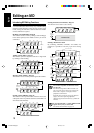
Recording a CD Manually
You can start recording an entire CD or any tracks of a CD
while listening.
1
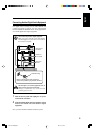
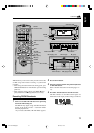
Insert a recordable MD into the MD loading slot.
The MD IN lamp lights orange.
2
Prepare a CD.
• Place a CD on the disc tray, press 6 (play/pause)
button on the CD player or CD 6 (play/pause) on
the remote control, then press 7 (stop) button before
going to the next step.
• You can also record programed tracks if you want
(refer to FS-G6’s Instructions, pages 17 to 18).
3
Press REC PAUSE button on the MD recorder.
The REC indicator on the MD recorder lights red.
4
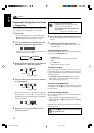
Press 6 (play/pause) button on the CD player or
CD 6 (play/pause) button on the remote control.
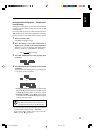
Recording starts automatically, and information changes
in the display window as follows:
• To stop recording temporarily, press REC PAUSE
button or 6 (play/pause) button on the MD recorder
or MD 6 (play/pause) button on the remote control.
• To resume recording, press 6 (play/pause) button
on the MD recorder or MD 6 (play/pause) button
on the remote control again.
5
Press 7 (stop) button to stop recording as required.
“WRITING” appears in the display window, and you
can remove the MD by pressing 0 (eject) button.
Continued
SYNC REC
>
MD
(
c
anceled
)
SYNC REC
>
TAPE
Remaining time for recording
Remaining time of each track
CD Track number
Remaining time for recording
Remaining time of each track
CD Track number
EN11-18.XM-G6[J]/2b 99.12.09, 17:5814