4
English
CAUTION: Make all connections before plugging the System into an AC power outlet.
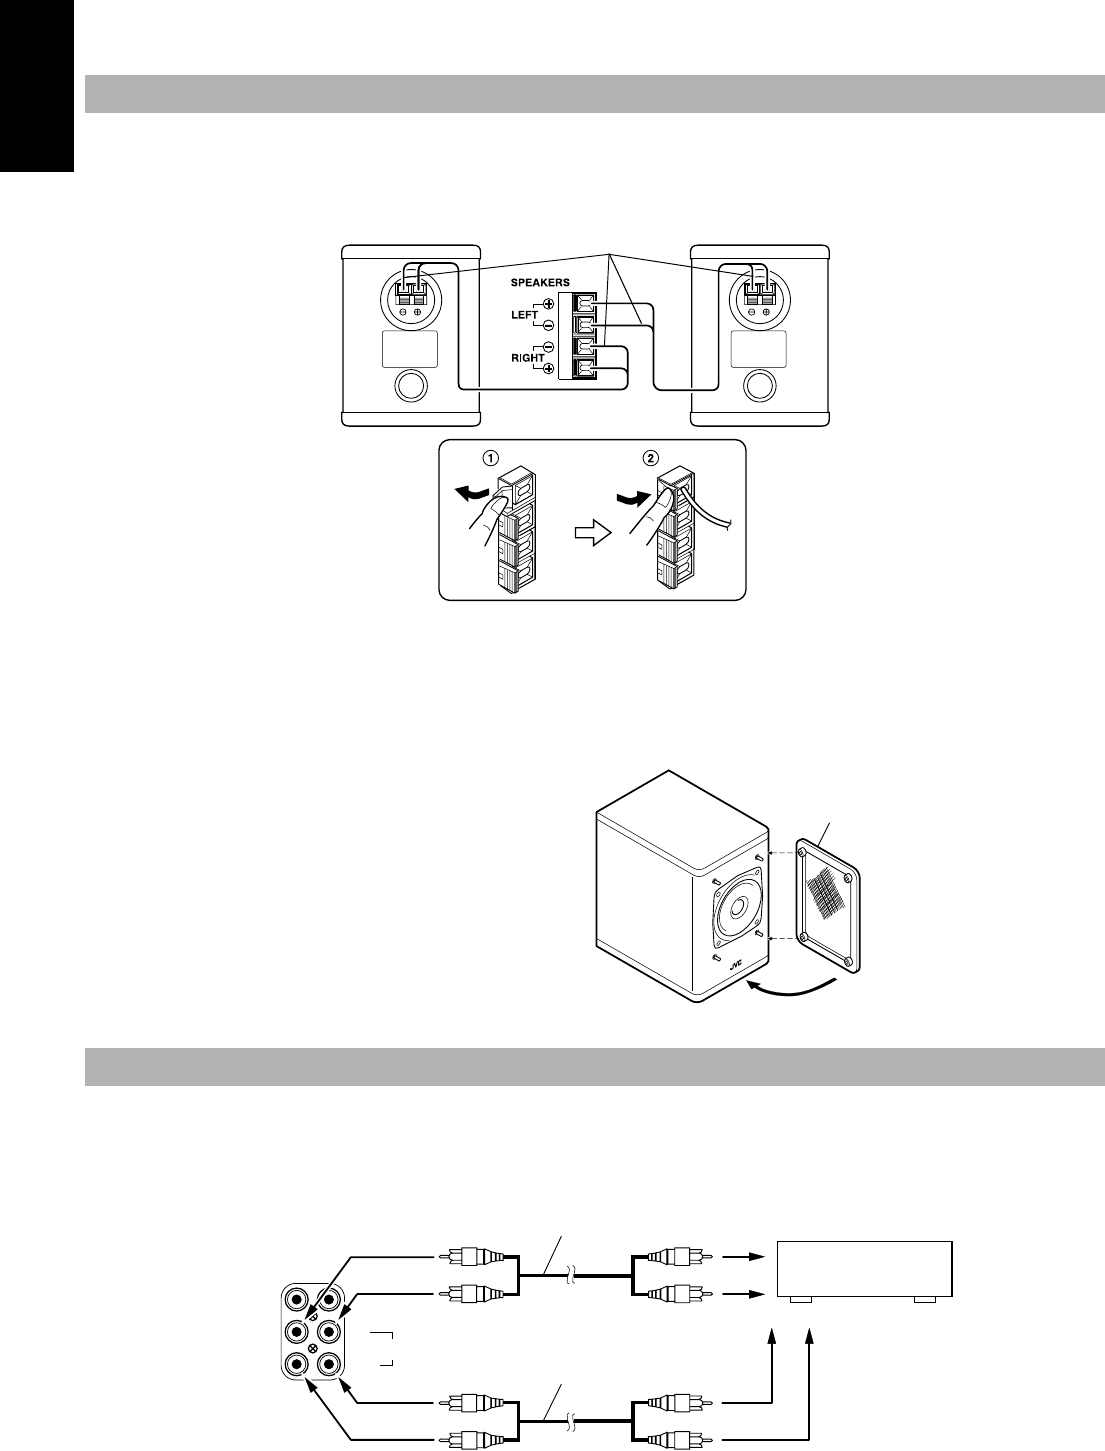
1. Open the Speaker terminals on the rear of the Unit, and on the Speakers themselves.
2. Connect the speaker cords between the terminals as shown below.
Connect the cords with a black line to the (–) terminals and cords without a black line to the (+) terminals.
Close each of the terminals to securely connect the cords1
Right speaker (rear side) Left speaker (rear side)
CAUTION: A TV may display irregular colors if located near the speakers. If this happens, set the speak-
ers away from the TV.
Removing the speaker grilles
7KH#VSHDNHU#JULOOHV#FDQ#EH#UHPRYHG1
When removing, When attaching the speaker grille
41 ,QVHUW#\RXU#ILQJHUV#DW#WKH#WRS#DQG#SXOO#WRZDUGV#\RX1
51 $OVR#SXOO#WKH#ERWWRP#WRZDUGV#\RX1
&RQQHFW#+RSWLRQDO,#VLJQDO#FR UGV#EHWZH HQ#WKH#6\VWHP¶V#0'27$3(#,12287#WHUPLQDOV#DQG#WKH#RXWSXW2LQSXW#WHUPLQDOV#RI#WKH#H[WHUQDO#0'#UHFRUGHU/
WDSH#GHFN /#HWF1
You can then listen to the external source through the System, or record the System’s CD player or tuner to the external uniW1
Connecting the Speakers
Connecting an MD Recorder/Tape Deck
Marked with a black line
SPEAKER CORD
Speaker grille
R
L
IN
OUT
MD/TAPE
Signal cord (optional)
MD recorder or tape deck (optional)
Pin-plug x 2
Pin-plug x 2
Pin-plug x 2
Pin-plug x 2
Signal cord (optional)
Ux5500(E)-e.fm Page 4 Monday, May 11, 1998 4:26 PM


