18
Using the Timers
English
1
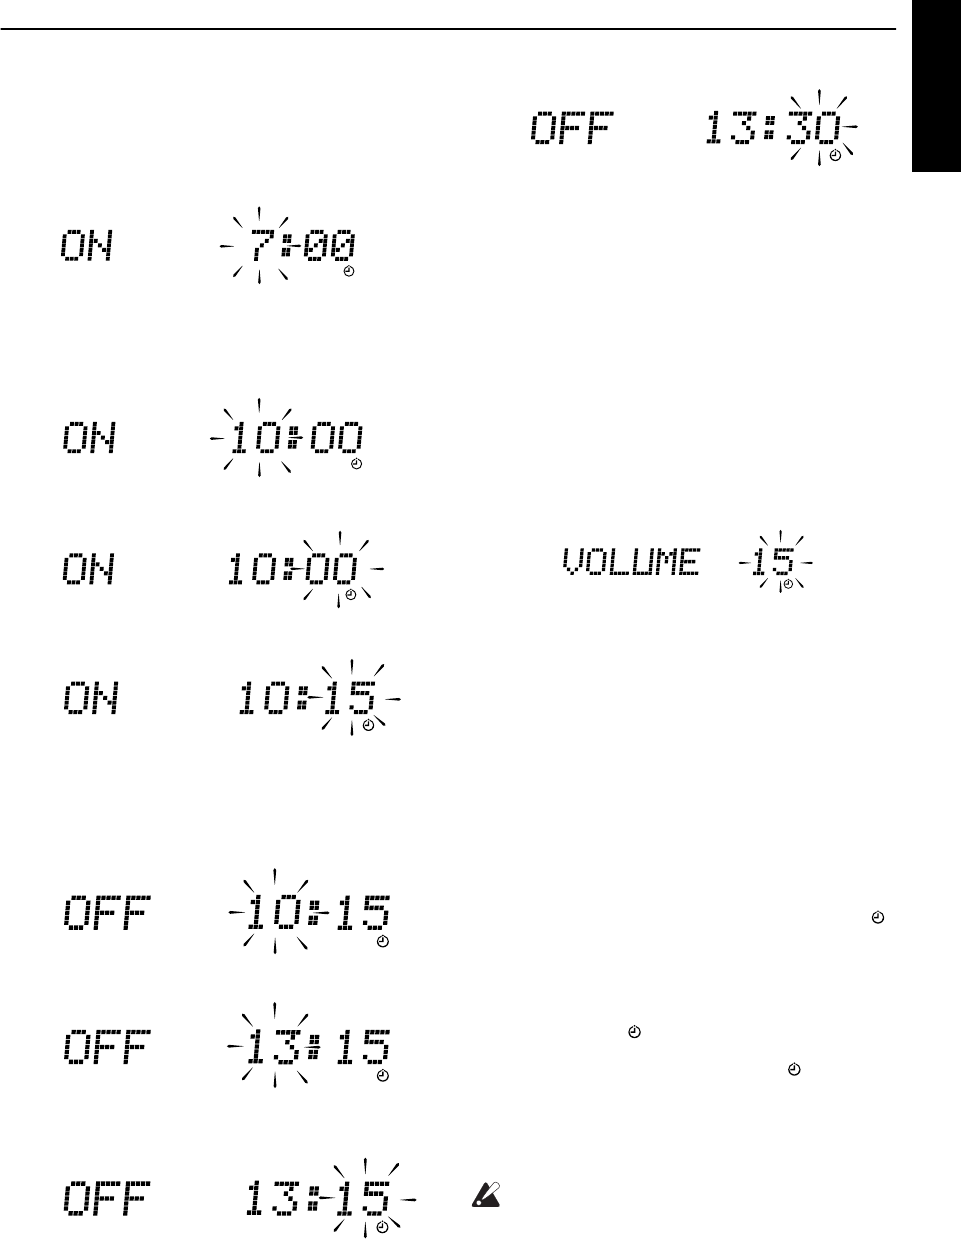
Setting the ON time (Example: 10:15).
1. Press the TIMER button on the Unit for more than
two seconds.
The Timer indicator lights up and the hour digit of the
current ON time blinks on the display.
• When the clock is not set, “CLOCK” and “ADJUST”
appear alternately on the display. Set the clock first.
Press the ¢ or 4 button on the Unit to set the
hour you want the Unit to come on.
Pressing the ¢ button moves the time forwards and
pressing the 4 button moves it backwards. Hold
down the button to move the time rapidly.
2. Press the TIMER button.
The minute digits of the ON time blink on the display.
Set the minute you want the Unit to come on, using
the ¢ or 4 button.
2
Setting the OFF time (Example: 13:30).
1. Press the TIMER button.
The hour digit of the OFF time blinks on the display.
(The same time as the ON time will be automatically
set.)
Set the hour you want the Unit to be turned off, using
the ¢ or 4 button.
2. Press the TIMER button.
The minute digits of the OFF time blink on the dis-
play.
Set the minute you want the Unit to be turned off, us-
ing the ¢ and 4 buttons.
3
Selecting the music source.
1. Press the TIMER button.
The “TUNER” or “CD” blinks on the display.
2. Press the ¢ or 4 button to select the music
source you want to listen to.
The display changes as shown below.
TUNER
Ô
CD
Ô
(back to the beginning)
4
Setting the volume level.
1. Press the TIMER button.
The current volume setting blinks on the display.
2. Press the ¢ or 4 button to select the volume level.
-- :The current volume level will be used.
0 to 50 :When the timer is turned on, the Volume
will be automatically set to the selected
level.
5
Press the TIMER button.
The timer setting is completed and the display returns to
the display before you set the Timer. The Timer indica-
tor remains lit.
6
Before turning off the System, prepare
the music source selected in step 3.
TUNER: Tune in to the desired station.
CD: Insert a CD. (Playback will start from the first
track at Timer on.)
7
Press the %
%%
% button to turn off the Sys-
tem.
In standby mode, you can see the Timer indicator ( )
on the display.
• When the timer turns on, the Timer indicator starts
blinking and the prepared source in step 6 will be
played.
To cancel the timer, press the TIMER button. The
Timer indicator ( ) goes out on the display.
To re-activate the cancelled timer, press the TIM-
ER button to light the Timer indicator ( ).
At this time, you can see the current timer settings. Each
setting appears on the display for two seconds in the or-
der of ON time, OFF time, music source and volume.
To change the timer setting, repeat the setting pro-
cedure from the beginning.
CAUTION:
• If the System is unplugged, or a power fail-
ure occurs, the timer setting will be lost.
You will need to reset the clock first, then
the timer.
FS-SD5&7&9_A3.fm Page 18 Thursday, June 1, 2000 9:30 AM


