55
Ripping sound directly from a CD to a USB device
1 Connect the USB device.
• Refer to page 21.
2 Press [USB 3].
3 Press 7 to stop playback.
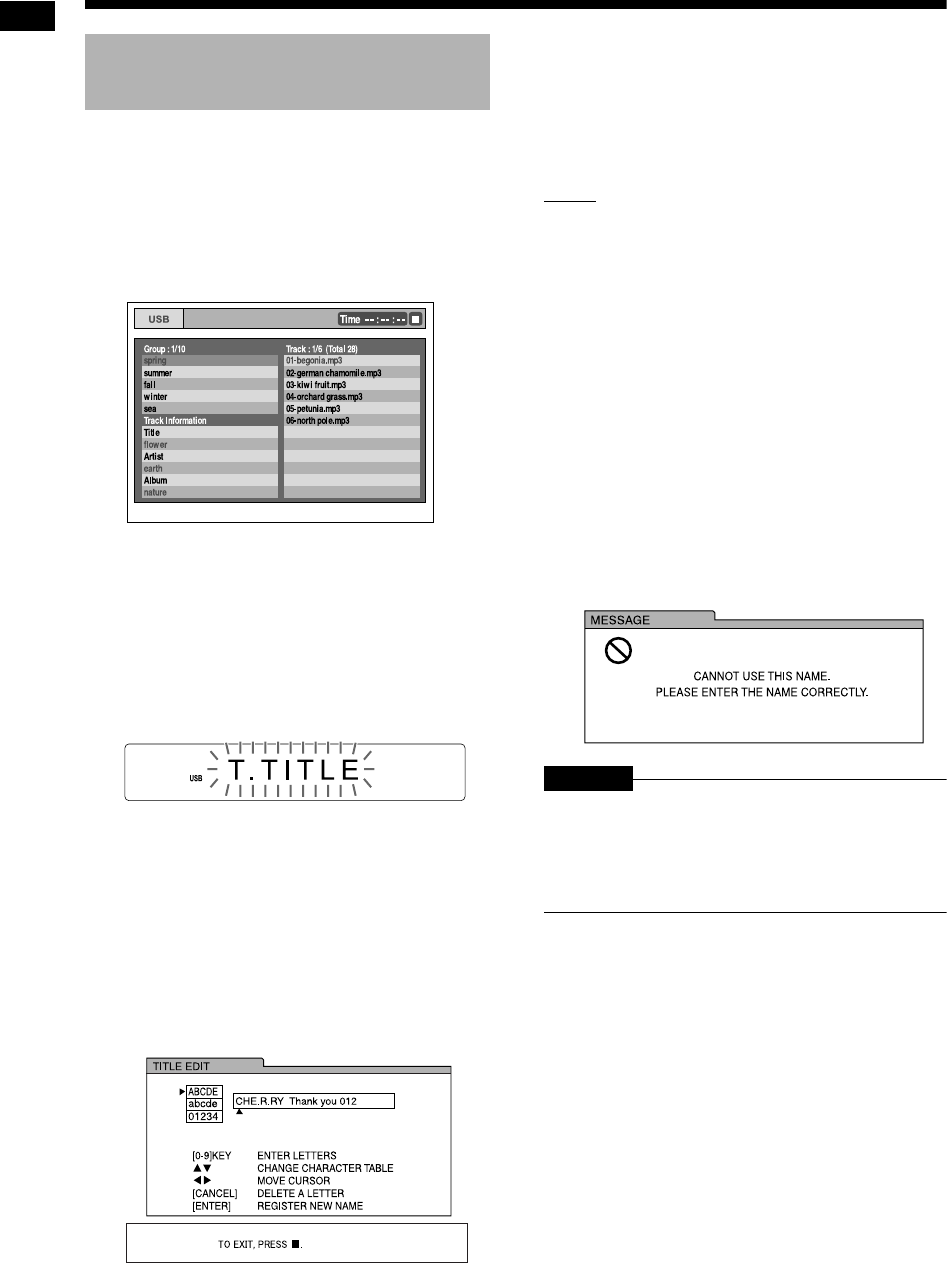
TV screen
4 Press 5, /, 2 or 3 (cursor)
repeatedly to select the desired
track/group.
5 Press [TITLE/DELETE] repeatedly
to select “T. TITLE” or “G. TITLE”
in the display window.
Display window
• Select “T. TITLE” to add a title to a track.
• Select “G. TITLE” to add a title to a group.
6 Press [ENTER].
• The title of the selected track/group appears
in the display window.
• If the track/group does not have a title, “NO
NAME” appears instead.
• Press [CANCEL] to erase a stored title.
TV screen
7 Enter a title.
• Refer to “Entering a title” on page 56.
• To cancel editing a title, press 7.
8 Press [ENTER].
NOTE
• When “WAIT” is displayed in the display window,
you cannot start editing.
• If “NO USB” appears in the display window,
check the USB device or its connection.
• You can also refer to messages on the TV
screen when you add or edit a title to a track/
group on the connected USB device. The mes-
sages indicate the operational status and pro-
vide instructions.
• Do not press [AUDIO F] while the main unit is
editing a title. If [AUDIO F] is pressed, the main
unit automatically turns off after the title is edited.
• If you press [ENTER] without first entering a title,
“EDIT ERR” appears in the display window and
the following display appears on the TV screen.
At this time, press [ENTER] again to enter a title.
TV screen
CAUTION
• Do not bump or move the main unit while editing
a title. Such movement may interfere with edit-
ing.
• Do not disconnect the USB device during edit-
ing, as this may cause malfunction.
Adding (Editing) a title to a
track/group on a USB device
Ripping sound directly from a CD to a USB device (continued)
NX-F3_NX-F7[US]-09.fm Page 55 Tuesday, February 19, 2008 11:36 AM


