


– 11 –
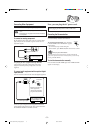
Selecting the Sources
To listen to the FM/AM broadcasts, press FM/AM.
(See page 13.)
To play back CDs, press CD 3¥8. (See pages 16 – 20.)
To play back tapes, press TAPE 2 3. (See page 21.)
To select the external equipment as the source, press AUX.
When you press the play button for a particular source
(FM/AM, CD 3/8, TAPE 2 3, and AUX), the unit turns on
and the unit starts playing the source if it is ready.
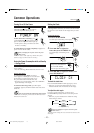
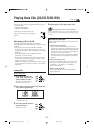
Adjusting the Volume
You can adjust the volume level only while the unit is turned
on. The volume level can be adjusted in 32 steps (VOLUME
MIN, VOLUME 1 – VOLUME 30, and VOLUME MAX).
Turn VOLUME + / – clockwise (+)
to increase the volume or
counterclockwise (–) to decrease it.
When using the remote control, press
VOLUME + to increase the volume or
VOLUME – to decrease it.
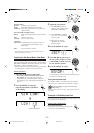
For private listening
Connect a pair of headphones to the PHONES (
) jack. No sound
comes out of the speakers. Be sure to turn down the volume before
connecting or putting on headphones.
DO NOT turn off (on standby) the unit with the
volume set to an extremely high level; otherwise, a
sudden blast of sound can damage your hearing,
speakers and/or headphones when you turn on the
unit or start playing any source next time.
REMEMBER you cannot adjust the volume level
while the unit is on standby.
To turn down the volume level temporarily
On the remote control ONLY:
Press FADE MUTING.
The volume level gradually decreases to
“VOLUME MIN.”
To restore the sound, press the button again.
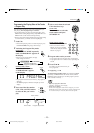
Reinforcing the Bass Sound
You can select one of the 5 subwoofer levels. This function
only affects the playback sound, but does not affect your
recording. The subwoofer level can be adjusted in 5 steps—
LEVEL 0 (MIN LEVEL), LEVEL 1, LEVEL 2, LEVEL 3,
and LEVEL 4 (MAX LEVEL).
Press SUBWOOFER LEVEL + to
increase the subwoofer level or
SUBWOOFER LEVEL – to decrease it.
• The SUBWOOFER lamp lights up in red when LEVEL 1 to
LEVEL 4 (MAX LEVEL) is selected. The lamp lights off when
LEVEL 0 (MIN LEVEL) is selected.
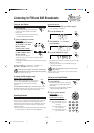
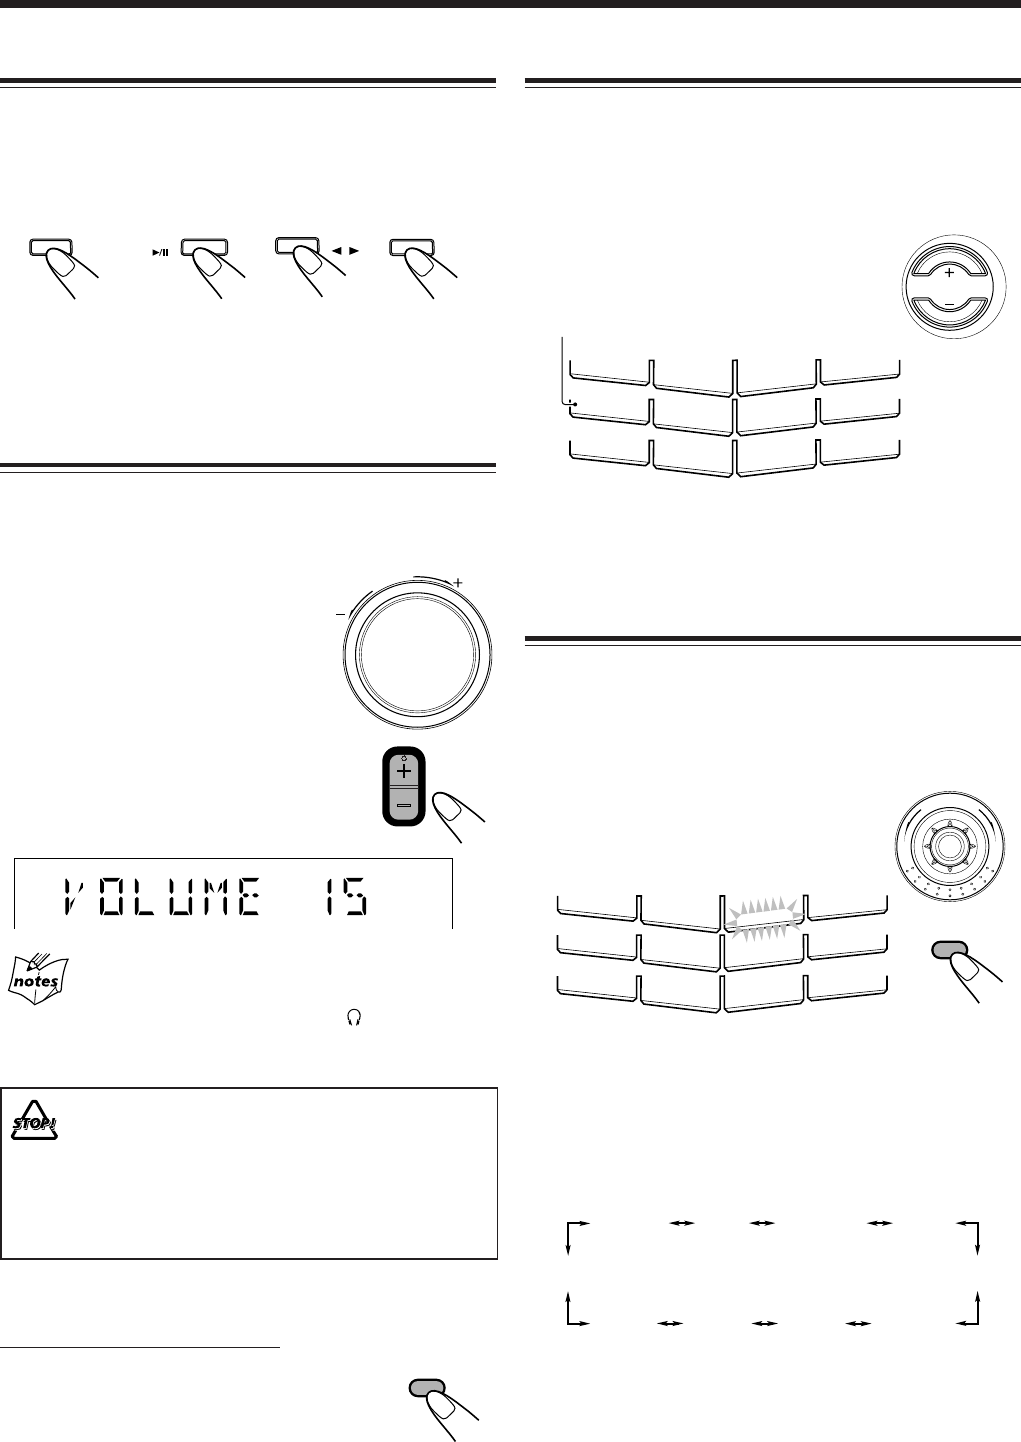
Selecting the Sound Modes
You can select one of the 6 preset sound modes (3 surround
modes and 3 SEA—Sound Effect Amplifier—modes) and 3
user modes. This function only affects the playback sound,
but does not affect your recording. Each Sound Mode has its
own display illumination.
To select the sound modes, turn SOUND
MODE (or press SOUND MODE on the
remote control) until the sound mode you
want appears on the display.
• When a sound mode is selected (for this example DANCE), the
SOUND MODE lamp and other than the selected sound mode
lamps light up. While the selected sound mode lamp flashes.
(If USER 1, USER 2, and USER 3 is selected, only the SOUND
MODE lamp lights up. If OFF is selected, the SOUND MODE
lamp and other sound mode lamps go off.)
The sound modes change as follows:
When using the remote control, the sound mode changes
clockwise in the above sequence.
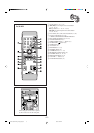
FADE
MUTING
S
O
U
N
D
M
O
D
E
SOUND
MODE
R E C
CLASSIC
CD1 READY
STADIUM
P O P
CD2 READY
H A L L
SOUND MODE
R O C K
D A N C E
CD3 READY
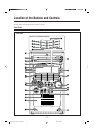
SUBWOOFER
V
O
L
U
M
E
VOLUME
FM / AM
TAPE
CD
AUX
SUBWOOFER lamp lights up in red.
SUBWOOFER
LEVEL
R E C
CLASSIC
CD1 READY
STADIUM
P O P
CD2 READY
H A L L
SOUND MODE
R O C K
D A N C E
CD3 READY
SUBWOOFER
DANCE
(DANCE club)
OFF
(Canceled)
HALL STADIUM
ROCK
POP
CLASSICUSER 1USER 2
USER 3
EN10-15.CA-HXZ1R_HXZ1[B_A]f.pm6 3/21/02, 2:50 PM11