


Installation of the AVA7 is a straight-
f
orward process.
I
MPORTANT:
The amplifier must be installed
following the directions described
below. To ensure adequate perform-
ance and safety, never install the
a
mplifier with less free space around
the amplifier than what is specified.
Always put amplifiers on the bottom
of a stack.
Heavy equipment should not be sup-
ported solely by the front-mounting
locations. It is recommended that addi-
tional rear support be used.
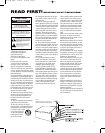
1. The JBL Performance Series AVA7
power amplifier has been designed
to be mounted in EIA standard racks,
or stacked freestanding as long as
there is 4 inches (10cm) of free
space around the amplifier (sides
and rear). If the AVA7 is being
mounted in a rack, it is suggested
that its feet be removed prior to
installation. If the AVA7 will be
stacked with other components, use
the feet that came attached to the
unit. This will ensure that there is suf-
ficient air space underneath so that
heat can be dissipated effectively.
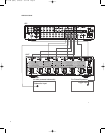
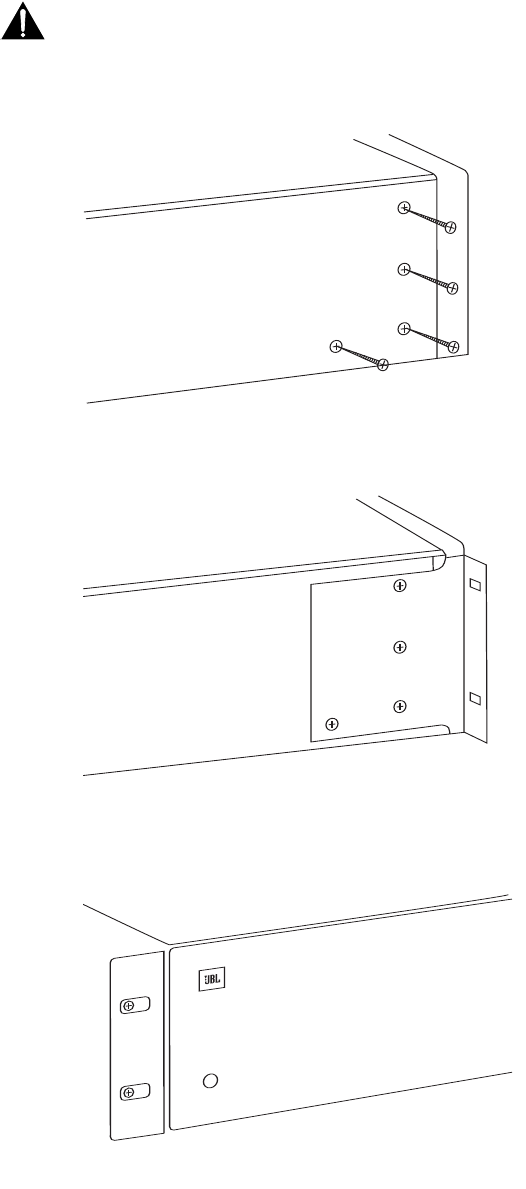
Two rack ears are included with the
AVA7. To install these rack ears,
remove the four machine screws on
each of the two side panels (see
drawing), hold each rack ear in
place, and attach it to the AVA7
using the same four screws. Make
sure that these screws are securely
tightened.
2.
Make sure that the amplifiers are
located in a well-ventilated, cool
area. Be certain that the side and
rear panels are not obstructed, as
the cooling fan brings air in from the
rear and expels it at the sides. It is
very important not to obstruct the
airflow from the rear panel; heat
buildup and premature failure may
occur. If the amplifier is installed
inside a cabinet that is enclosed on
all sides, the front of the cabinet
must remain open to allow sufficient
flow-through ventilation to avoid
overheating.
3. Using a helper to guide the unit into
the rack, gently slide the AVA7 into
place. Align the rack mounting holes
to the rack ears of the equipment
rack.
4. Starting with the bottom two screw
h
oles and using two of the rack
s
crews and plastic washers (if sup-
plied with your rack), secure the
AVA7 into the rack. It may be neces-
sary to have a helper hold up the
r
ear of the
u
nit until you have started
the threads
of the screws. Once the
bottom mounting screws are
i
nstalled, move to the top mounting
s
crews. Once done, check and
tighten all four screws. Always use
all four screws when mounting any
equipment.
I
NSTALLING THE AVA7
9
PERFO
RMA
NCE
Front view of amplifier with rack ear attached.
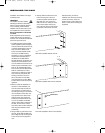
Side view of amplifier without rack ear.
Side view of amplifier with rack ear attached.
AVA 7 OM (New) 6/20/05 3:51 PM Page 9