


UNDERSTANDING POWER RATINGS
An A/V (audio/video) receiver with limited power output can
actually cause damage to your speakers. When played beyond
its power capability, it will go into clipping. This generates
spurious high-frequency signals which, when routed to the
tweeter, can cause it to overheat and fail.
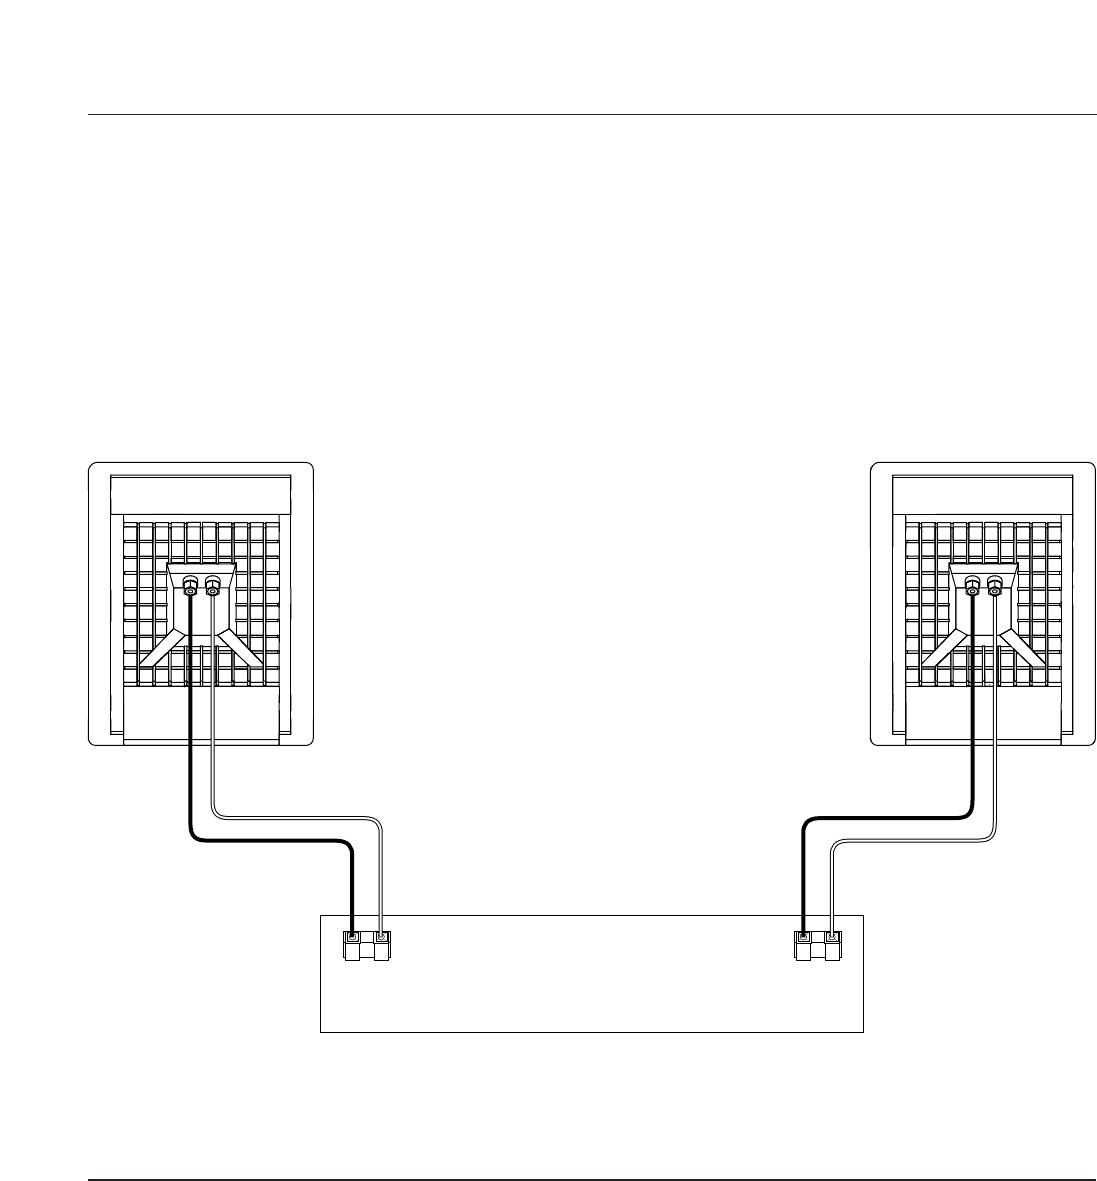
3
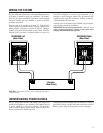
Receiver
(Rear Panel)
-
+
L
-
+
R
RightLeft
+
-
+
-
OUTRIGGER Left
(Rear View)
OUTRIGGER Right
(Rear View)
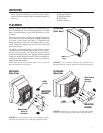
WIRING THE SYSTEM
After placing the Outrigger speakers, you are ready to wire them.
First turn off all audio system power. Use high-quality speaker wire
(#16 gauge or heavier) to make your connections. Use weather-
proof wire for outdoor installations. Consult the owner’s manuals
that were included with your amplifier or receiver to confirm
connection procedures.
Strip the ends of the speaker wires about
3
⁄8". Twist the wire
strands together for terminal insertion. Observe polarities when
making speaker connections, as shown in Figure 4. Outrigger
speakers have screw-down terminals for easy wiring. Open the
terminal shell by turning it counterclockwise to expose the
FIGURE 4. An example of how to connect Outrigger speakers to
a stereo receiver.
opening in the post. Insert a wire from each + terminal on the
back of the amplifier or receiver to the respective + (red)
terminal on each Outrigger speaker.Turn the terminal shell
clockwise until it secures the connection. Similarly, connect the
– (black) terminal in the same way.
If desired, you can use banana plugs (available at your local elec-
tronics store) to make these connections.
IMPORTANT! Do not reverse polarities (i.e., + to – or – to +)
when making connections. Doing so will cause poor
imaging and diminished bass response.
Overdriving the power amplifier must be avoided. It is always a
good idea to choose a receiver with more power than you need.
(Refer to power ratings in Specifications on the next page.)