


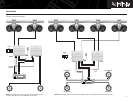
The 6000m speakers use a unique mounting
bracket that works with various tube sizes
and flat mounting surfaces. The speakers also
incorporate a swivel feature that allows you to
easily turn them once they’re mounted.
TUBE-MOUNTING
The 6000m speakers can accommodate tower
tubes that range from 1-1/2" to 2-1/2" in diame-
ter. The top of the mounting bracket is made with
two cutouts that allow the bracket to easily
adjust to the tower. Simply rotate the bracket
90 degrees, depending on your application.
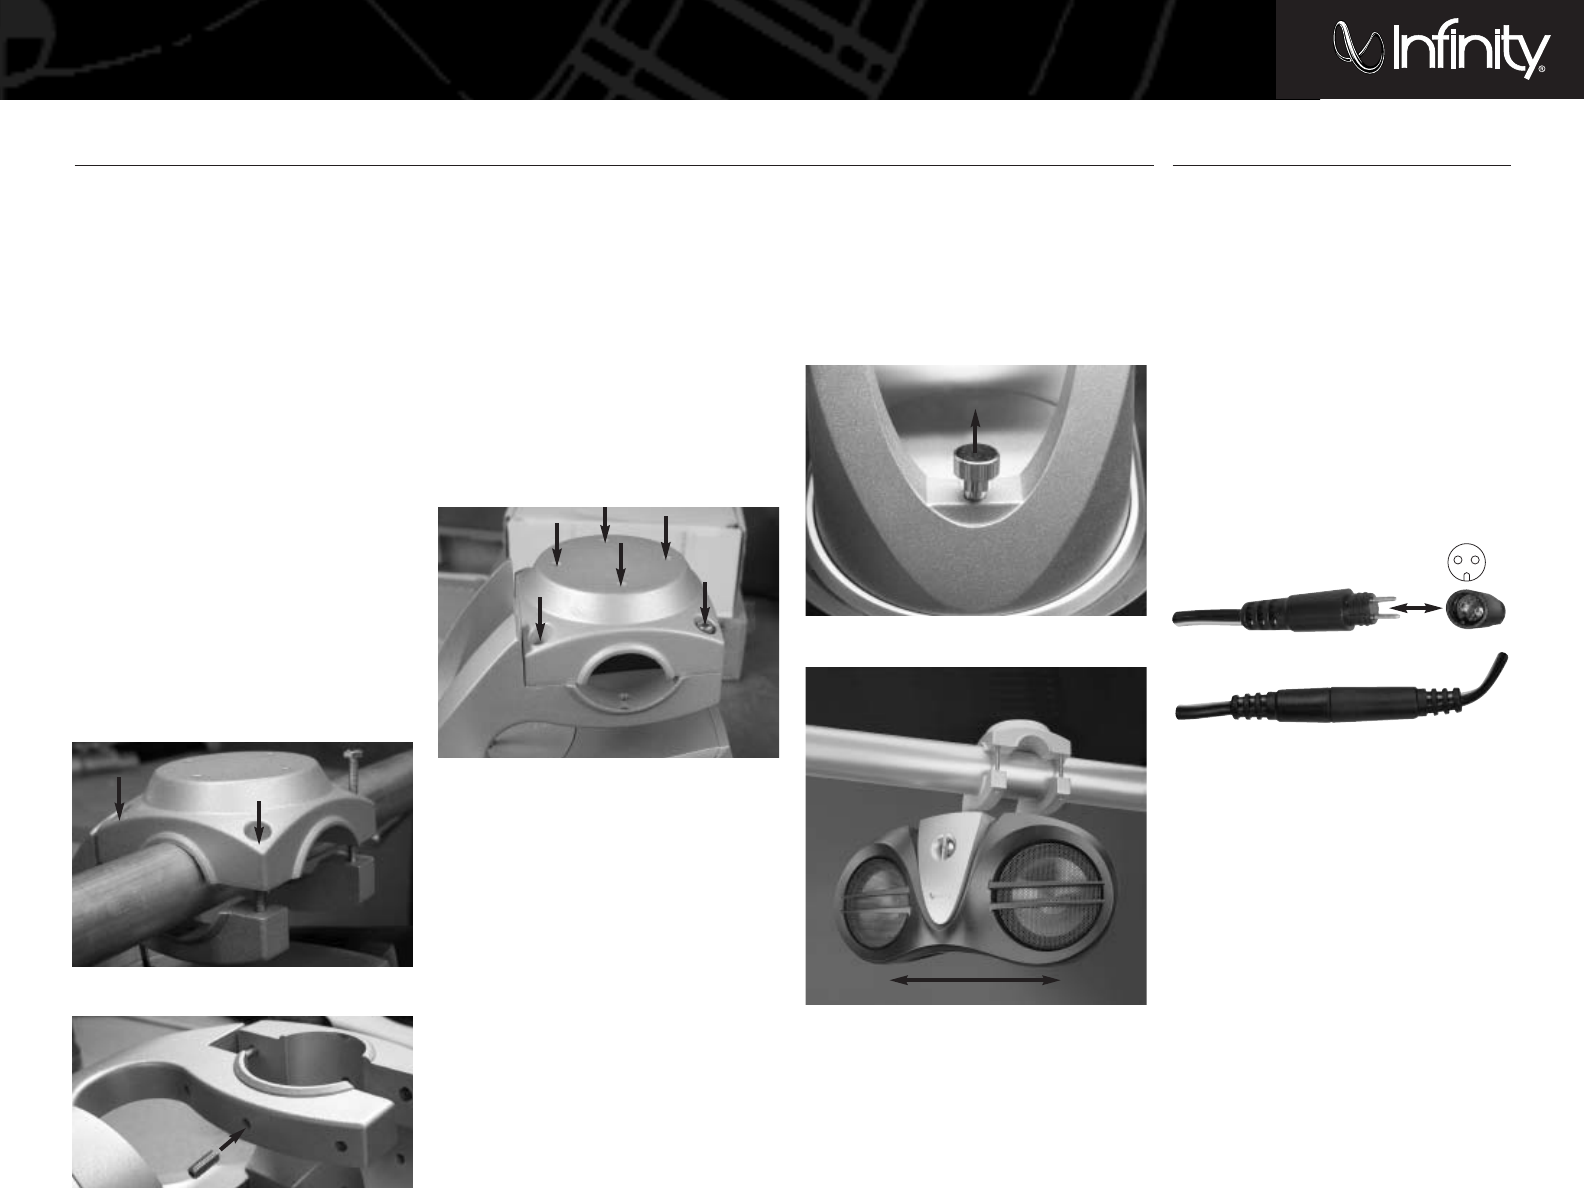
Position the bottom bracket with the speaker
and top bracket in place on the tower. Install
the supplied 2-1/2" bolts through the top bracket
and tighten in place using a 5mm hex-key
wrench. While tightening the bolts, keep the
bottom bracket parallel with the top bracket at
all four corners of the bracket. Take care not to
overtighten the bracket. See Figure 1. Once the
speakers are in position, install the set screws in
the bottom of the bracket to keep the speakers
from twisting out of place. See Figure 2.
NOTE: There are four pre-tapped mounting
holes (1/4-20 thread) on the top of each
speaker bracket that can be used for mounting
accessories, such as lighting. See Figure 3.
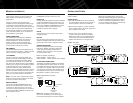
SWIVELING THE SPEAKERS
Located at the base of the speaker mounting
bracket is a swivel-lock pin. Pull this pin up
in order to swivel the speaker 270 degrees at
45-degree intervals. Once you have the speaker
near the position that you want, release the
pin and rotate the speaker until the pin locks
in place.
Figure 4. Pulling the swivel-lock pin up.
Figure 5. Swiveling the speaker.
SURFACE-MOUNTING
Some towers may have a flat support panel used
to mount accessories such as lighting, board
holders, radars, antennas or other accessories.
If you wish to mount the 6000m speakers to this
panel, use the 2-1/2" screws to clamp the bracket
together, as shown in Figure 3. Using the four
mounting holes in the top of the bracket, align
the speaker with holes on the mounting plate on
the tower. If there are no holes in the panel, use
the bracket as a template to mark the locations
of the four holes. Drill four new holes in the
panel. DO NOT drill through the holes in the
bracket. Insert the 1-1/4" bolts using the large
washers and tighten using a 5mm hex-key
wrench.
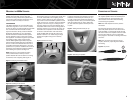
MOUNTING THE 6000M SPEAKERS
Figure 1. Clamping the brackets down.
Figure 2. Installing the set screws.
Figure 3. Surface-mounting.
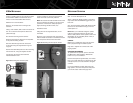
Connect the speakers to an amplifier using
the supplied speaker wires. The weatherproof
connectors allow for quick connection and
disconnection of the wires when installing
and removing the speakers.
NOTE: The white-striped wire is the positive
connection.
Run the wires along the tube and secure in
place with plastic zip ties. If the tube has wire
holes available, run the speaker wires through
the tower tubes to the amplifier. Check to make
sure the wires will not come in contact with
sharp edges or metal that can damage the wires
over time.
NOTE: The connectors are keyed to line up
properly. Check for proper alignment before
connecting.
Figure 6. Key notch.
CONNECTING THE SPEAKERS
3