


1716
• RECORD Start recording
• PAUSE, RECORD Record pause
followed by PAUSE Start recording
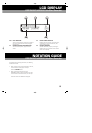
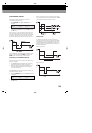
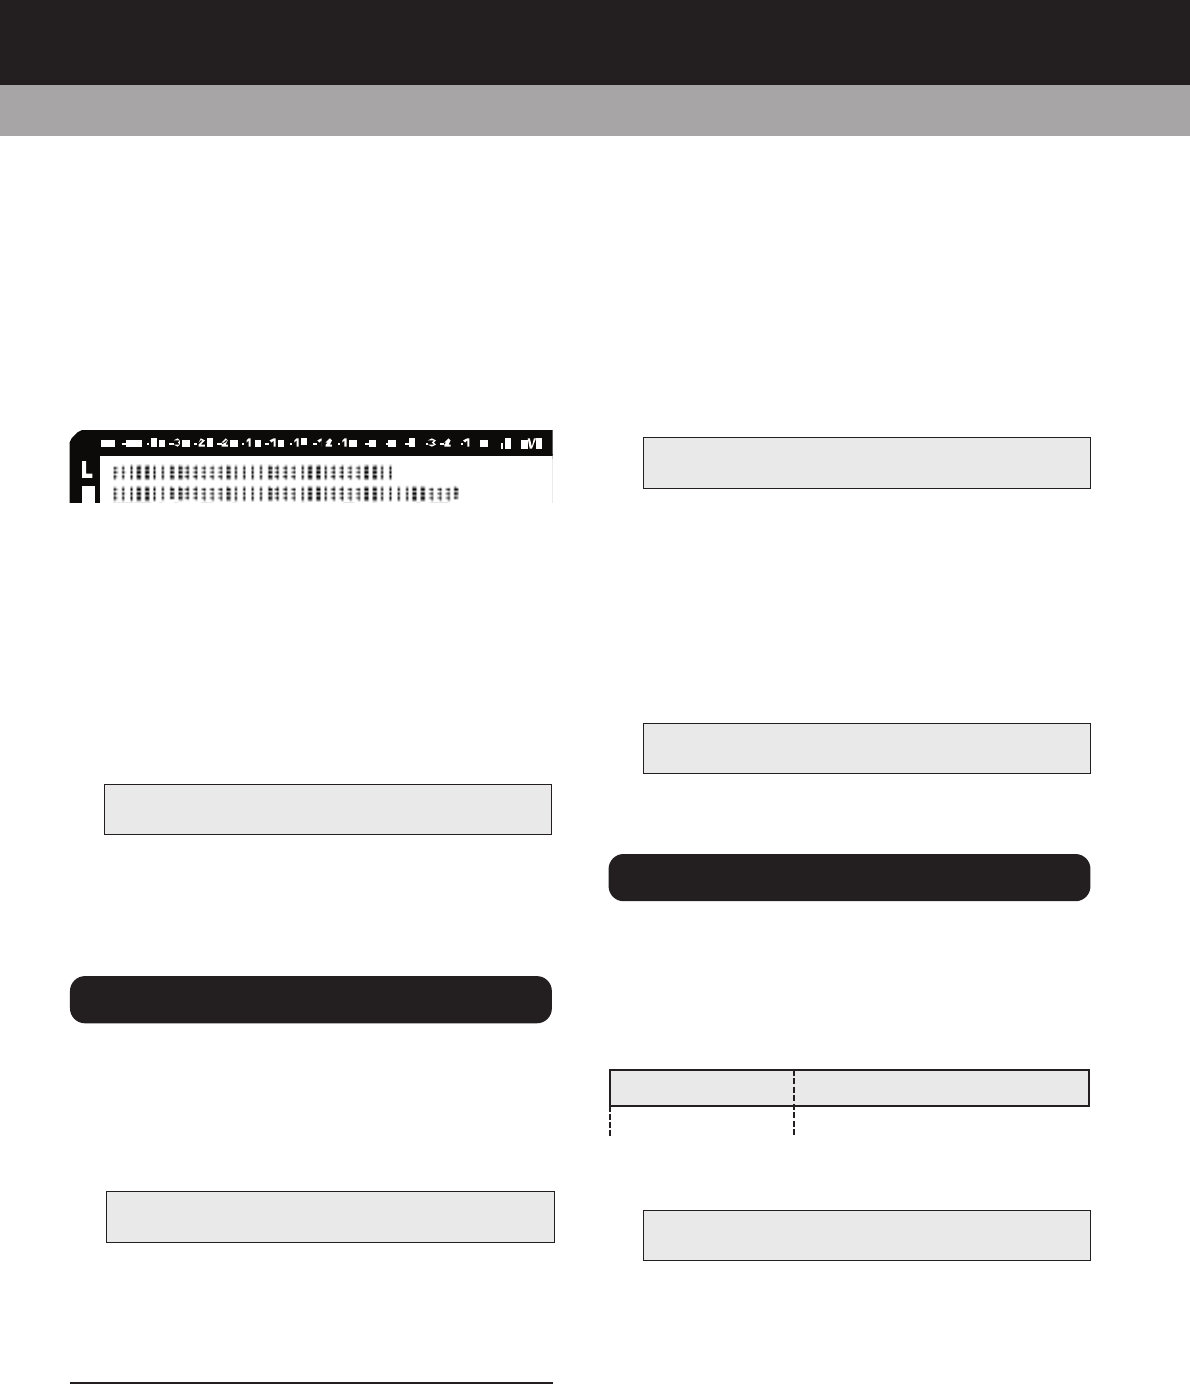
4. Adjust the recording levels so that the peak level
meters do not go beyond 0dB (marked ‘OVR’ in the
top right of the diagram below). If the recording
level goes above 0dB, distortion to the recorded
material may occur.
5. Press the STOP button to stop recording. Or press
the PAUSE button to pause recording. If you press
the PAUSE button once again in record pause
mode, the PORTADISC will start recording again.
MONO RECORDING
You can double the recording time on an MD disc by
using the mono recording mode.
1. Recall ‘REC MODE ?’ by pressing the SYSTEM
button once.
2. Press F1 to choose ‘MONO’. Then press F2 to
confirm and F3 to exit.
NOTE – The left and right channels will be added and
recorded as a mono signal.
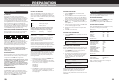
ONE-TOUCH SETUP
Use the SETUP button to quickly configure the
PORTADISC for mic, line or digital recordings.
1. Press the SETUP button once to recall ‘OPEN
SETUP’ mode.
2. The following setup options are available by scrolling
through F1 from the ‘OPEN SETUP?’ menu page.
Press F2 to select.
SETUP PORTADISC settings
USER1 - USER5 5 user-defined settings
MIC REC Microphone recording setup
LINE REC Line recording setup
DIGI REC Digital recording setup
You can save your input and system settings (which
were made by using the INPUT and SYSTEM buttons)
into 5 user memories and then easily recall them by
opening the user memories.
HOW TO SAVE
5 user memories are available, named ‘USER 1’ to
‘USER 5’.
1. Make your record mode setting using the INPUT
button and the SYSTEM button.
2. Press the SETUP button until ‘SAVE SETUP’ is
displayed.
3. Press F1 to choose the user memory from USER
1-5. Then press F2 to save.
HOW TO OPEN
You can open your pre-set record mode, which you
saved in the user memories from USER 1-5.
1. Press the SETUP button until ‘OPEN SETUP’ is
recalled.
2. Press F1 to choose the user memory from USER
1-5. Then press F2 to open.
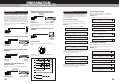
6 SECONDS PRE-RECORDING
This function enables you to record 6 seconds of audio
from the internal memory buffer prior to pressing
RECORD. This is a useful function for minimising the
chance of missing the beginning of a take.
1. Press the SYSTEM button until ‘PRE-RECORD?’
mode is recalled.
2. Press F1 until ‘YES’ is displayed. Then press F2 to
set-up.
3. Enter record pause mode by pressing PAUSE
before sliding the RECORD button.
CAUTION – For the pre-record mode to work, you need to
wait at least 6 seconds after preparing the record pause
mode in order to pre-load the buffer. The PORTADISC will
not record the full 6 seconds of audio otherwise.
4. Press PAUSE to start recording. The PORTADISC
will record the audio, including 6 seconds of audio
prior to the start of the recording.
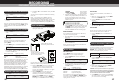
RECMODE
M O N O SE T EXIT
1. Press the INPUT button once to recall ‘SOURCE’
mode.
2. Press F1 and F3 to choose ‘LINE’. Then press F2
to set-up.
Once your input source is selected as ‘LINE’, the limiter
setting will also be available by pressing INPUT. See the
previous section for further details about the limiter
function.
1. Press the INPUT button once to recall ‘SOURCE’
mode.
2. Press F1 and F3 to choose ‘DIGITAL’. Then press
F2 to set-up.
Once your input source is selected as ‘DIGITAL’, the
digital input mode setting will also be available by
pressing INPUT:
1. Press INPUT again to recall DIGITAL INPUT? mode.
2. Press F1 to select the correct digital input source
from ‘COAXIAL’, ‘OPTICAL’ or ‘USB’. Then press F2
to confirm and F3 to exit..
DIGITAL INPUT mode Digital input setting
COAXIAL Coaxial input
OPTICAL Optical input
USB Universal Serial Bus input
NOTE – If the digital source is interrupted (e.g., due to an
intermittent connection), recording will automatically
enter a record suspend mode and ‘Din Unlock!’ will be
displayed. Recording will resume as soon as the signal is
restored. If one channel is set to ‘DIGITAL’, the other
channel will automatically be set to the same. If you
subsequently decide to change this setting, you must first
select the required source for both the left and right
channels using F1 and F3 before pressing F2 to confirm.
1. Press INPUT button once to recall SOURCE mode.
2. Press F1 or F3 to choose ‘INTMIC’. Then press F2
to set-up.
The internal mono microphone is suitable for use identing
tracks, etc.
NOTE – If one channel is set to ‘INTMIC’, the other
channel will automatically be set to the same. If you
subsequently decide to change this setting, you must first
select the required source for both the left and right
channels using F1 and F3 before pressing F2 to confirm.
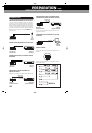
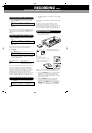
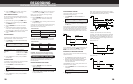
1. Load the MD disc to be used for recording into the
opening as shown below:
For best results, we recommend HHB MD74 or HHB
MD80 (74 and 80 minute) professional MD media.
2. Adjust the REC LEVEL control for the appropriate
recording level. This control is not active if the
‘LIMITER’ mode is set to ‘AGC’ (Automatic Gain
Control), internal ‘INTMIC’ is selected, or if a digital
signal is being recorded.
3. Slide the RECORD button to the right to start
recording if you want to record immediately.
However, if you first want to enter record pause
mode, press the PAUSE button first, then slide the
RECORD button. When you press the PAUSE
button again, the PORTADISC will start recording:
RECORDING FROM LINE SOURCES
RECORDING FROM DIGITAL SOURCES
INPUT-L SOURCE INPUT-R
LINE SET LINE
INPUT-L SOURCE INPUT-R
DIGITAL SET DIGITAL
DIGITAL INPUT?
COAXIAL SET EXIT
INPUT-L SOURCE INPUT-R
INTMIC SET INTMIC
BASIC RECORDING
Load the MD disc with the
arrows facing towards the slot.
To allow recording, the record
protection tag on the disc must
be in the correct position.
RECORDING cont.
PORTADISC MDP500 MiniDisc Recorder
SAVE SETUP
USER1 SAVE EXIT
OPENSETUP
USER1 OPEN EXIT
OPENSETUP
MICREC OPEN EXIT
TIME = 0 SECONDS TIME +6 SECONDS
ACTUAL RECORDING
BEGINS HERE
RECORD BUTTON
IS PRESSED
SETUP MENU
USEFUL RECORDING FUNCTIONS
PRE-RECORD?
Y ES SET EXIT
RECORDING FROM MONO INTERNAL MIC