Tuner
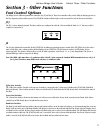
The Bank Up switch will also activate the tuner. To activate the tuner, press and hold the Bank Up switch for 2 seconds. Once the tuner
mode is activated, the J8 display will read “tu.” At that point, any note played will register in the display. The 7 LEDs above the display will
provide an indication as to whether the note is flat, sharp, or in tune. When the single green LED in the center is lit, the note is in tune. If
LEDs to the left are lit, your note is flat and must be tuned up. If LEDs to the right are lit, your note is sharp and must be tuned down. To exit
the tuner mode, simply press any footswitch.
Expression Pedal
The expression pedal on the J8 can be used as a volume pedal or a wah wah pedal. In normal operation of the JT50/JT100, the J8’s
Expression Pedal will be a volume pedal. To change the function to a wah, simply rock the pedal all the way forward (toe down) and apply
pressure on switch under the toe. This will activate the wah. To disengage the wah effect, just repeat this toe down procedure and the
expression pedal will control the volume again.
J8 Expression Pedal Calibration
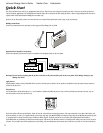
Follow these steps when connecting the J8 to the amplifier for the first time:
1. Begin with the power turned off on your amplifier.
2. Using the supplied 5-pin DIN cable, connect from the controller output jack on the back of the J8 to the J8 Foot Controller jack on the
back of your amplifier.
3. Power up the amplifier.
4. On the Mirage series amplifiers, the J8 will enter a calibration mode the first time it is connected. The J8 display will briefly flash 1.X
(software version number) followed by Pb.
5. Rock the J8's expression pedal back (toe up position) and press any footswitch.
6. The display will now read PF. Rock the expression pedal forward (toe down position) and press any foot switch.
If the Expression Pedal fails to work with the JT50/JT100, it may need to be recalibrated . To recalibrate the J8's expression pedal do the
following:
1. Begin with the power off.
2. Press and hold the Preset 1 button while turning the power on.
3. When -- appears in the display of the J8, release Preset 1 button and press the Tap-It/Shift button.
4. The display on the J8 will read “Pb” for pedal back. Rock the expression pedal back (toe up) and press any button on the J8.
5. The display on the J8 will now read “ Pf” for pedal forward. Rock the expression pedal forward (toe down) and press any button. The
J8's expression pedal is now calibrated. The displays will return the to bank and channel number currently in use.
If “Er” appears in the display, an error has occurred in the calibration procedure. Follow steps 1-5 again.
Headphones
For those times when you want to turn it up without getting thrown out of the house, the JT50/JT100 include a Headphone jack. Simply
connect a pair of stereo headphones to the rear panel Headphone jack, and the speaker will automatically be disabled. The JT50/JT100’s
Master Volume adjusts the Headphone level.
Direct Output
The Mirage provides you with the option of running speaker compensated direct outputs to your house PA system or a recording console.
This eliminates the need to mic your speaker. To utilize this feature, you will need a 1/4” stereo “Y” cord. Connect the stereo Y cord to the
Headphone jack on the rear panel of the JT50/JT100. Connect both of the other ends of the Y to two channels of the mixer, and pan those
two channels opposite of each other. This will provide your mixing console with a speaker compensated stereo signal. Connecting a plug to
the Headphone jack will automatically disable the internal speaker of the JT50/JT100. To enable the speaker while using the
Headphone/Direct Out, press and hold the Tap-It/Shift button while inserting the plug into this jack.
If the JT50/JT100 is powered up while a connection is made to the Headphone/Direct Out, the speaker will be automatically disabled.
Holding the Tap-It/Shift button while engaging the power will enable the speaker.
12
Johnson Mirage User’s Guide Section Three - Other Functions


