AVR 700/AVR 70/AVR 70C
14
Set Up the AVR
Set Up the AVR
Turn On the AVR
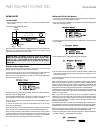
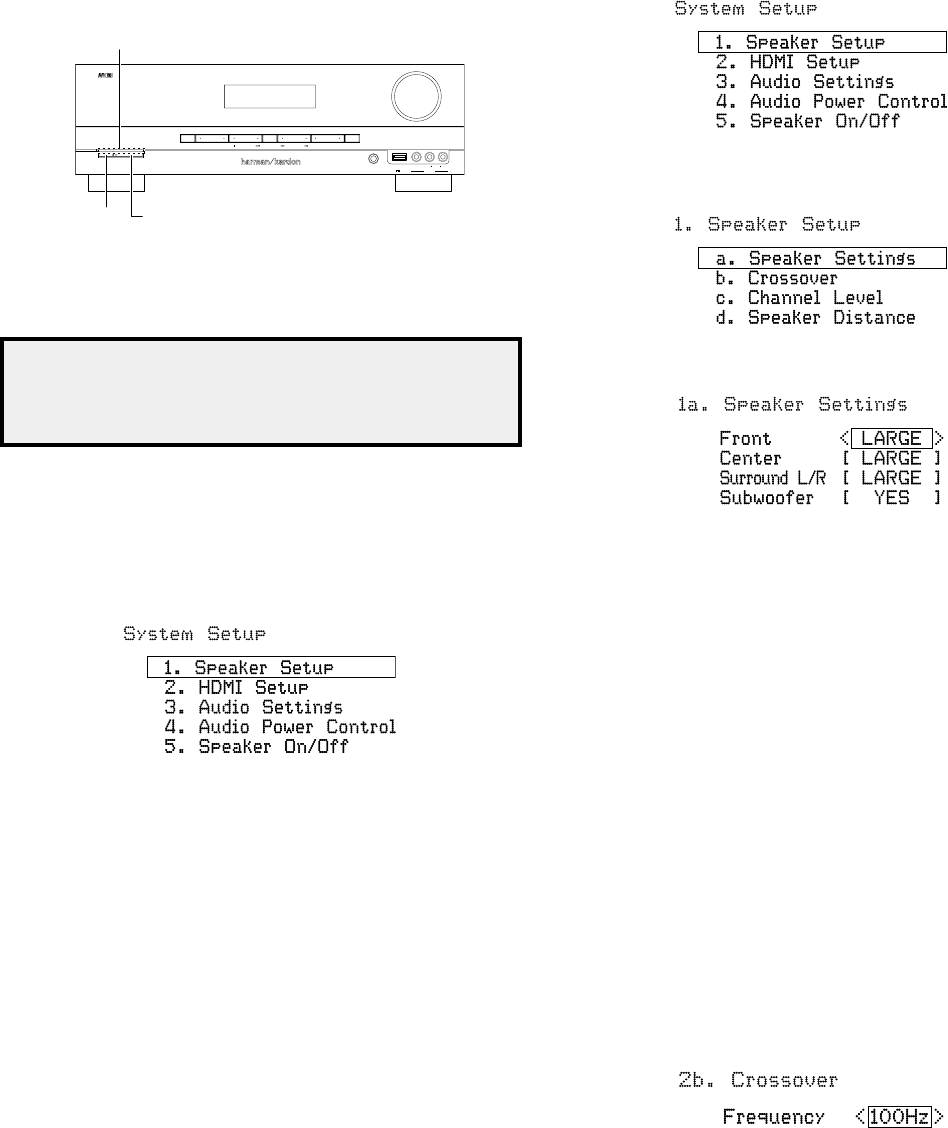
1. Set the front-panel Main Power switch to “On.” (The front-panel Standby indicator
will glow amber.)
2. Press the front-panel On/Standby switch.
Phones USB
Video 3
Vide
oR
LAudio
Stereo
Power
Surr.SelectTuning AM/FM Preset Source Memory
Folder
5V 500A
On/Standby
Button
Main Power
Switch
Standby
Indicator
Unless you will not be using the AVR for an extended period of time, leave the Main Power
switch set to “On.” When the Main Power switch is turned off, any settings you have
programmed will be preserved for up to two weeks.
IMPORTANT NOTE: If the PROTECT message ever appears in the Message
display, turn off the AVR and unplug it. Check all speaker wires for a short
circuit (“+” and “–” wires touching). If none is found, bring the unit to an
authorized Harman Kardon service center for inspection and repair before
using it again.
Using the On-Screen Menu System
Although it’s possible to configure the AVR using only the remote and the front-panel
Message display, it is easier to use the on-screen menu system.
To access the menu system, turn on your TV and select the TV’s composite video input
where you connected the AVR in Connect Your TV or Video Display, on page 11.
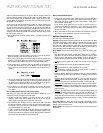
Press the remote control’s SETUP button. The AVR’s on-screen display (OSD) System
Setup menu will appear on the TV.
The System Setup menu consists of five submenus: Speaker Set, HDMI Set, Parameter,
Auto Power Control and Speaker On/Off.
Use the Up/Down/Left/Right buttons on the remote to navigate the menu system, and
press the OK button to select a menu or setting line, or to enter a new setting.
The current menu, setting line or setting will appear in the front-panel Message display,
as well as on screen.
To return to the previous menu, press the remote’s BACK button. To exit the menu
system, press the SETUP button.
Follow the instructions in this Set Up the AVR section to configure your home theater
system. You may return to these menus at any time to make additional adjustments.
Before you begin initial setup, all loudspeakers, a video display and all source devices
should be connected to the AVR. You should be able to turn on the AVR and view the
System Setup menu when you press the SETUP button. If necessary, reread the Making
Connections section and the beginning of this section before continuing.
Configure the AVR for Your Speakers
1. Turn on your TV and select the TV’s composite video input where you connected the
AVR in Connect Your TV or Video Display, on page 11.
2. Press the remote control’s SETUP button. The AVR’s on-screen display (OSD) System
Setup menu will appear on the TV.
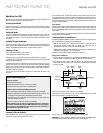
3. Use the remote’s arrow and OK buttons to select “Speaker Setup.” The Speaker Setup
menu will appear.
4. Select “Speaker Settings.” The Speaker Settings menu will appear.
5. Use the remote’s left and right arrow buttons to select OFF, SMALL or LARGE for the
Front, Center and Surround speaker positions, depending on the speakers you have
connected to the receiver.
OFF: Select this setting if you have not connected a speaker in that position (not available
for the Front speakers).
SMALL: Select this setting if the speaker is not capable of producing clean, deep bass
energy at output levels that match those produced by a powered subwoofer. All bass
below the crossover frequency (see Step 6, below) in that channel is removed from that
speaker and is sent to the subwoofer (or to the Front speakers if Subwoofer is set to NO).
Most speakers (unless they are large and powerful) should be considered SMALL.
LARGE: Select this setting if the speaker is capable of producing clean, deep bass energy
at output levels that match those produced by a powered subwoofer. All bass in that
channel is sent to that speaker.
NOTE: If your system has a subwoofer and you set the Front speakers to LARGE, the
subwoofer may not output audio except for Dolby Digital- and DTS-encoded program
material that contains LFE channel information. If you set your Front speakers to LARGE
and you want your subwoofer to reproduce bass from all program material, set the
Subwoofer to PLUS (see below).
For Subwoofer, select YES (if your system has a subwoofer), NO (if your system does not
have a subwoofer), or PLUS (if your system has a subwoofer, you set your Front speakers
to LARGE and you want your subwoofer to reproduce bass from all program material).
When you’re finished, record your settings in Table A2 of the Appendix, on page 21, then
press the remote control’s BACK button to return to the Speaker Setting menu.
6. (Note: If your system does not have a subwoofer, skip to step 7.) Press the BACK button
and select “Crossover.” The Crossover menu will appear


