AVR
35
ENGLISH
Advanced Functions
Plasma and CRT monitors may suffer from “burn-in” when the same image, such as the
horizontal or vertical bars, is left on screen for a long period of time. Adjust the picture
so that it fills the display’s screen. Highlight this setting and press the OK Button. Each
press of the Up/Down buttons changes the setting. Press the OK button when the desired
setting appears in the display box at the lower right corner of the video screen.
Auto Fit: The AVR automatically adjusts the image, as required, to fit the display’s •
capabilities.
Height Fit: Adjusts the image to eliminate any bars above or below it. Bars may remain •
at the sides.
Width Fit: Adjusts the image to eliminate any bars on the sides. Bars may remain above •
and below the image.
Zoom 1x: Displays the image as received from the source. If the image is in the 4:3 •
aspect ratio, on widescreen displays the pillarbox format may be used. If the image
is in the 16:9 aspect ratio, on full-screen (4:3) displays the letterbox format may be
used.
Zoom 2x and Zoom 3x: Stretches the image evenly to fill the screen completely. The •
outer portions of the image may be cropped.
Experiment with this setting until you find a pleasing display format for each program.
Overscan: For historical reasons, there has been a convention among video broadcasters
to reserve an area around the border of a video frame, called “overscan,” that may be
viewed on newer high-definition displays, although it was not visible on older analog
television sets. However, since not all displays are capable of showing this portion of the
frame, directors avoid placing important information in that area.
If your video display is capable of displaying the overscan area, set Overscan to On to
prevent the display from showing a black border around the image, which could cause
unwanted “burn-in” on some plasma and CRT displays. The AVR turns this setting off by
default when the source device is connected to one of the HDMI input connectors.
Advanced Video Settings: Select this to display the Advanced Video Modes submenu.
This submenu is not accessible when the Video Mode setting is set to Off.
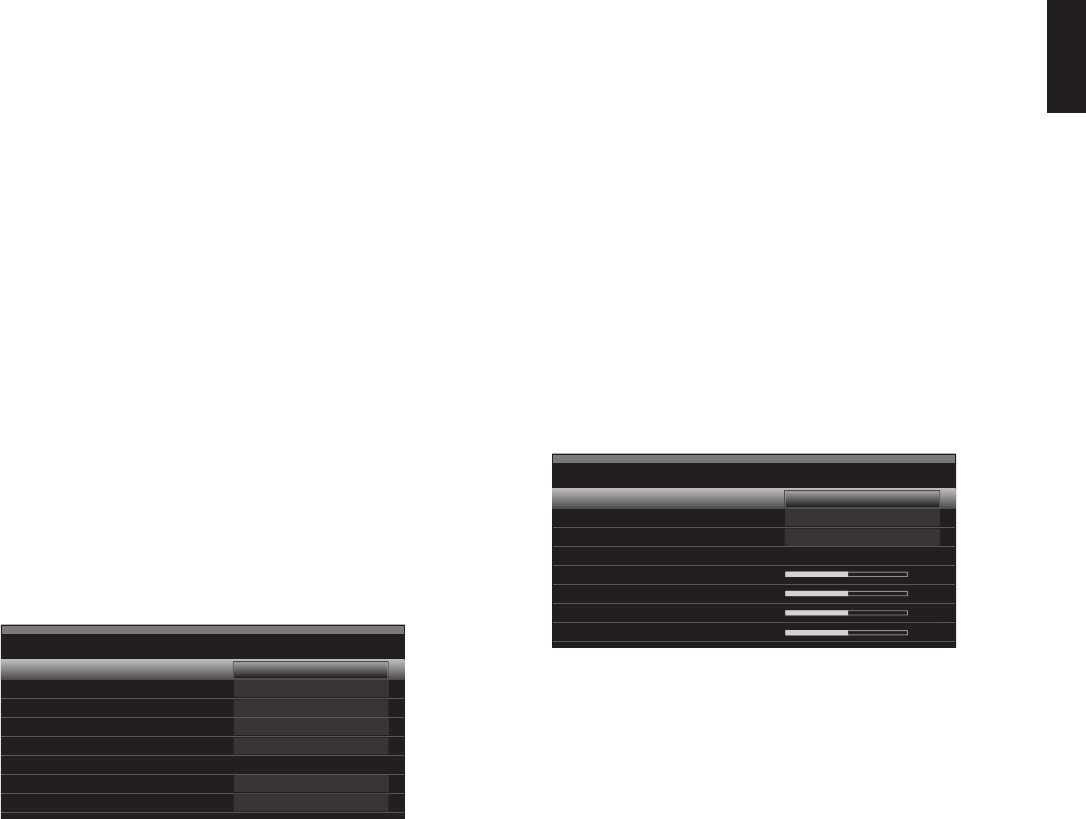
Advanced Video Modes – Blu-ray
Noise Reduction:
MPEG Noise Reduction:
Cross Color Suppressor:
Flesh Tone Enhancement:
Black Level
Deinterlacing:
Film Mode Detect:
Off
Off
Off
Off
Off
Off
Off
Noise Reduction: Adjust this setting to Low, Medium or High to filter out signal noise.
MPEG Noise Reduction: This setting is designed to address two specific types of video
distortion: mosquito noise and blocking artifacts. If you see haziness or shimmering
around the edges of objects or the scrolling credits in a film, or if the image appears
to “pixelate” into blocks, change the MPEG Noise Reduction setting from Off to Low,
Medium or High.
Cross Color Suppressor: Turn this setting on to remove cross color artifacts, which
can occur when high-frequency luminance (brightness) signals are misinterpreted as
chrominance (color) signals, causing unwanted flickering, flashing colors or rainbow
patterns. This setting is not available when you are using HDMI sources or when no video
signal is present.
Flesh Tone Enhancement: Turn this setting on to enhance the flesh tone of peoples’
skin. (On many TVs this enhancement will be subtle.)
Black Level: This setting is effective only when the AVR’s Composite Video Monitor Out
connection is being used. Set the Black Level to On for a full black-level setting that
provides the full dynamic range of black as presented on most DVDs. When set to Off, the
Black Level setting complies with NTSC standards for video and may be more appropriate
when your video display has limited video-processing capability.
Deinterlacing: Analog video in the NTSC format is interlaced. That is, each refresh of
the television screen displays only half the pixels in a frame, alternating between all
of the even rows of pixels and all of the odd rows. Modern video displays are capable
of displaying the complete frame all at once by progressively scanning all of the rows
of pixels from top to bottom. For optimal viewing on a progressive-scan display (e.g.,
most flat-panel displays), the video images must be deinterlaced. When you are viewing
images via the Composite Video Monitor Out connection, any time the AVR’s video output
resolution is 480i, this setting may be turned off.
Film Mode Detect: This setting is accessible only when the Deinterlacing setting is
turned on. It compensates for the different frame rates in which film and video are shot.
Film is shot at a rate of 24 frames per second (progressive scan), while video is shot at
slightly less than 60 frames per second (interlaced). The AVR is able to detect whether the
program was originally shot on film and transferred to video (e.g., to create a DVD), and
will compensate appropriately for any authoring errors in the conversion. Select a setting
of 3:2 (for NTSC materials), 2:2 (for PAL materials), Off or Auto.
How to Adjust the Custom Picture Settings
Set the Video Mode to Custom to display the picture settings.
Video Modes – Blu-ray
Video Mode:
Picture Adjust:
Overscan:
Advanced Video Settings
Brightness
Contrast
Color
Sharpness
Custom
Auto Fit
Off
With a color-bar test pattern from a test disc or other source on the TV screen, you can
make the following adjustments:
The color intensity setting on your TV. •
Color adjustments using the color bars, which may be (left to right) black, white, yellow, •
cyan (turquoise), green, magenta, red, blue, black.
The color transition, seen as sharp separation of the bars. •
The performance of the color circuits in your TV (with video signals); bar edges should •
show no vertical crawling dots.
Use the gray scale and the black/white fields in the test pattern to adjust the brightness
and contrast.
Brightness Adjustment
Turn down the color control on your TV until the color bars appear in black and white.1.
Adjust the Contrast to the lowest level where you still can see all gray-scale bars 2.
separately and clearly.
Adjust the Brightness so that the bars in the gray scale are all visible. The bar farthest 3.
to the left has to be as black as possible rather than gray, but the next gradation must
clearly be distinct from it. The bars in the gray scale should gradually and evenly
change from black to white.
0295CSK - HK (x65Series) AVR3650_365_2650_265 CORE OM, WORK18 danny.indd 35 01/07/11 11:34:06


