


AVR
20
Making Connections
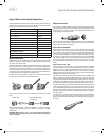
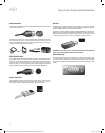
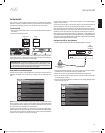
Connect Your Audio Recorders
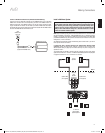
Connect a digital audio recorder’s optical digital input to the AVR’s optical digital output.
You can record both coaxial and optical digital audio input signals.
Optical Digital Audio
Cable (not supplied)
To Optical Digital
Record Input
Digital
Recording Device
Receiver
Digital Audio Recorder Connector
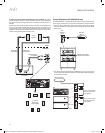
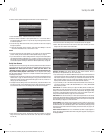
Connect an analog audio recorder’s inputs to the AVR’s analog audio Rec Out connectors.
You can record any analog audio input signal.
Stereo Audio
Cable (not supplied)
To Stereo Analog
Record Inputs
Analog
Recording Device
Receiver
Analog Audio Recorder Connectors
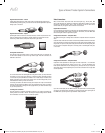
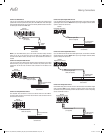
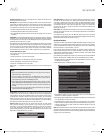
Connect Your Video Recorder
Connect an analog video recorder’s video input connector to the AVR’s Composite Video
Rec Out connector. You can record any composite video signal. NOTE: To record the audio
and video from the source device, connect the AVR’s analog audio Rec Out connectors to
the analog video recorder’s audio inputs.
Analog Audio/Video
Cable (not supplied)
To Analog
Audio/Video
Record Inputs
Analog Video
Recording Device
Receiver Analog Audio
Recorder Connectors
Receiver Analog Video
Recorder Connectors
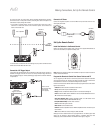
Connect The Bridge IIIP
Connect an optional The Bridge IIIP to the AVR’s The Bridge IIIP connector. Insert the plug
until it snaps into place in the connector. IMPORTANT: Connect The Bridge IIIP only
with the AVR’s power turned OFF.
AVR
The Bridge IIIP
Connector
The Bridge IIIP
Dock your iPod or iPhone (not included) in The Bridge IIIP, and you may listen to its audio
through your high-performance audio/video system. You may also view still images or
video materials stored on a photo- or video-capable iPod or iPhone that supports video
browsing. You can use the AVR remote to control the iPod, with navigation messages
displayed on the AVR’s front panel and on a video display connected to the AVR.
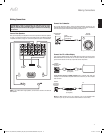
Connect to Your Home Network
Use a Cat. 5 or Cat. 5E cable (not supplied) to connect the AVR’s Network connector to
your home network to enjoy Internet radio and content from DLNA-compatible devices
that are connected to the network.
Receiver
Network
Connector
Network
Modem
Cat. 5/5E Cable
(not supplied)
To
Internet
and LAN
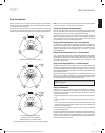
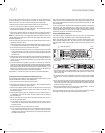
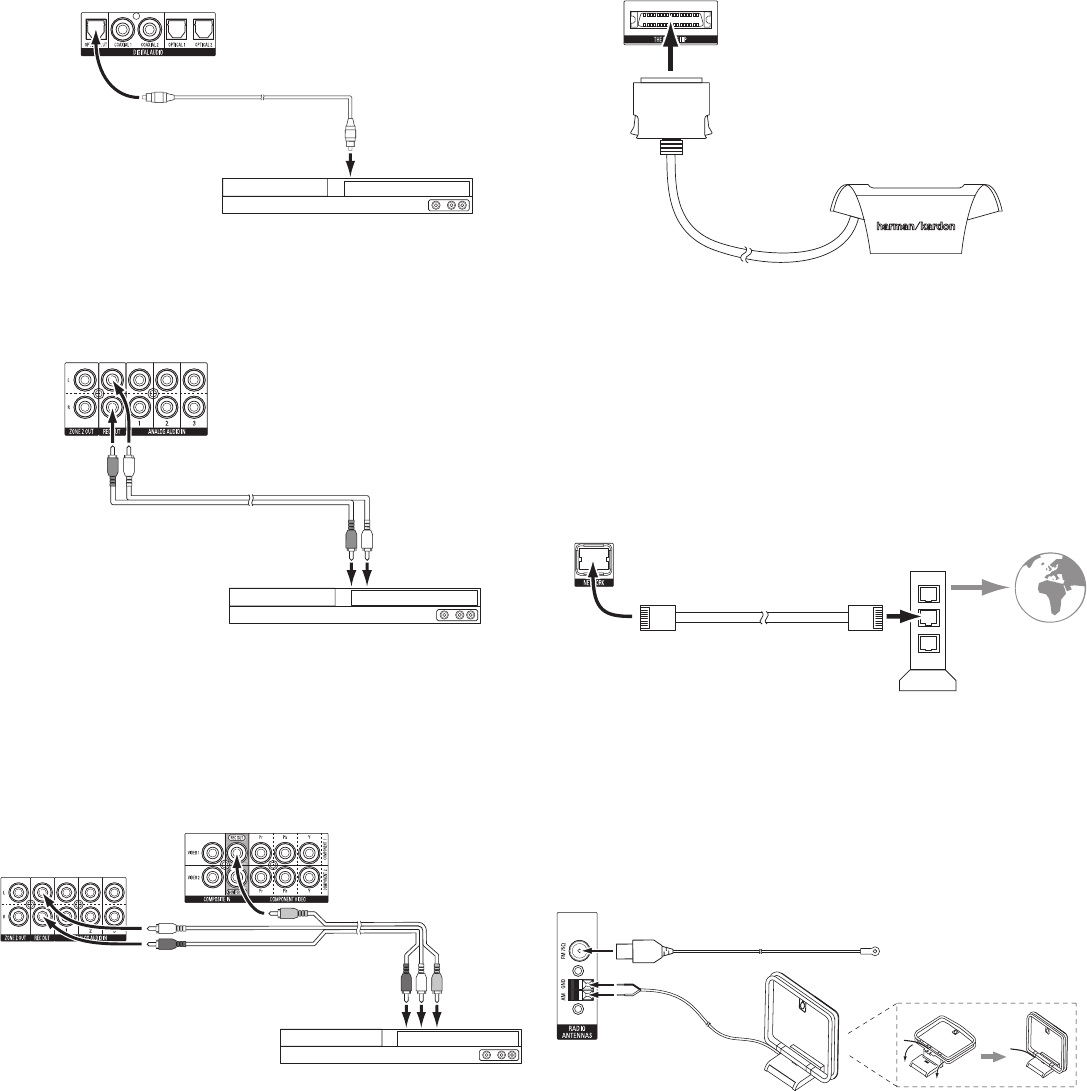
Connect the Radio Antennas
Connect the supplied FM antenna to the AVR’s FM 75 • Ω antenna connector. For the best
reception, extend the FM antenna as far as possible.
Bend and fold the base of the supplied AM antenna as shown and connect the antenna •
wires to the AVR’s AM and Gnd connectors. (You can connect either wire to either
connector.) Rotate the antenna as necessary to minimize background noise.
AVR
Antenna
Connectors
FM Antenna (supplied)
AM Antenna
(supplied)
Bend and fold base
0295CSK - HK (x65Series) AVR3650_365_2650_265 CORE OM, WORK18 danny.indd 20 01/07/11 11:33:47