


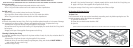

VI. Insert iPod
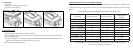
1. Ensure the correct inserts and height adjusters are installed for your iPod
(PLEASE NOTE: If the correct insert and height adjusters are not used
you may damage or destroy your iPod and the iDive300)
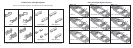
2. Place iPod in the inserts with the iPod dock connector facing toward the cam knob.
3. Insert the connector cable into the dock connector of the iPod with the H2O Audio logo facing up.
4. Depending on your iPod model, press and hold the “Play / Pause” button or press the Power button
to turn the iPod on.
5. IMPORTANT: For touch-screen iPod models, to prevent the display screen from locking, access the
General Settings to turn the Auto-Lock feature off.
- Settings - General - Auto-Lock - “Never”
VII. Operation
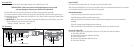
Power On/Off
Press and hold the power button for 2 seconds to turn the iDive300 on/off.
After turning the iDive300 on, all 3 LEDs on the back of the case should illuminate within a few seconds.
If connected successfully only the Green LED should remain lit.
iPod Authentication
Green LED indicates successful connection of the iPod.
Red LED indicates a failed connection of the iPod.
When the Red LED is illuminated, controls will be limited to adjusting the volume of the built-in
amplifi er.
Blue LED indicates that the authentication timed out.
When the Blue LED is illuminated there is some limited function of the iPod controls.
In case of a Blue LED
Restart the iDive300 by turning the power off then on. If this does not solve the problem:
1. Turn off the iDive300.
2. Disconnect the connector cable from the iPod.
3. Ensure the iPod is on.
4. Reconnect the connector cable to the iPod.
5. Turn on the iDive300.
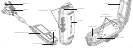
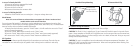
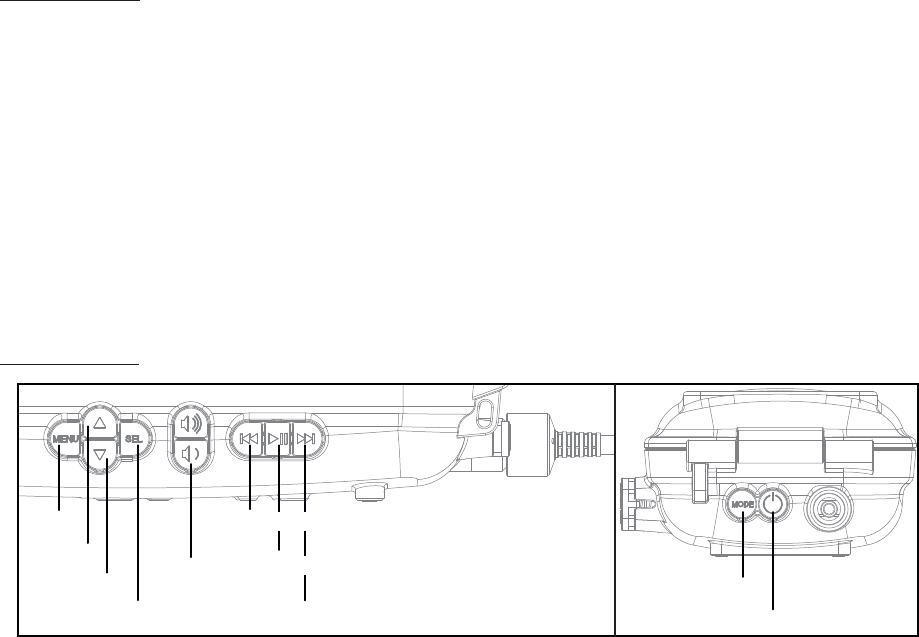
Menu
Next/Fast-forward
Previous/Fast-forward
Play/Pause
Select
Volume
Controls
Up
Mode
Power
Down
11
12