FRONT PANEL
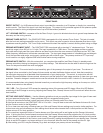
DIRECT OUTPUT – An XLR balanced direct output is provided for connection to a PA system or directly into a recording
studio console. The Direct Out signal is mic level and pre eq. This output is fully protected against 48 volt phantom power
and may be used for driving microphone lines of up to 300 feet without problems.
LIFT / GROUND SWITCH – connects or lifts the Direct Out pin 1 ground to eliminate hum due to ground loops between the
bass amp and the mixing console.
PREAMP TUNER OUTPUT – The CONTOUR™500 is equipped with a fully isolated Tuner Output. This jack is located
after the front end scaling preamplier and is pre-eq. This output may also be used to drive a separate direct box or high-
impedance recording device. The Tuner Output remains active when the amplier is muted, allowing silent tuning on stage.
PREAMP INSTRUMENT INPUT – The CONTOUR™500 is equipped with a standard ¼” unbalanced input. The input
sensitivity range is from 200 mV to 1.6 volts. The input impedance is >700K ohms. The input stage contains a precision
high order active high pass lter (more effective and less intrusive than the more common 6 dB lters) and an “RFI” lter
(radio frequency interference) to eliminate unwanted noise. The input gain stage consists of a feedback type variable gain
circuit that provides wide range, continuously variable gain with minimal noise. The preamp contains a FET input amp
circuit based on our highly regarded GBE and Shuttle
®
series touring ampliers.
PREAMP MUTE SWITCH – With this mute switch, you can place the amplier (and Direct Output) in standby mode
between sets without having to change any of your amp settings. This feature can also be used for silent tuning since the
Tuner Out stays active when the mute is engaged.
PREAMP GAIN – This control sets the input sensitivity gain of the preamp to the output of your bass. The volume of
the signal is then controlled by the Preamp Volume control and also the Master Volume control. Note that overdriving
the input gain stage may be a desirable tonal characteristic of your playing style. This control, in conjunction with the
Preamp Volume and Master Volume controls, allows you to set the amount of input stage overdrive or clean tone your amp
produces. Dramatic changes in overdriven tone can be achieved with this control in the 3 o’clock to 5 o’clock positions.
It is recommended when using heavily distorted tones that you reduce the high frequency settings on the amp our cut the
tweeter level control on the cabinet.
“O/L” LED – This “Over-load” LED senses the operating status of the preamp and EQ stages. When this LED ashes,
overdriving of the EQ stage is occurring. Adjusting the Preamp Gain, Preamp Volume and EQ controls will affect the over-
load condition.
SETTING YOUR INPUT SIGNAL – Use the following guidelines to set your amplier input stage for the type of bass used
and your personal playing style. These guidelines are just a suggested starting point.
1) Set your instruments controls (volume and tone) where you normally prefer to run them.
2) Now set all controls on the CONTOUR™500 to 12 o’clock. It may be best to start with the Master Volume at 9 o’clock
and the Contour control in the at position.
3) For a clean tone and using a Passive bass your Gain and Preamp Volume settings may be set to similar positions. For
a clean tone using an Active bass your Gain setting should be set more towards the 9 o’clock position and the Preamp
Volume at noon to 2 o’clock positions.
4) For overdriven tones with Active or Passive basses your Gain setting will be set higher and the Preamp Volume set
lower. If driving the Gain Control towards maximum then the Preamp Volume should be set below the 10 o’clock position.
Set your Master Volume for your desired overall volume. We suggest experimenting with different settings for best results.
5) Now, turn your attention to the Contour control and EQ section, making the adjustments for your desired tone. Because
this is an active EQ network, any larger settings of cut or boost will affect the level of the preamp and the O/L light.
6) After setting your EQ it may be necessary to go back and adjust your preamp volume accordingly.
2


