


34
Setting DVD preferences
7 PICTURE SOURCE
You can obtain optimal picture quality by selecting whether
the content on the disc/file is processed by field (video
source) or by frame (film source).
Normally set to “AUTO”.
•AUTO
Used to play a disc/file containing both video and film
source materials.
This system recognizes the source type (video or film) of
the current disc/file according to the disc/file
information.
–If the playback picture is unclear or noisy, or the oblique
lines of the picture are rough, try to change to other
modes.
•FILM
Suitable for playing back a film source disc/file.
•VIDEO
Suitable for playing back a video source disc/file.
7 SCREEN SAVER (See page 19.)
You can activate or deactivate screen saver function.
7 FILE TYPE
When several types of files are recorded on a disc/device,
you can select which files to play.
•AUDIO
Select this to play MP3/WMA files.
• STILL PICTURE
Select this to play JPEG files.
•VIDEO
Select this to play ASF/MPEG-2/MPEG-1/DivX files.
: Audio menu (AUDIO)
7 D. RANGE COMPRESSION
(Dynamic range compression)
You can enjoy low level recorded sound clearly at night even
at a low volume when listening to the sound with Dolby
Digital.
•AUTO
Select this when you want to enjoy surround sound with
its full dynamic range (no effect applied).
•ON
Select this when you want to fully apply the compression
effect (useful at midnight).
NOTE
• When you play a multichannel Dolby Digital source with the
surround mode is off, the setting of D. RANGE
COMPRESSION is set to ON automatically.
: Speaker setting menu (SPK. SETTING)
7 Level menu (LEVEL)
FRONT LEFT SPEAKER/FRONT RIGHT SPEAKER/
CENTER SPEAKER/SURROUND RIGHT SPEAKER/
SURROUND LEFT SPEAKER
While monitoring the test tone, adjust the output level of
the speakers.
You can adjust the output level in the -6 dB to +6 dB range.
TEST TONE*
Outputs the test tone.
* The test tone comes out of all of the activated speakers in
the following sequence:
s Front left speaker s Center speaker s Front
right speaker s Surround right speaker s Surround
left speaker s (back to the beginning)
NOTE
• Adjustment of subwoofer output level is not available.
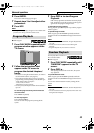
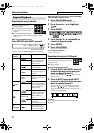
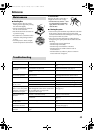
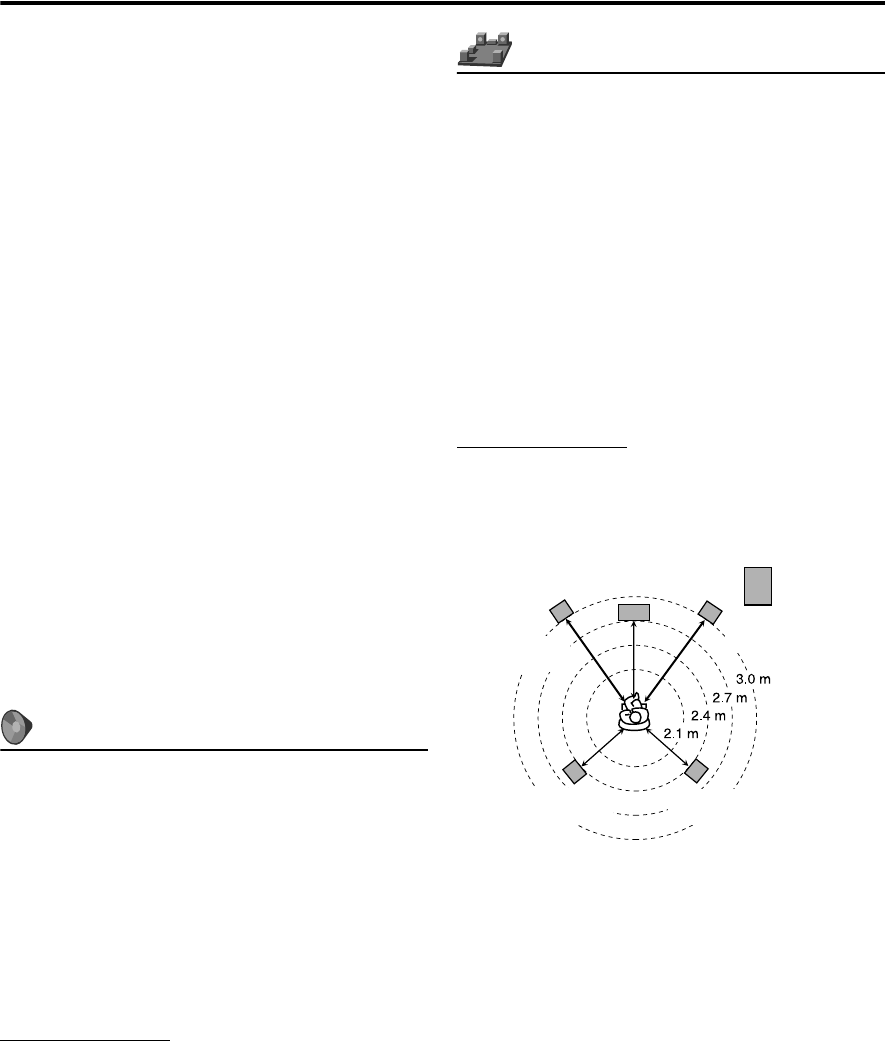
7 Delay menu (DELAY)
Example:
Set to “0 ms” for the furthest speaker from your position as
the basis for the delay time setting.
In this case, set the delay time of each speaker as follows;
• Delay time of front speakers: 0 ms
• Delay time of center speaker: 1 ms
• Delay time of surround speakers: 2 ms
FRONT LEFT SPEAKER/FRONT RIGHT SPEAKER/
CENTER SPEAKER/SURROUND RIGHT SPEAKER/
SURROUND LEFT SPEAKER
Adjust the distance from the listening position to the
speakers.
Within the range from 0 ms to 15 ms (by 1 ms).
Subwoofer
Front left
0 ms
Center speaker
1 ms
Front right
0 ms
Surround left
2 ms
Surround right
2 ms
1 ms increase (or decrease) in delay time corresponds to
about 30 cm decrease (or increase) in distance.
EN_THP7-P3[U]4.book Page 34 Tuesday, April 4, 2006 5:08 PM