EN
EN
First Things First
2
Under Cabinet Mounting
Instructions
Tools Required
• Drill and
1
/
4
" Drill Bit
• Ruler or Tape Measure
• Nail or Awl
• Scissors
• Screwdriver - Phillips
• Countersink (Optional)
• Masking Tape
• Safety Glasses
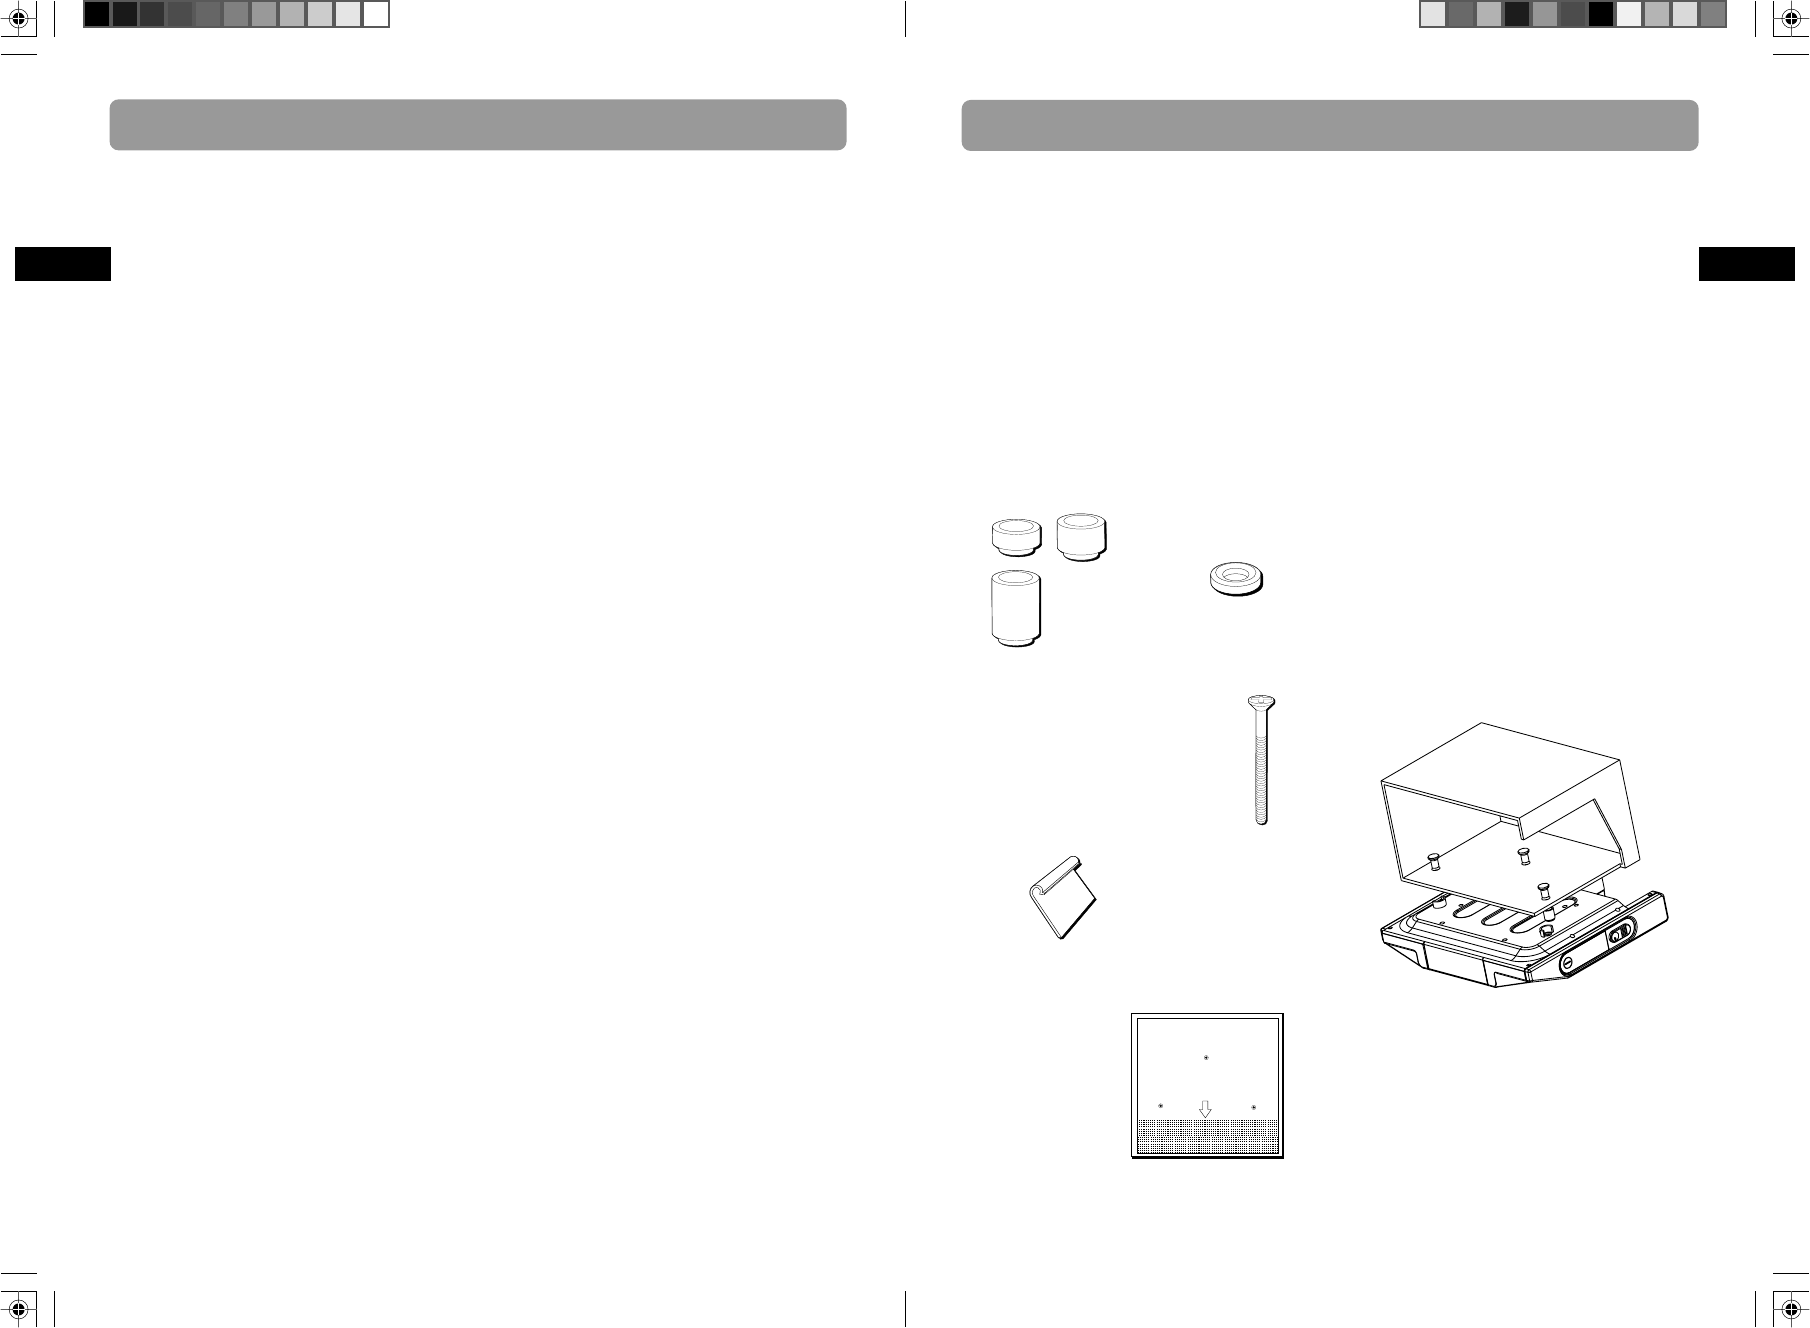
Parts Packed with your Unit
3 — Washers
Spacers
3 —
1
/
4
"
3 —
1
/
2
"
3 — 1"
2 — Cord hooks
USE:
3 — 2
3
/
4
" Phillips head screws
or
3 — 1
5
/
8
" Phillips head screws
Before Mounting
Empty contents of the selected cabinet under
which the unit will be mounted and thoroughly
clean the underside of the cabinet to remove any
grease residue which might be present.
We recommend the unit be mounted at the front
edge of the cabinet.
Important: For secure mounting, the screws
must go into the radio to a depth of at least
3
/
8
".
If the overall length from the bottom of the
cabinet shelf to the bottom of the overhang is
more than 1
3
/
4
", then a wood shim will be
necessary. A shim can be made from a sheet of
plywood, using the Template to locate the central
lines for drilling the
1
/
4
" mounting holes. The
shim can be located between the cabinet shelf
bottom and spacers. Make sure the wood is at
least as thick as the excess over 1
3
/
4
" If a shim is
necessary, longer screws are required. Longer
screws (Type #10-32) are available at most local
hardware stores.
Cut out the Template on the line indicated. The
Template size and screw hole positions are
identical to the top of the clock radio.
1 — Mounting
template
If no overhang, front edge of templet
should be even with front edge of cabinet.
Le bord avant du gabarit doit etre
de niveau avec le bord avant de l'amoire
FRONT
AVANT
Fold guidelines for cabinet with overhang.
Pliere le long des lignes pour les armoirs a rebord en saillie
Table of Contents
1
FCC Information
Table of Contents ..............................1
First Things First ................................ 2
Tools Required ...................................2
Parts Packed with Your Unit ............ 2
Before Mounting ............................... 2
Mounting Procedure ......................... 3
Getting Started ..................................6
Automatic Time Set ...........................6
Selecting Time Zone ..........................6
Daylight Saving Time (DST) ..............6
U.S. Time Zone (Figure 1) ................. 7
Canadian Time Zone (Figure 2) ........7
Battery Backup Operation ................ 8
Installing Backup Battery ..................8
General Controls................................ 9
Main Unit ........................................... 9
Side Views .......................................... 9
In Battery Compartment ...................9
The Remote Control ........................10
Display ..............................................10
Clock & Timer .................................. 11
Setting the Time ..............................11
Setting the Countdown Timer ....... 11
Radio ................................................11
Built-In AFC ...................................... 11
Antennas ..........................................11
Turning On the Radio ..................... 11
Turning Off the Radio..................... 11
Selecting Radio/TV Band .................11
Tuning to a Channel .......................11
Automatic Channel Search .............12
Radio Frequency Memory ...............12
Memory Recall ................................. 12
RBDS (Radio Broadcast Data
System) .............................................12
Program Type Search....................... 12
TV Band ............................................ 13
Weather Band ..................................13
CD Player ..........................................14
Selecting CD Player ......................... 14
Loading CD Disc............................... 14
Play and Pause Playback ................. 14
Skip and Search Tracks.................... 14
End Playback .................................... 14
Repeat and Random Playback........14
Listening to External mp3 Player .......
.......................................................... 14
Weather Forecast ............................ 15
Thermometer ................................... 15
Using the Countertop Light ........... 17
Replacing the Bulb ..........................17
Troubleshooting Tips .......................17
Care and Maintenance ................... 18
Limited Warranty ............................ 19


