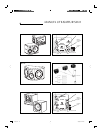
SETTING UP THE SYSTEM
Control facilities
They are three different ways of remotely controlling a SM11 loudspeaker:
• Through an Infra-Red receiver, located on the front of the cabinet, below the midrange driver. This is the link provided for a
wireless control from a PDA. It will operate at distances of up to (approx.) 3 metres.
• Via a serial RS-232 port, intended to connect to a computer or the proprietary remote control unit.
• By means of a MIDI link, allowing data in and out.
Selection between those three operation modes is achieved by operating the three-position switch (IR, PC, and MIDI marks
respectively) located within the INTERFACE box of the rear panel.
The principle of operation of a complete system, as far as remote control is concerned, is based on a "master/slave" scheme.
One single loudspeaker is set to receive control information, becoming the master, and pass on the information to all the others
(slaves). All the slave units must be set to the MIDI switch position, and linked together to the master, in a daisy chain scheme:
MIDI cables will be used, going from the "MIDI OUT" connector of one speaker, to the "MIDI IN" connector of the next speaker.
The master unit may use either IR or PC modes, depending on the control source. Please note that the CONTROL switch
should be set before powering the speaker
, proper operation is not guaranteed otherwise.
Initialising the whole loudspeaker system
Before starting to work with your SM11 system, you need to go through a quick initialisation procedure, in order to specify which
loudspeaker will be allocated a specific channel: please note this is for control data only
, you still need to properly set the Left/
Right switch for the audio data if you are to use the digital input (see previous section).
Indeed, most controls can be set individually and independently for the various channels: this adds a great deal of flexibility
when it comes to tailor the system to your listening environment, as described in the next sections.
In case the initialisation is not carried out, the factory set default values are such that all speakers will respond to any controls,
regardless of the channels selected.
At this stage, it is assumed that all the loudspeakers are appropriately configured with respect to the CONTROL switch and
associated connections. One of them should have been configured as the "master", and all the others as slaves.
Make sure there are no audio connection, then turn the power on by pressing the switch on the back of the speakers: a green
LED indicator should come on.
Start the Focal Manager programme on the computer (or the PDA), and select the Initialisation menu.
If needed please refer to the Focal Manager manual, which details the software operation.
You will have to tick the boxes corresponding to the audio channels to be used in your actual configuration (except for the
Sub): Left, Right, Centre, Left Surround, Right Surround. You will then have to check for the serial numbers of the corresponding
speakers: they can be found on the back of each unit.
Finally enter these numbers in the relevant fields, but using only the last 6 numerical digits
.
Once this is done and verified, click on the Send box.
Please note that the Subwoofer does not need any initialisation, as by definition it can only be utilised for this particular channel.
6
notice sm11 6 19/03/04, 15:22:39


