


Page 4 of 9 CM2837
**Interconnected alarms provide added
warning as compared to single alarms.
Question: How do I program and link the alarms?
Answer: TO PROGRAM FIRST ALARM:
1. Insert batteries (2, AA batteries).
Alarm Will Say: “Welcome, First Alert
Smoke Alarm.” “No location
programmed” if first time or
“[Location, example: “Basement”]
location programmed” when changing
batteries. “To select location, press
and hold test button now.”
2. Press & Hold Test Button if you
would like to program the location or
change the location of the Alarm.
Release button after Alarm responds. Alarm Will Say: “To save location, press
and hold test button after location is heard.” Alarm will speak list of locations.
3. After you hear the location of where you are placing the Alarm, Press & Hold
the Test Button. Alarm Will Say: “[Location, example: “Basement”] location
saved.” If no location is chosen: “No location saved.”
Your Alarm has now been programmed for the location of your choice.
ADDING AND LINKING ADDITIONAL ONELINK® ALARMS
NOTE: Steps 1 through 3 below need to be completed within two minutes. If
more than two minutes pass, the Green power LED will stop blinking. Simply
open the battery drawer of the second Alarm and repeat steps 1 through 3.
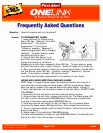
1. Insert the batteries into the battery drawer of the next Alarm. DO NOT CLOSE
THE DRAWER.
2. Press and hold the test button and then close the battery drawer.
3. Once you hear the unit chirp, release the test button. The Green power LED
will start to blink indicating the ONELINK® Alarm is waiting for program data
from one of the other existing setup ONELINK® Alarms.
4. Press and hold the test button on the first Alarm, until the second Alarm
chirps and its Green power LED stops blinking. Then release the test button.
5. You will now be prompted to set the Alarm's location. Follow the directions
given by the Alarm.
6. Repeat steps 1-6 for additional ONELINK® Alarms.
You have now successfully linked your new ONELINK® Alarms. To add additional
Alarms at a later time, follow steps 1 through 6.