


7
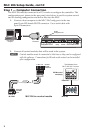
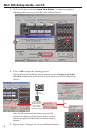
Step 5 — Completing the installation
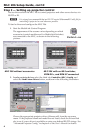
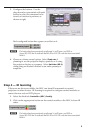
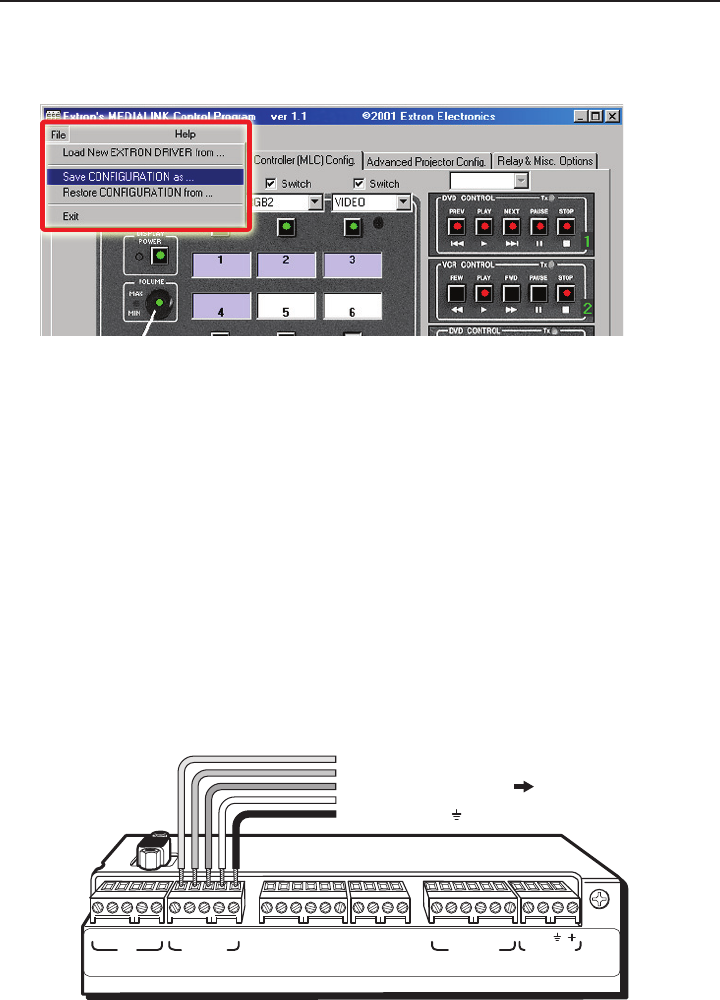
1. Save the configuration by selecting Save CONFIGURATION as..., and name it
appropriately.
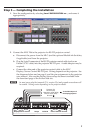
2. Connect the MLC 206 to the projector for RS‑232 projector control.
a. Disconnect the power from the MLC (and the optional MediaLink Switcher,
if applicable) and from the projector.
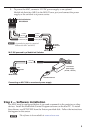
b. Plug the 9‑pin D connector of the RS‑232 projector control cable (such as an
Extron UC 50’ cable) into the projector RS‑232 port. A cable adapter may be
required.
c. Connect the other end of the projector control cable to the MLC
Display/Source Control RS‑232 port. Wiring depends on the projector. See
the diagrams below and on page 8, and the pin assignments in the projector
user manual. Also see the display driver setup document available from
the download page of the Extron Web site.
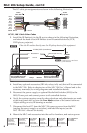
N
In most cases only the transmit (Tx), receive (Rx) and ground connections will
be needed. Wiring varies depending on the projector model.
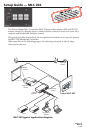
A B C D E A B C
IR
Relays IR/RCM
RS-232
D E A B C A BD
1A 1B 2A 2B 3A 3B
1 2 3 4 5 6
Tally Out
33-644-01 A
07 01
MLS/Power
Display/Source Control
Extron Switcher Control
MLC RS-232 display ctrl wiring_112202.eps
Request to send (RTS)
Ground ( )
Transmit (Tx)
Receive (Rx)
Clear to send (CTS)
To the RS-232 port of
the display/projector
E
D
C
B
A