7
Digital audio output terminals
Digital audio is output from these terminals.
Connect these terminals to the digital input terminals of D/A
converters (D-01) using commercially available cables.
XLR: Use balanced XLR digital audio cable
COAXIAL: Use RCA (pin) digital audio cable
IEEE1394 / i.LINK (AUDIO):
Use S400 compatible IEEE1394 6pin cable
To output digital surround sound from SACD discs, the
ES-LINK compatible D/A converter, or an IEEE1394
(i.LINK S400 (AUDIO)) compatible D/A converter is
necessary.
See pages 8-11 for details on the connection to the
Esoteric D-01 or TEAC D-70.
If your D/A converter doesn’t have an IEEE1394 terminal nor
ES-LINK terminal, connect P-01’s FL/FR terminal (XLR or RCA)
to the digital input terminal of the D/A converter. In this
case, the P-01 cannot output digital sound from SACD.
<
The IEEE 1394 terminal is an interface capable of bi-
directional data transmission with a connected device. You
don’t need to be concerned with distinguishing between
input and output.
<
No digital output is available at the RCA C/SW and LS/RS
terminals at this time. If no ES-LINK-capable device is
connected, no digital output is available at the XLR C/SW
and LS/RS terminals, either. When updated in the future,
this unit will have the capability of outputting multi-channel
digital audio coming from DVD-Audio sources.
Digital audio output terminals (NORMAL)
Conventional digital audio from CD is output from this
terminal. Connect this terminal to the digital input terminal
of a digital device using a commercially available RCA digital
audio cable.
<
When you are using this terminal, select ON in the “D-OUT
Norm” setting (see page 28).
<
This terminal cannot output digital sound from SACD discs.
<
This terminal cannot output up-converted signals.
Word sync input terminal
This allows the use of an externally generated word clock
connection, using a commercially available BNC coaxial
cable (75Ω).
Devices producing such a suitable clock signal include
external D-A converters, or dedicated word clock
generators. Connect the WORD SYNC OUT of such a device
to the unit.
C
B
A
SIGNAL GND connection
Use a commercially available PVC-covered cord to connect
the signal ground terminal on the unit to the amplifier signal
ground.
<
Note that this is NOT an electrical safety ground (earth).
DC IN/OUT connector
Connect the DC OUT connectors of the power supply unit
to the DC IN connectors of the main unit using the supplied
DC power cables.
DC OUT 1 q
DC IN 1
DC OUT 2 q
DC IN 2
<
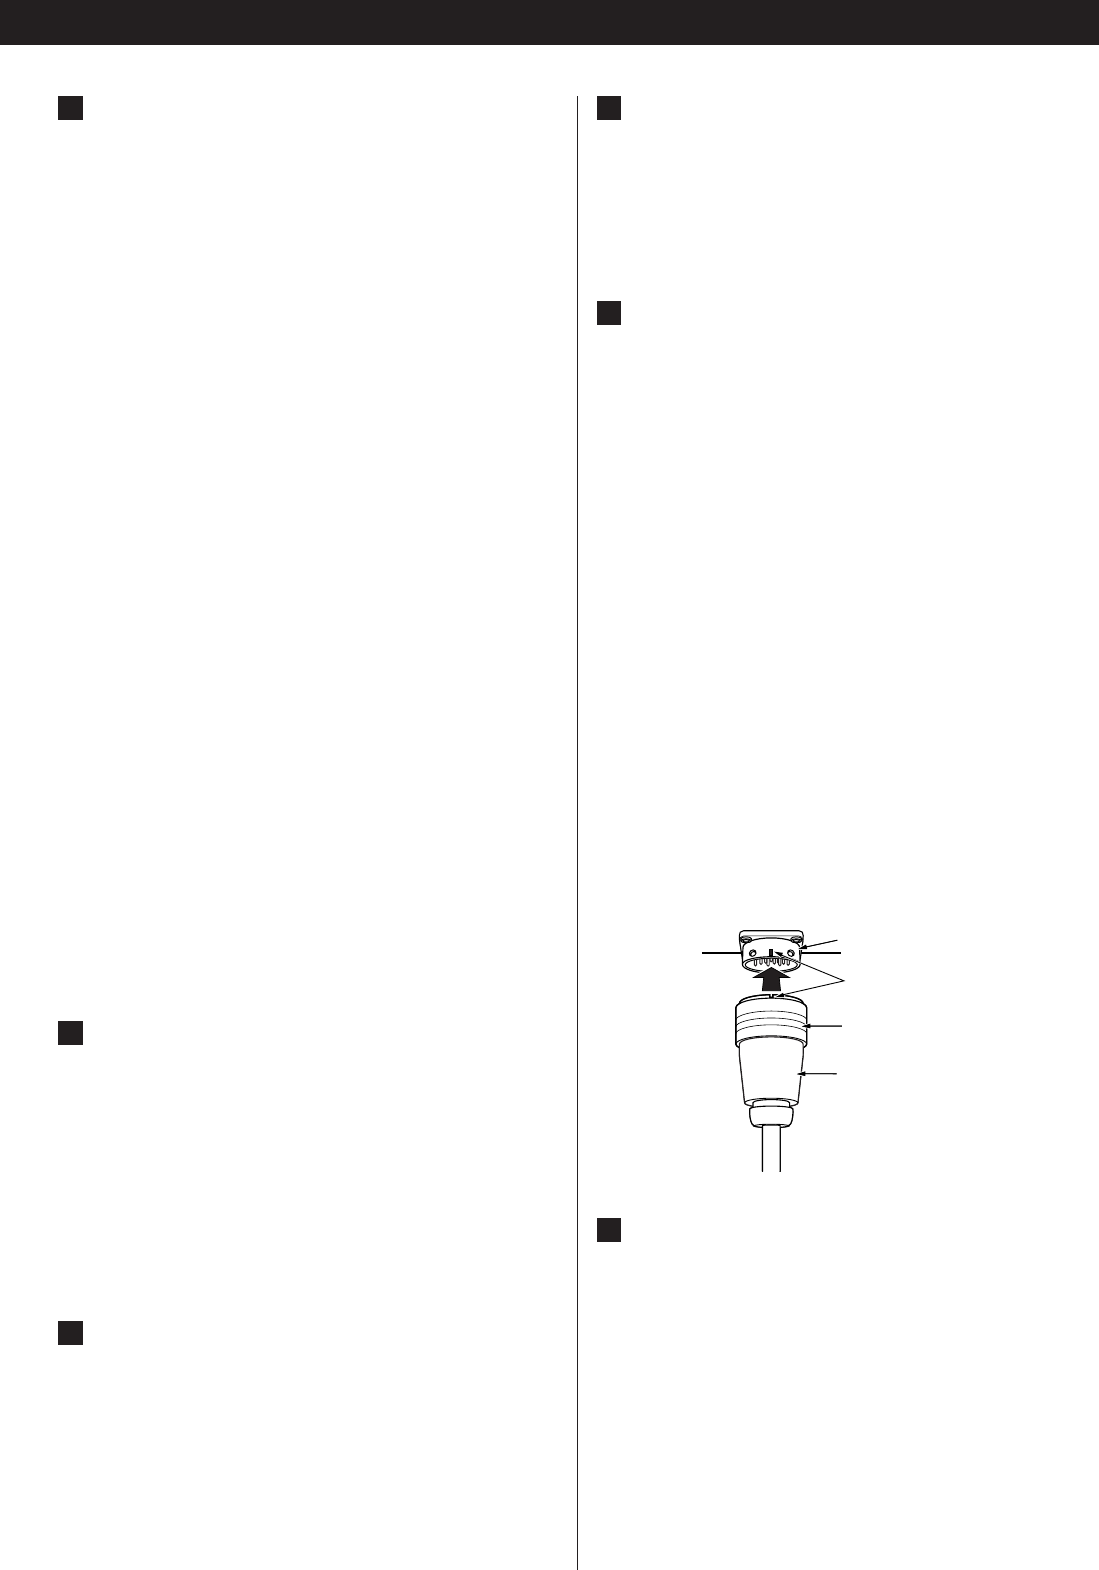
The DC power cables carry arrow marks on them. Connect
them so that the arrows point as shown on the opposite
page. Making sure of the position of the cut-out in the end of
the plug and the direction of the arrow on the DC power
cable, hold the body of the plug, align the cut-out with the
guide mark on the connector and inset the plug until it clicks
in and locks in place. When unplugging the cable, firmly
grasp the barrel or locking ring around the end of the plug
and pull directly toward you. Do not push or pull the plug at
an angle when plugging or unplugging the cable.
<
Always switch off the power before plugging or unplugging
the DC power cable.
< Be careful not to get your fingers pinched between the end of
the plug and the connector.
E
D
Power cord receptacle
After all other connections have been made, insert the
supplied AC power cord into this receptacle, then connect
the other end of the power cord into the AC power source.
Ensure that your AC voltage corresponds to the voltage
marked on the rear panel of the unit. Consult a qualified
electrician if you are in doubt.
<
In order to avoid the risk of electric shock, fire, or other
hazard, only use the supplied power cord or a suitably
approved OEM power cord.
<
If you are not going to use the unit for some time,
disconnect the power cord from the wall socket.
F
Align using this mark.
Grasp the ring and pull toward you
to unplug the cable.
Plug
Connector


