4 – CIS Series
CIS Series – 5
4. CONNECTIONS
WARNING: To prevent the risk of electric shock, do not connect the loudspeaker
with the amplier switched on.
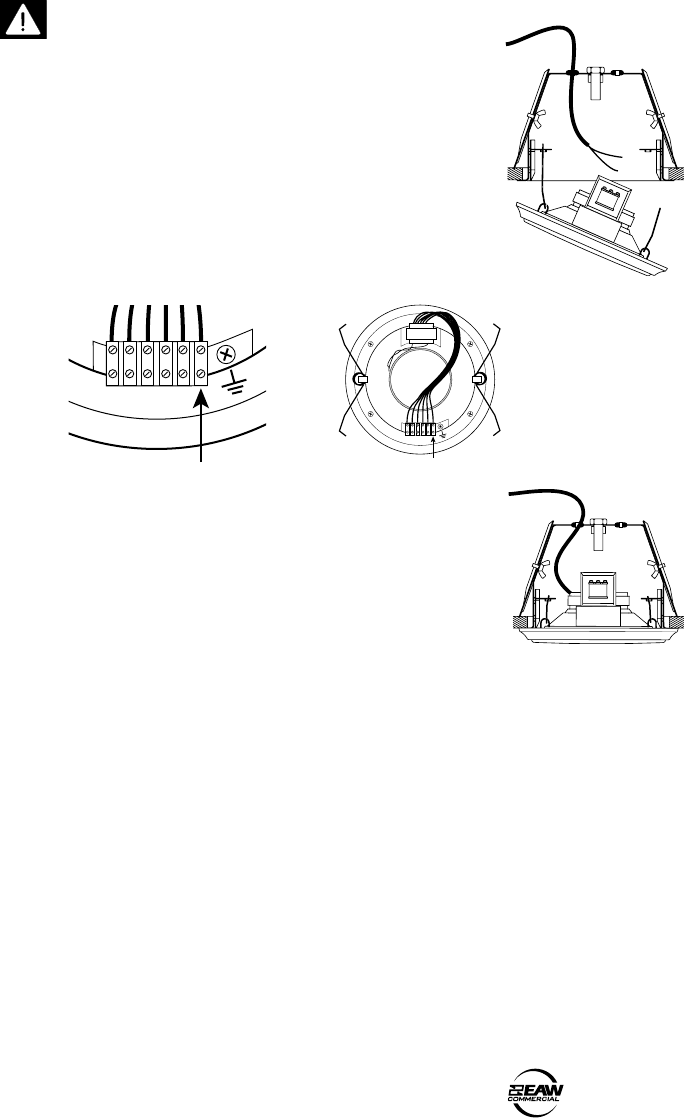
1. Offer up the Loudspeaker and attach the spring clips to one
of the redome side brackets.
2. Connect your amplier output to the terminals on the
loudspeaker. The negative amplier output connects to the
loudspeaker COM terminal, the positive amplier output
connects to one of the other loudspeaker terminals. Use
the tables in the specication section to select the power
rating for the voltage line you are using (70 V or 100 V). Use
a small at screwdriver to secure the connections.
3. When the connections are securely made, connect the
other spring clip to the redome, and press the loudspeaker
upwards until it is ush with the ceiling.
Precautions
• Before using the loudspeaker, carefully check that all the connections have been
made correctly to make sure there are no accidental short circuits that could
cause electrical sparks.
• Check if your power amplier’s constant output voltage is 70 V or 100 V, and nd
the rated power output.
• The sum of the operating power values of all the loudspeakers connected to the
audio line must not exceed 80 % of the amplier’s output power.
• Verify that the connections to all of your loudspeakers are made correctly “in
phase.” When different loudspeakers reproduce the same frequencies but with
phase differences, there may be sound cancellation. Loudspeakers are often
situated in adjacent positions and the sound waves interact with each other.
If a loudspeaker is connected incorrectly; i.e., the polarity of the audio line
conductors is inverted, the audio signals are transmitted with differences in
phase and correct reproduction is therefore jeopardized. Most notably, the bass
response may suffer.
5 4321
COM
5 4 3 2 1
COM


