Connections Connections
ENGLISH
8
1
4
2
3
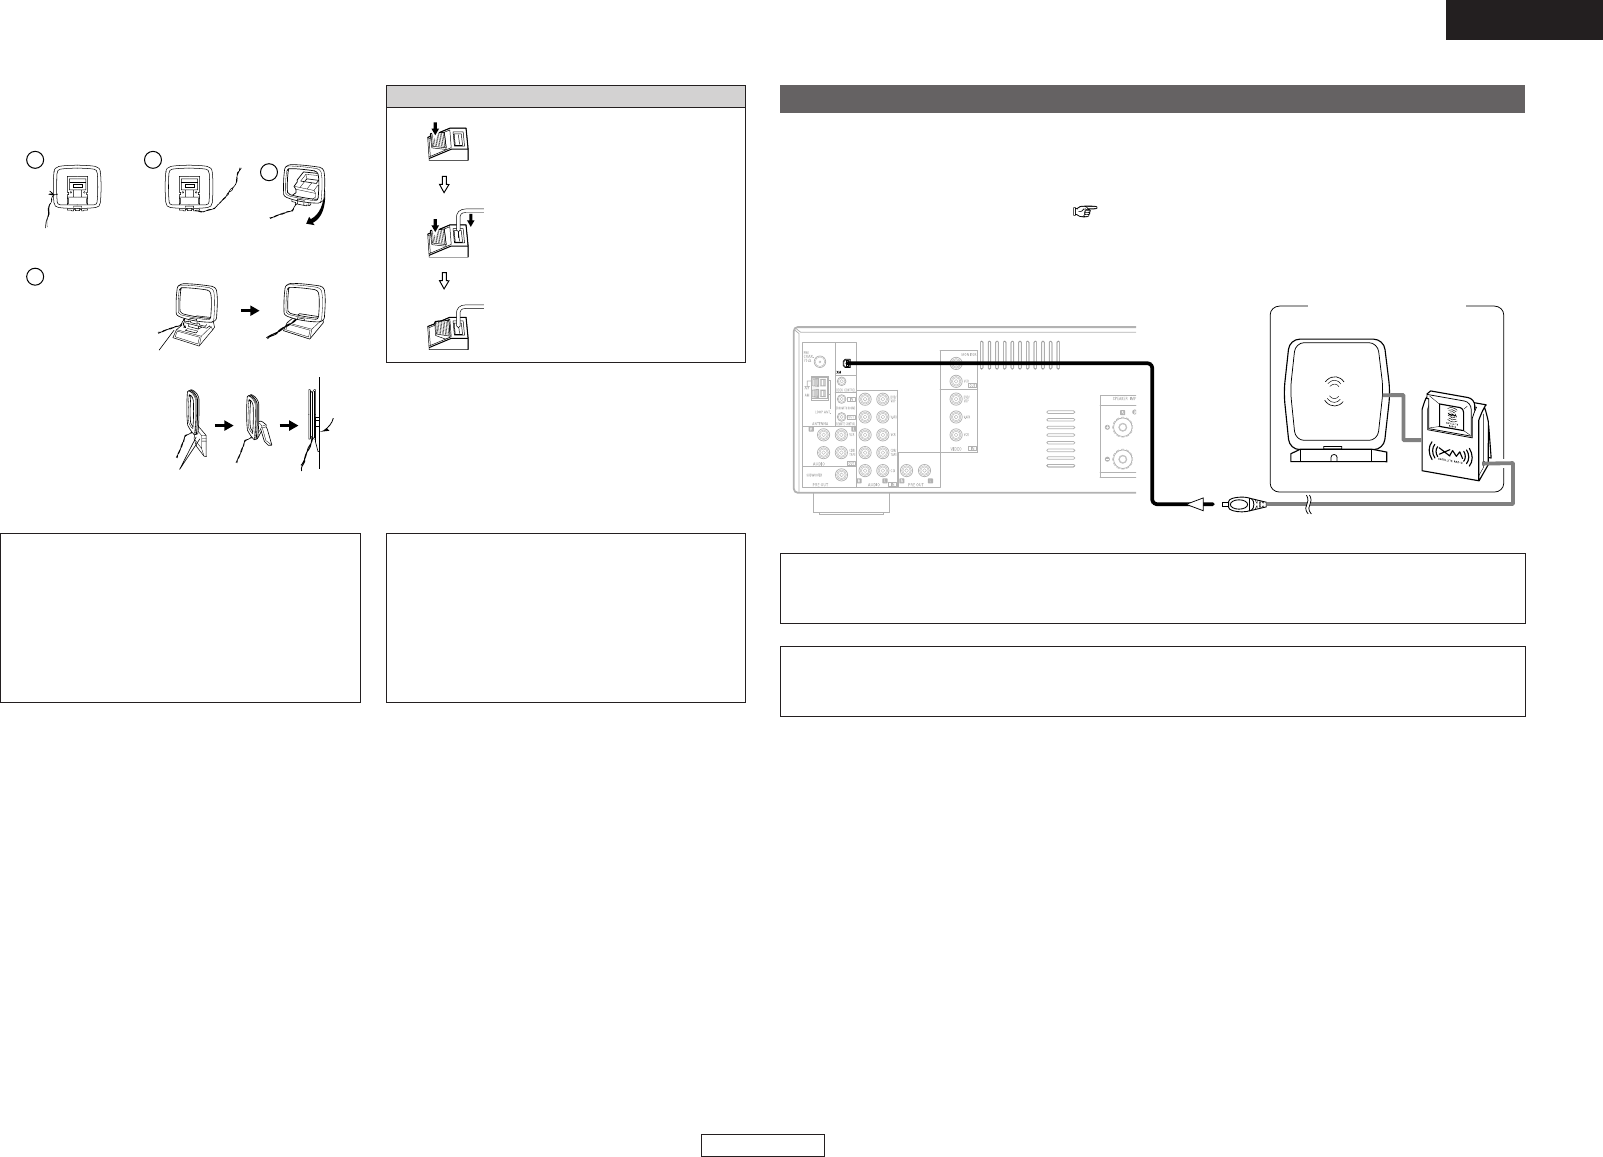
¢AM loop antenna assembly
Connect to the AM
antenna terminals.
Remove the vinyl tie
and take out the
connection line.
Bend in the reverse
direction.
a. With the antenna on
top any stable
surface.
b. With the antenna
attached to a wall.
Mount
Installation hole Mount on wall, etc.
NOTE:
•Do not connect two FM antennas
simultaneously.
•Even if an external AM antenna is used, do
not disconnect the AM loop antenna.
•Make sure the AM loop antenna lead
terminals do not touch metal parts of the
panel.
Note to CATV system installer:
This reminder is provided to call the CATV
system installer’s attention to Article 820-40 of
the NEC which provides guidelines for proper
grounding and, in particular, specifies that the
cable ground shall be connected to the
grounding system of the building, as close to
the point of cable entry as practical.
Connection of AM antennas
1. Push the lever.
2. Insert the conductor.
3. Return the lever.
Connecting the XM terminal
• DRA-37 is the XM Ready
®
receiver. You can receive XM
®
Satellite Radio by connecting to the XM Mini-
Tuner and Home Dock (includes home antenna, sold separately) and subscribing to the XM service.
• Plug the XM Mini-Tuner Home Dock into XM terminal on the rear panel.
• Position the Home Dock antenna near a south-facing window to receive the best signal.
For details, see “XM Satellite Radio” ( page 13).
When making connections, also refer to the operating instructions of the XM Mini-Tuner and Home
Dock.
NOTE:
•Keep the power supply cord unplugged until the XM Mini-Tuner and Home Dock connection have
been completed.
AUX OUT
MX
XM Mini-Tuner and
Home Dock
•The XM name and related logo are registered trademarks of XM Satellite Radio Inc. All rights
reserved.
•XM Ready is a registered trademark of XM Satellite Radio Inc. All rights reserved.
ENGLISH


