1-16 Dell PowerEdge 2400 Systems Rack Installation Guide
6. Press up on the green latches and push the chassis into the rack.
7. Tighten the thumbscrews on each rack adapter bracket.
Installing the Cable-Management Arm
To install the cable-management arm on the computer, perform the following steps:
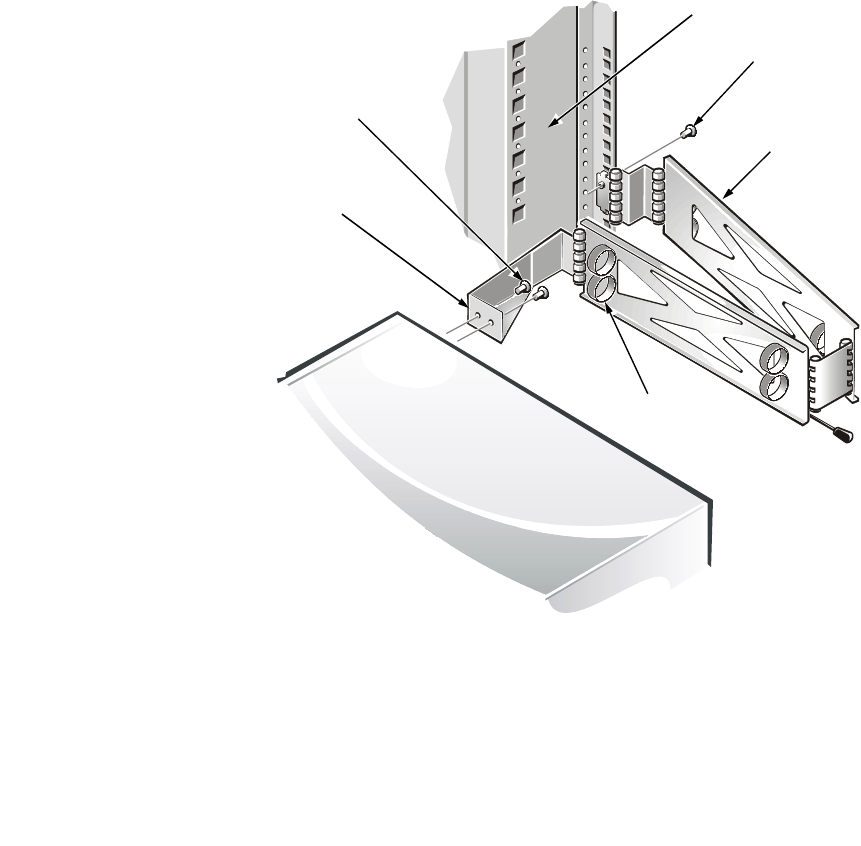
1. Secure the loose end of the cable-management arm to the back vertical rail as
shown in Figure 1-14.
Use one 10-32 x 0.5-inch Phillips-head screw to secure the cable-management
and template arm to the back vertical rail as shown in Figure 1-14. (This is the rail
on the right as you face the back of the rack.) Ensure that the cable-management
arm is straight in relation to the computer—that is, parallel to the ground.
Figure 1-14. Installing the Cable-Management Arm
2. Align the bracket on the end of the cable-management arm with the correspond-
ing holes on the lower-right corner of the computer’s back panel (see Figure 1-14).
Secure the arm using two 8-32 x 0.313-inch Phillips-head screws.
cable-management
arm
8-32 x 0.313-inch
screws (2)
back of computer
vertical rail
10-32 x 0.5-inch
screw
bracket
Velcro strip


