


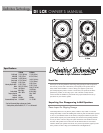

DI LCR
OWNER’S MANUAL
4
Installation Continued
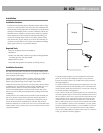
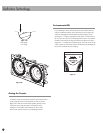
• Push down on the top of the terminal to reveal the wire
hole in the side of the terminal post and insert the wire into
the hole [Figure 7]. Release the pressure on the terminal to
secure the wire.
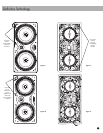
• Loosen the rotating lock arms by turning the lock arm
screws on the front of the speaker counter clockwise 1⁄2 to 1
turn, just enough to allow the lock arm to move freely.
[Figure 8]. Make sure that the rotating lock arms are flipped
inwards [Figure 9] so that the speaker fits into the cutout.
• Place the speaker carefully into the cutout. If you have a
bubble level, use it to help you correctly align the speaker.
Tighten the lock arm screws with a screwdriver [Figure 10].
This will rotate the lock arms [Figure 11] and secure the
speaker to the wall/ceiling. Do not over-tighten the lock
arm screws. If you are using a powered screwdriver or drill
set the torque to a value of 7 in. – lb. (8dN – m).
• Install the grille on the speaker frame. Powerful magnets
hold the grille in place.
SAFETY FIRST
When installing your DI Series Loudspeakers, be
aware of the weight of your particular model (see
specification page for the weight of your model) and
the sturdiness of the material into which you are
installing the speaker. Also be aware of any
concealed studs, electrical wiring or plumbing in the
wall or ceiling into which you are installing the
speakers. If you are not sure of a safe way to install
these speakers, consult a professional installer, your
authorized Definitive Technology dealer, or a building
contractor.
Figure 7
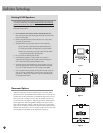
AMP LI FI ER OR
R
ECE IV ER
Figure 6