EnglishEnglish
SYNCHRONIZED TAPE-TO-TAPE RECORDING
NORMAL SPEED TAPE-TO-TAPE RECORDING
• Insert a fully rewound prerecorded cassette into Tape Deck B.
• Insert a fully rewound blank cassette tape into Tape Deck A.
• Set the Function Selector (14) to the TAPE position and keep the DUBBING Selector
(26) in the “high” position.
• Press the Pause Key of Tape Deck “A”, and then press both the Play and Record keys
of Tape Deck “A”.
• Press the Play Key of Tape Deck “B”. The contents of the tape in Deck “B” will now be
copied onto the tape in Deck “A”.
• Adjust the Volume Control to the desired levels for monitoring purposes. The recording
will be unaffected by changes in these control.
• To stop recording, press both of the Stop / Eject Keys. Otherwise the tape will stop
automatically when the end of the tape is reached.
HIGH SPEED TAPE-TO-TAPE RECORDING
• Press down the DUBBING Button (26) to the “low” position.
• Follow the steps described above for Normal Speed Tape-to Tape Recording. You will
hear the speeded up tape play through the speakers. Turn down the volume to silence
the sound.
NOTES: If the length of the tape in Deck B is shorter than that in Deck A, the Play Key of Deck
B will be released automatically at the end of the tape. Tape A will continue to record
until the tape reaches its end, or its Stop / Eject key is pressed.
If the length of the tape in Deck A is shorter than that in Deck B. The Record and
Play Keys of Deck A will be released automatically at the end of tape. Tape B will
continue to play back until the tape reaches its end, or its Stop / Eject Key is pressed.
SOUND ADJUSTMENT
• Press the PRESET EQ button (17) to select between pre-adjusted equalizations. The
indicator of the selected type will light up (20):
• To Mute the sound instantly press the MUTE Button (7) on the Remote control.
The MUTE (19) indicator lights up and flashes . Pressing this button again or pressing the
VOLUME buttons on the remote Control, will switch the sound on again.
HANDLING COMPACT DISC
78
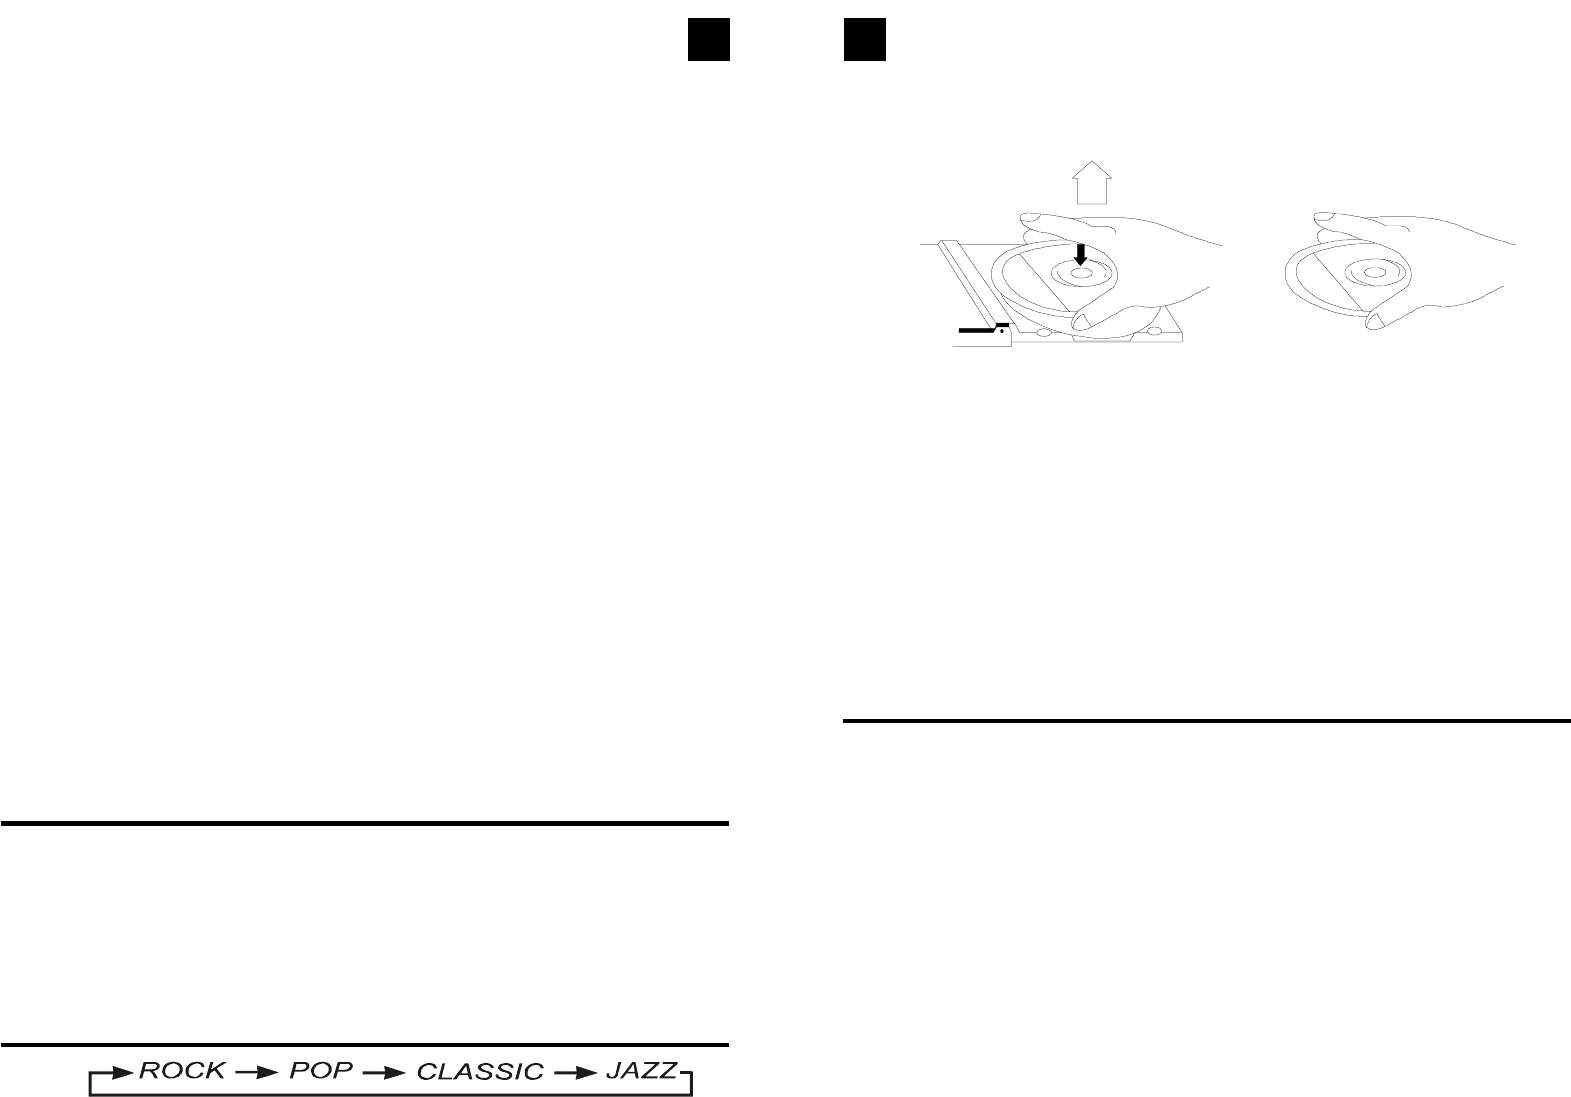
• To remove a disc from its storage case, press down on the centre of the case and lift the
disc out, holding it carefully by the edges.
• Fingerprints and dust should be carefully wiped off the disc’s recorded surface with a
soft cloth. Unlike conventional records, compact discs have no grooves to collect dust
and microscopic debris so gently wiping with a soft cloth should remove most particles.
Wipe in a straight line from the inside to the outside of the disc. Small dust particles and
light stains will have absolutely no effect on reproduction quality.
• Never use chemicals such as record sprays, antistatic sprays, benzine, or thinners to
clean compact discs. These chemicals can irreparably damage the disc’s surface.
• Discs should be returned to their cases after use. This avoids serious scratches that
could cause the Laser pickup to skip.
• Do not expose discs to direct sunlight, high humidity, or high temperatures for extended
periods. Long exposure to high temperatures can warp the disc.
• Do not stick paper or write anything with a ballpoint pen on the label side of the disc.
COMPACT DISC OPERATION
LOADING AND UNLOADING COMPACT DISCS
• Press the STANDBY/ON Button (16) to ON . The Standby indicator (19) will go off.
• Set the Function Selector (14) to the CD position.
• Press the OPEN/CLOSE (38) button to open the CD drawer.
Note: You do not have to wait for the changer to search all three pockets for Ds. You may
open the CD drawer immediately.
• The CD pockets are numbered “1,2 and 3”. These numbers correspond to the disc
indicators in the CD display. The disc indicators do not change position. However the
disc symbol will flash to show which disc is in the play position.
Place up to 3 CDs in the pockets of the tray. Place the disc you want to play first in pocket
no. 1. Place the disc you want to play second in pocket no.2 and so on. To load three
CDs in the tray it will be necessary to rotate the tray to expose the third pocket. After you
load the first two discs press the Disc Skip (10) button to rotate the tray and then load


