


BlueLab Installation
blab-ug-005Pa
© Cambridge Silicon Radio Limited 2005
This material is subject to CSR’s non-disclosure agreement.
Page 6 of 24
_äìÉi~Ä»=îPKO=Combined AV Headset User Guide=
4 BlueLab Installation
This chapter provides guidance on the installation of xIDE as supplied on the BlueLab CD-ROM.
4.1 Prerequisites
BlueLab xIDE should be installed on a PC running Windows 2000 or Windows XP.
CSR recommend that 150Mbytes of free disk space is available.
Note: A typical BlueLab installation requires 125Mbytes and each application built will need approximately
10Mbytes of additional space.
A minimum of Windows Power User privileges is required to install the software correctly.
Note: If you are unsure of your current level of privileges, please contact your system administrator.
New BlueLab installations can coexist with previous releases provided they are installed in different directories.
The use of a convention such as C:\BlueLabversion (eg
C:\Bluelab3_2) to create the program folder will
avoid conflict between versions.
Note: Spaces in folder names of the directory path are not supported ie you should not try to install the software in a
directory which itself has spaces in its name or is contained within a folder that has spaces in its name eg
xIDE cannot be successfully installed in the Program Files directory.
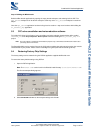
4.2 Installation procedure
CSR recommend that any applications running on the PC are closed before installing the BlueLab software.
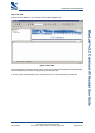
1. Insert the Bluelab CD-ROM into the computer’s CD drive.
2. Right-click on the Windows Start menu and explore the CD-ROM.
The CD-ROM contains PDFs of the Bluelab documentation and the BlueLab executables.
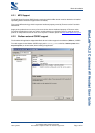
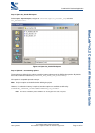
3. Double-click on
BlueLab-3.2.exe file to launch the Setup wizard, which will guide you through the
rest of the installation process.
4. Follow the on-screen instructions, clicking
Next to continue.
For a first time installation, CSR recommend that the default settings are accepted.
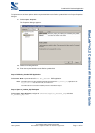
5. When the VM and DSP libraries have been built, the PC the Setup Wizard will display the final setup
screen.
6. Click
Finish to complete the installation.
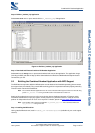
If the default option to install the Serial Peripheral Interface (SPI) device driver was accepted, the PC
must be restarted to complete the installation.