


Antenna System Crestron SRD-ANT-4-PAK
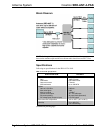
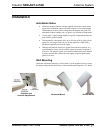
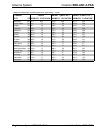
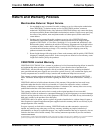
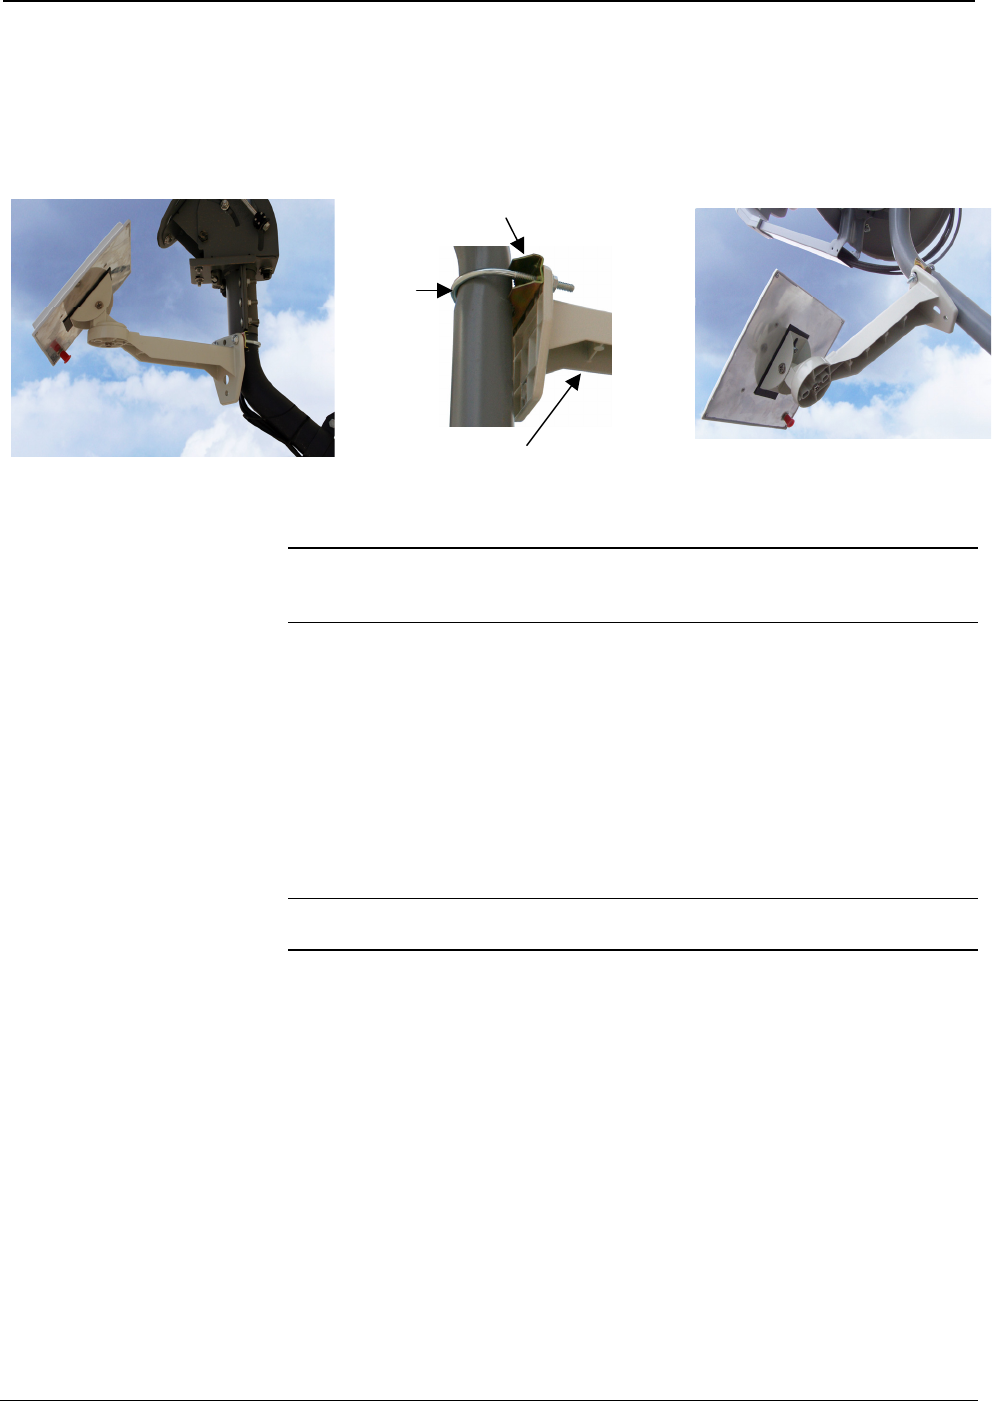
Pole Mounting
Attach the antenna to any pole (not larger than two inches in diameter) using the
U-bolt and saddle with supplied attaching hardware as shown in the following
figures.
U-Bolt
Wall Mount
Bracket
Mounting Hardware 2” DirecTV Pole
Saddle
1 ¾” Dish Network Pole
NOTE: For operation in close proximity to high power satellite radio terrestrial
repeaters, please use the supplied 20 dB attenuator on the input of the splitter to
avoid amplifier overload. Otherwise this attenuator is not required.
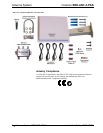
Hookup
After the antenna is mounted, refer to the diagram on page 2, connect cables, attach
the splitter, adjust the antenna position, and finalize the installation as follows:
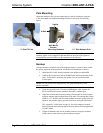
1. Attach the RG-6 cable from the antenna to the splitter port labeled IN.
2. Attach an RG-6 cable from one of the OUT ports and route the cable to the
radio. (If the radio is located by the splitter, you can use the included
F-male splice).
NOTE: For best results in all configurations, use quad-shielded RG-6 cable
whenever possible.
3. Using the supplied 3-foot F-Female to SMB adapter cable, connect the
RG-6 coaxial cable from the antenna to the radio’s antenna input.
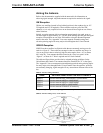
4. Adjust the azimuth and elevation pointing of the antenna for best reception
using the antenna signal strength menu in the radio. The antenna has a beam
width of ± 25º, which is narrower than standard consumer-quality home-kit
antennas, but provides higher gain and rejection to multi-path interference.
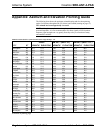
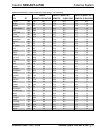
The “Appendix”, which starts on page 10, lists exact magnetic azimuth
bearings and elevation pointing angles for many major cities throughout the
US and Canada.
5. Tighten all hardware and seal the outdoor connectors using the included
weather boot or other means to prevent moisture ingress.
6 • Antenna System: SRD-ANT-4-PAK Installation Guide – DOC. 6723A