


6
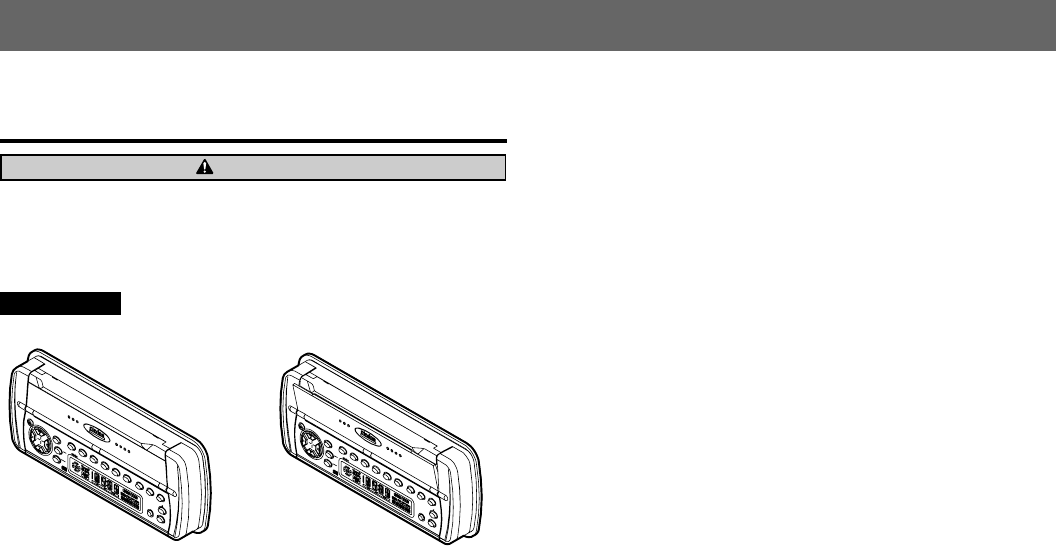
XMD1/XMD2
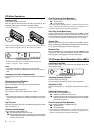
Turning ON the Power and Adjusting the Volume
1) Press the POWER button 4.
∗ To turn off the power, press the POWER button 4 for 1 second or longer.
2) Press the FUNC button 4 and select another operation mode.
Every time the FUNC button 4 is pressed, the display changes
the operation mode as:
Radio ➜ CD ➜ CD changer ➜ Radio
Notes:
• The operation mode not connected to the unit will not be selected.
• If the CD mode is selected when no disc is inserted, the display
flashes “DISC”.
3) Use the volume button 1 to adjust the volume.
w: Increases the volume.
z: Decreases the volume.
∗ The volume level is from 0 (minimum) to 33 (maximum).
Audio Mode Adjustments
Press the A-M button # to select the adjustment mode. The mode
switches as follows each time the A-M button is pressed:
BASS ➜ TREB ➜ BAL ➜ FAD ➜ Previous mode
Adjusting the Bass
1) Press A-M button # and select “BASS”.
2) Press volume button 1 w to emphasizes the bass; press z to
attenuates the bass.
∗ The factory default setting is “0”. (Adjustment range: –6 to +6)
3) When the adjustment is complete, press A-M button # several
times until the function mode is reached.
Adjusting the Treble
1) Press A-M button # and select “TREB”.
2) Press volume button 1 w to emphasizes the treble; press z to
attenuates the treble.
∗ The factory default setting is “0”. (Adjustment range: –6 to +6)
3) When the adjustment is complete, press A-M button # several
times until the function mode is reached.
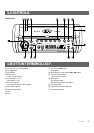
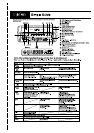
7. OPERATION
Note:
• Be sure to read this chapter referring to the front diagrams of chapter 2. CONTROLS on page 3.
When this unit is turned on, starting and stopping the engine
of a boat with its volume raised to the maximum level may
harm your hearing.
Be careful about adjusting the volume.
CAUTION
Basic Operations
Adjusting the Balance
1) Press A-M button # and select “BAL”.
2) Press the volume w emphasizes the sound from the right speaker;
press the volume z emphasizes the sound from the left speaker.
∗ The factory default setting is “0”. (Adjustment range: L9 to R9)
3) When the adjustment is complete, press A-M button # several
times until the function mode is reached.
Adjusting the Fader
1) Press A-M button # and select “FAD”.
2) Press the volume w emphasizes the sound from the front speak-
ers; press the volume z emphasizes the sound from the rear
speakers.
∗ The factory default setting is “0”. (Adjustment range: F9 to R9)
3) When the adjustment is complete, press A-M button # several
times until the function mode is reached.
Setting the Z-enhancer
This unit comes with three types of sound tone effects stored in
memory. Select the one you prefer.
∗ The factory default setting is “Z-EHCR OFF”.
Each time you press Z-EHCR button &, the tone effect changes in
the following order.
“Z-ENHANCER 1” ➜ “Z-ENHANCER 2” ➜ “Z-ENHANCER 3” ➜ “Z-
EHCR OFF” ➜ “Z-ENHANCER 1”...
• Z-ENHANCER 1: bass emphasized
• Z-ENHANCER 2: treble emphasized
• Z-ENHANCER 3: bass and treble emphasized
• Z-EHCR OFF: no sound effect
Loudness Effect
In order to turn on/off the loudness effect, use the LOUD button #
for 2 seconds or longer. Every time the LOUD button # is pressed
and held for 2 seconds or longer, the loudness effect switches on
and off.
∗ When the loudness effect is on, the display will show “LD”.
Switching the Clock Display
Every time the DISP button % is pressed, the display will change
between the operation mode and the clock display.
Setting the Clock
1) Press the DISP button % to display the clock display.
2) Press and hold the DISP button % for 2 seconds or longer.
3) Press the SRCH Left button @, then set the current hour.
4) Press the SRCH Right button @, then set the current minute.
5) Press the DISP button %, then the clock is set.
Notes:
• If you select another operation mode while you are setting the clock,
the clock setting operation will be canceled.
• If you remove the vehicle’s battery for a check or repair, the clock
will be reset, so you must set it again.
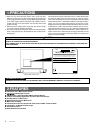
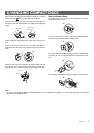
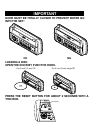
OK NG
IMPORTANT
Door must be totally closed to prevent water go into the set!