1
CONTENTS
1. introduction
This manual covers operation information for the Cerwin-Vega’s XLS-12S & XLS-15S Subwoofers. Illustrations of control locations and
hook-up wiring may differ in physical appearance and location than those shown on the actual product you own. However, the operation
information is still the same.
2. subWoofer installation
2.1 prior to installation
Carefully unpack your subwoofer and save the box and all of the packing material. At some point, you may need to transport, ship, or move
your subwoofer. Before continuing with the installation, please make sure the subwoofer is unplugged and the power switch is turned “OFF.”
Warning: Severe damage may result from improperly selected voltage.
Refer to qualified service personnel to select voltage.
2.2 installation
Please read the following to determine which installation procedure is best for your audio/video system. For additional hook-up connections,
you may want to refer to your A/V receiver, processor, preamplifier, or amplifier’s manual.
Note: Read carefully the “Important Symbols and Safety Instructions” page before starting the installation.
2.3 CONTROL DESCRIPTIONS
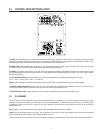
The following controls are located on the XLS subwoofer’s rear panel (Figure 1), page 2.
Attention! The Cerwin-Vega’s XLS Subwoofers have LFE, Line Level, and SPEAKER-LEVEL input connections. Please choose one option
only for hook-up. Do not hook up more than one option!
1. LFE INPUT: Mono “low frequency effects” connection. Use this input if receiver/preamp/processor has a dedicated LFE or subwoofer
OUT. Refer to the owner’s manual provided by your receiver/preamp/processor manufacturer. Set receiver’s crossover to 150 Hz.
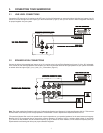
2. LINE LEVEL INPUT: Stereo low-level input to subwoofer. Connect to “LINE-OUT”, “MAIN-OUT or PREAMP-OUT,” of your receiver/
preamp/processor using a dual RCA patchcord (not supplied). Refer to the owner’s manual provided by your receiver/preamp/processor
manufacturer. Set receiver’s crossover to 150 Hz.
3. SPEAKER LEVEL INPUT: Stereo high-level inputs to subwoofer. Use these terminals when line level connections are not available from
A/V receiver/preamp/processor. Connect to SPEAKER outputs on receiver using high-quality speaker wire (16-gauge or heavier). Set the
front left and right speaker settings to large or full range.
4. SPEAKER LEVEL OUTPUT: Audio loop of stereo high-level (SPEAKER LEVEL) inputs. Use to loop (continue) signal to speaker
connections to the left and right main speakers.
5. VOLUME CONTROL: Controls volume level of subwoofer. Use to balance the output of the subwoofer with the main speaker output.
6. CROSSOVER FREQUENCY: The crossover control allows you to adjust the upper limit of the subwoofer’s frequency response from 50 to
150 Hz. The subwoofer’s response will begin rolling off above the set frequency.
Note: Crossover control does not function when LFE input is used.
1. Introduction ......................................................................................................................................................................................... 1
2. Subwoofer Installation ....................................................................................................................................................................... 1
2.1. Prior to Installation ..................................................................................................................................................................... 1
2.2. Installation ................................................................................................................................................................................... 1
2.3. Control Descriptions ................................................................................................................................................................... 1
2.4. Placement ................................................................................................................................................................................... 2
3. Connecting your Subwoofer ............................................................................................................................................................. 3
3.1. Line Level Connections ............................................................................................................................................................. 3
3.2. Speaker Level Connections ...................................................................................................................................................... 3
4. Troubleshooting ................................................................................................................................................................................. 4
5. Specifications ...................................................................................................................................................................................... 4


