


6
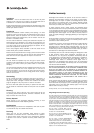
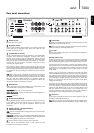
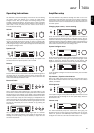
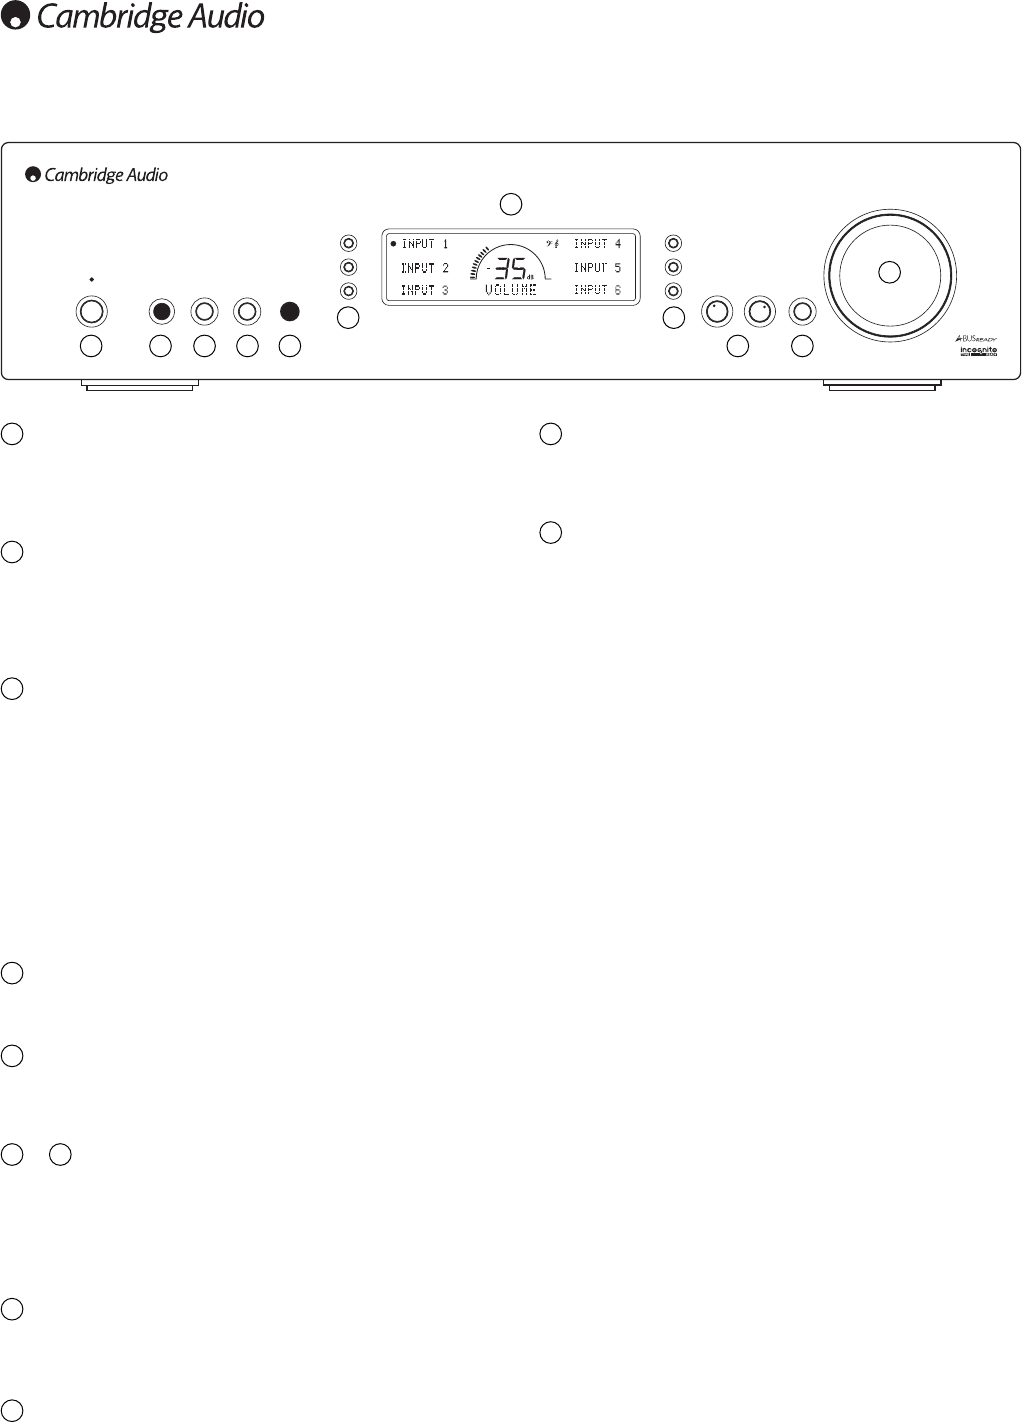
Front panel controls
Bass Treble DirectModeSpeaker A/BPhonesStandby / On
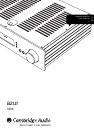
azur 740A
Integrated Amplifier
Volume
Standby/On
Switches the unit between Standby mode (indicated by dim power LED)
and On (indicated by bright power LED). Standby is a low power mode
where the power consumption is less than 10 Watts. The unit should be
left in Standby mode when not in use.
Phones
Allows for the connection of stereo headphones with a ¼" Jack plug.
Headphones with an impedance of between 32 and 600 ohms are
recommended. When the headphones are connected, the loudspeaker
relays are released switching off the output to the loudspeakers
(speakers A and B).
Speaker A/B
Press to scroll through the speaker sets connected to the loudspeaker
terminals on the back panel (speaker sets A, B or A and B). This can be
used for listening to an extra set of loudspeakers in another room.
Please note that care should be taken when choosing speakers if two
loudspeakers are going to be used on each channel. If the combined
resistance measured on the loudspeaker terminals is too low the
amplifier may not switch out of Standby mode until a suitable load
resistance is detected. For more information refer to the CAP5 section of
this manual.
Note: When using one pair of speakers, use speakers with a nominal
impedance of between 4-8 ohms. When using two pairs of speakers,
use speakers with a nominal impedance of between 6-8 ohms each.
Mode
Press to switch between Volume and Balance modes. Press and hold to
to enter the 740A System Configure menu.
Infrared sensor
Receives IR commands from the supplied Azur remote control. A clear
unobstructed line of sight between the remote control and the sensor is
required.
& Input select buttons
Push the appropriate input selection button to select the source
component that you wish to listen to (highlighted by a solid circle on the
display). The signal selected is also fed to the Tape Out sockets so that
it may be recorded. The input should not be changed whilst recording
(but the recorded signal can be checked using the tape input Tape
Monitor).
Display
LCD used to control the 740A. Please refer to the ‘Operating
instructions’ and ‘Amplifier setup’ section of this manual for more
information.
Bass and Treble
Press to release and rotate to allow subtle adjustments to the tonal
balance of the sound.
Direct
This control gives the audio signal a more direct path to the power
amplifier stage of your amplifier, bypassing the tone control circuits for
the purest possible sound quality.
Volume
Use to increase/decrease the level of the sound from the outputs of the
amplifier. This control affects the level of the loudspeaker output, the
pre-amp output and the headphone output. It does not affect the Tape
Out connections.
The Volume control is also used in navigating the 740A System
Configure menus on the front panel display.
Please refer to the ‘Operating instructions’ section of this manual for
more information on some functions of these buttons.
1
2
3
1
2
3 4
5
8
9
11
11
76
4
5
6 7
8
10
10
9