


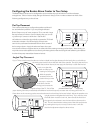
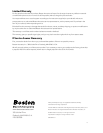
Angled Top Placement
If your TV has a shallow top (less than six inches in depth) and angles downward in the back, then you should use
the sliding rear stand to secure the back half of the speaker. First apply the two front
rubber feet as shown above (do not apply the rear feet). Loosen the knurled
knob, move the slide
down and flip up the
rotating mounting pad.
With the speaker
centered and in the
position that you want
it to stay in, move the
slide down until the
mounting pad contacts the
angled surface of the TV. Pull off the
paper backing from the pre-attached, self-adhesive hook-and-loop strip and stick the mounting pad on the TV.
Press down on the mounting pad to ensure that the two hook-and-loop halves are locked. Adjust the speaker to its
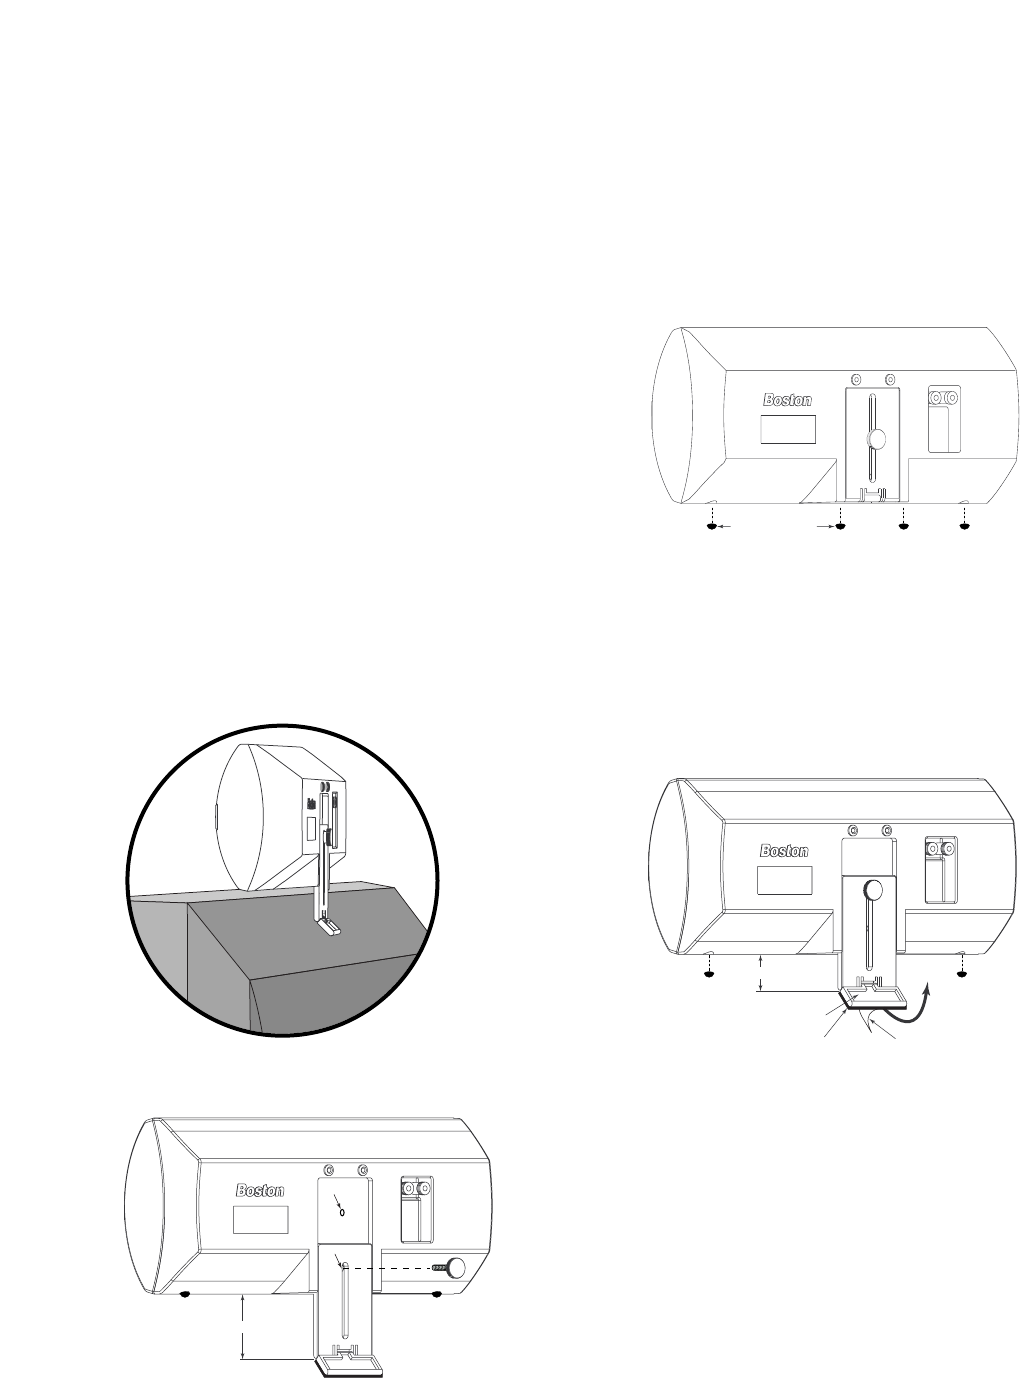
upright position and tighten the knob firmly. If you need to move
the slide down more than one inch, then remove the knob from
the upper hole and screw it into the lower hole as shown to the
left. This will centralize the contact point of the slide and prevent
any rattling that may occur at very loud volumes. It will also
double the adjustment depth to three inches.
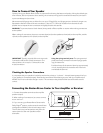
Configuring the Boston Bravo Center to Your Setup
The Boston Bravo Center can be configured to accommodate any style of television and home theater
arrangement. Take a minute to study the type of television that you have in order to determine which of the
following configurations you should use.
1
1
/
2
'' (38mm) max
rotating mounting pad
pre-installed self-adhesive strip
paper backing
3'' (76mm) max
upper hole
lower hole
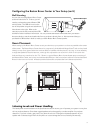
Flat Top Placement
This is the simplest way to configure the speaker and should
be used wherever possible. If you are placing the Boston
Bravo Center on top of a rear projection TV or one with a large
flat top surface (six inches or more in depth), then you can use
it just the way it comes out of the box. Use the four
self-adhesive rubber feet (provided) to protect the TV’s finish
and reduce vibration. Peel off and apply a foot to each
semi-circular pad located underneath the two front corners of
the housing as shown. Apply the other two feet to the outer-
most corners of the rear support section on either side of the rotating mounting pad as shown. Alternatively, you
may wish to secure the speaker to its surface by eliminating the rear feet and using the self-adhesive, pre-installed
hook-and-loop strip instead (see illustration below).
self-adhesive feet
4