


10
V-AMP 2
18
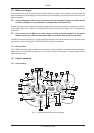
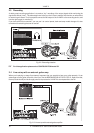
Connect the enclosed power supply unit via the AC IN socket.
19
The balanced LINE OUT 1/4" sockets provide the audio signal from the V-AMP 2 in stereo, for example,
for recording purposes.
You can connect the LINE OUT outputs with balanced or unbalanced jack plugs. The left line
output of the V-AMP 2 can be used to route the audio signal to a guitar amp with a mono input.
Please note that the signal from the multi-effects processor will then not be available in stereo either.
20
The AUX LEVEL control is used for determining the volume of the signal received at the AUX IN input.
21
The AUX IN jack socket enables you to feed in additional stereo signals on the V-AMP 2 and play with
a drum computer or play-back, for example.
22
The PHONES jack allows you to monitor the V-AMP 2 audio signal with standard headphones.
When you connect your headphones, the V-AMP 2 automatically activates studio mode 1 (S1).
If the current preset or setting does not have a cabinet model, the V-AMP 2 will also select a
default speaker simulation automatically, as soon as you plug in your headphones. The standard
cabinet simulations are shown in tab. 8.2. However, you can intentionally change or deactivate
the simulation when using headphones by selecting “-” in the CABINETS mode.
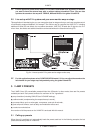
23
The INPUT socket is the V-AMP 2’s 1/4" jack socket for your guitar. Please use a standard 1/4" mono
jack cable.
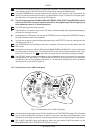
2. EXAMPLES OF USE/CONFIGURATIONS
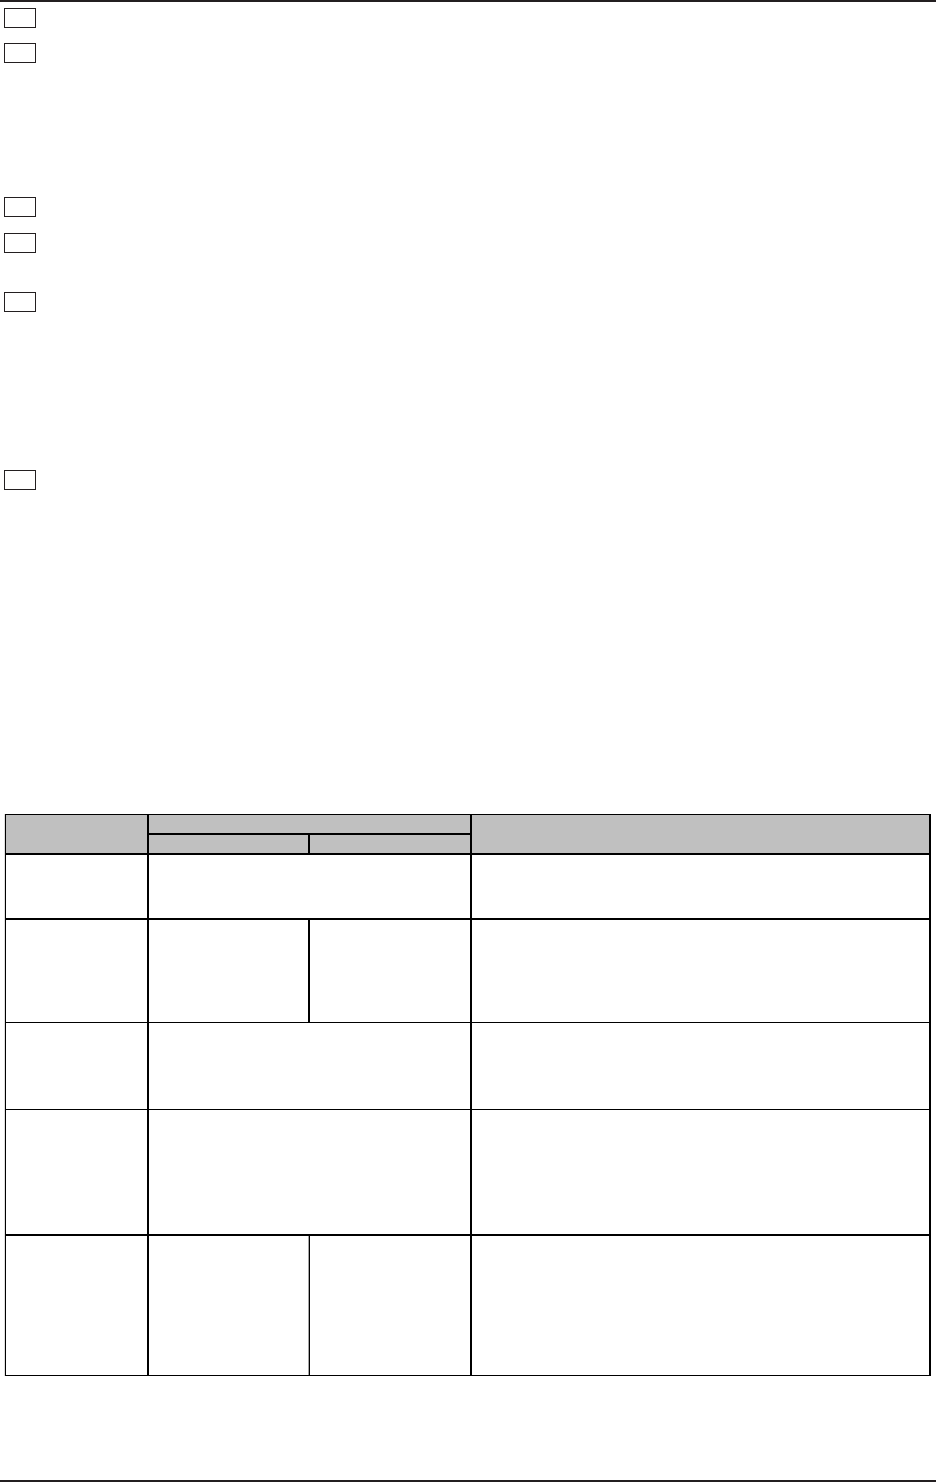
To adapt the V-AMP 2 best to different studio and live situations, you have a choice of five modes
(CONFIGURATION). Regardless of the settings on the unit itself, these modes determine from where the
V-AMP 2’s output signal is taken. And the left and right output signals can be used differently at the same
time, too. One look at the following table will clearly show that you can optionally take the signal with or
without speaker simulation or sound control at the V-AMP 2 output. The effects signal at the output does not
necessarily have to be present on both sides either:
LINE OUT L
LINE OUT R
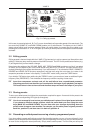
Studio 1 (S1)
V
V-AMP 2 as practice amp, e.g. with headphones.
V
Recording situation: (V-AMP 2 is connected to stereo
line channel on the mixing console).
Studio 2 (S2)
Left
(dry signal, only
compressor plus
auto-wah).
Right
(with modulation,
delay and
reverb effects).
V Recording situation: with the left channel connected to the
recording device. The right channel is used for monitoring
only (with effect). Advantage: while recording, you don't
have to specify the effect used during the mix-down, but
can still monitor wet signals.
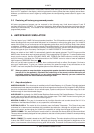
Live 1 (L1)
V V-AMP 2 connected to a guitar amp with stereo input. The
additional EQ (BASS, MID & TREBLE controls) allows you
to match the sound to the amplifier used. The additional
EQ does not affect the settings of your presets.
Live 2 (L2)
V
Here, too, the V-AMP 2 can be connected to a guitar amp
with a stereo input. The additional EQ (BASS, MID &
TREBLE controls) allows you to match the sound to the
amplifier used. However, since no cabinet simulation is
enabled, the speaker sound is determined by the combo/
cabinet used.
Live 3 (L3)
Left
+ additional
3-band EQ with
modulation, delay
and reverb
effects, but without
cabinet simulation.
Right
with cabinet and
modulation, delay
and reverb effects,
but
without
additional
3-band EQ.
V V-AMP 2 as a stage amp, with the left output connected
to a line input on the monitor amp. The additional EQ
(BASS, MID & TREBLE controls) allows you to match the
sound optimally to the monitor amp. The right channel (DI
Out) is connected to the mixing console or stage box and
is used for the FOH mix.
Stereo operation
+ additional 3-band EQ
(adjustable in
CONFIGURATION mode).
Stereo operation
+ additional 3-band EQ,
but without cabinet simulation.
Operating mode
Function
Applications
Stereo operation
with selected
effects and speaker simulations.
Tab. 2.1: V-AMP 2 modes with examples of use
2. EXAMPLES OF USE/CONFIGURATIONS