


0
10
MASTER
0
10
REVERB
PHONES
POWER
ON
LG-200AS
1
2
3
4
5
6
7
CAUTION
RISK OF ELECTRIC SHOCK
DO NOT OPEN
0
10
RATE
0
10
DEPTH
STEREO CHORUS
ON
1. Read these instructions.
2. Follow all instructions.
3. Keep these instructions.
4. Heed all warnings.
5. Do not use the LG-200AS near
water.
6. Clean only with a dry cloth.
7. Do not block any ventilation open-
ings. Use in accordance with the
manufacturer’s instructions.
8. Do not use near any heat sources
such as radiators, stoves, or other
devices that may produce heat.
9. Do not defeat the safety purpose of
the polarization or grounding-type
plug. A polarized plug has two
blades with one wider than the other.
A grounding-type plug has two
blades and a third grounding prong.
The wide blade or the third prong is
provided for your safety. If the pro-
vided plug does not fit your outlet,
consult an electrician for replace-
ment of the obsolete outlet.
10. Protect the power cord from being
walked on or pinched, particularly at
the plug and the point where it exits
the LG-200AS amplifier.
11. Only use attachments / accessories
specified by B-52 Pro-Audio.
12. Unplug the LG-200AS during light-
ning storms or when un-used for long
periods of time.
13. Refer all servicing to qualified
personnel. Servicing is required
when the LG-200AS has been dam-
aged in any way such as when
power-cord or plug is damaged,
liquid has been spilled, been
exposed to moisture or rain, does not
operate normally, or has been
dropped.
14. To reduce the risk of fire or electric
shock, do not expose the LG-200AS
to rain or moisture.
IMPORTANT SAFETY
INFORMATION
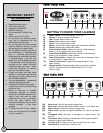
GETTING TO KNOW YOUR LG-200AS
(1) Power Switch: Turns the amplifier ON or OFF
(2) Phones: Connects a stereo headphone
(3) Rate: Adjusts stereo chorus rate
(4) Depth: Adjusts stereo chorus depth
(5) On/off: Turns stereo chorus on/off
(6) Master: Controls the overall signal level of the guitar amplifier
(7) Reverb: Adjusts the reverberation effect
(8) Clean Channel Treble: Adjusts the amount of high frequency
boost or cut as desired in the clean channel
(9) Clean Channel Middle: Adjusts the amount of mid frequency
boost or cut as desired in clean channel
(10) Clean Channel Bass: Adjusts the amount of low frequency boost
or cut as desired in clean channel
(11) Clean Channel Level: Controls the complete signal of the
clean channel
(12)
Channel Switch: Selects between clean and overdrive channel
(LED for Overdrive Channel indicates when O.D. is in use.
LED for Clean)
FFRROONNTT PPAANNEELL VVIIEEWW
CAUTION
RISK OF ELECTRIC SHOCK
DO NOT OPEN
WA
OR
TH
LINE OUT
FOOT SWITCH
CHANNEL
GAIN
REVERB
STEREO
CHORUS
0
10
LEVEL
0
10
LEVEL
RETURN
SEND
CA
RE
22
23
24
25
26
28
0
10
LEVEL
29
27
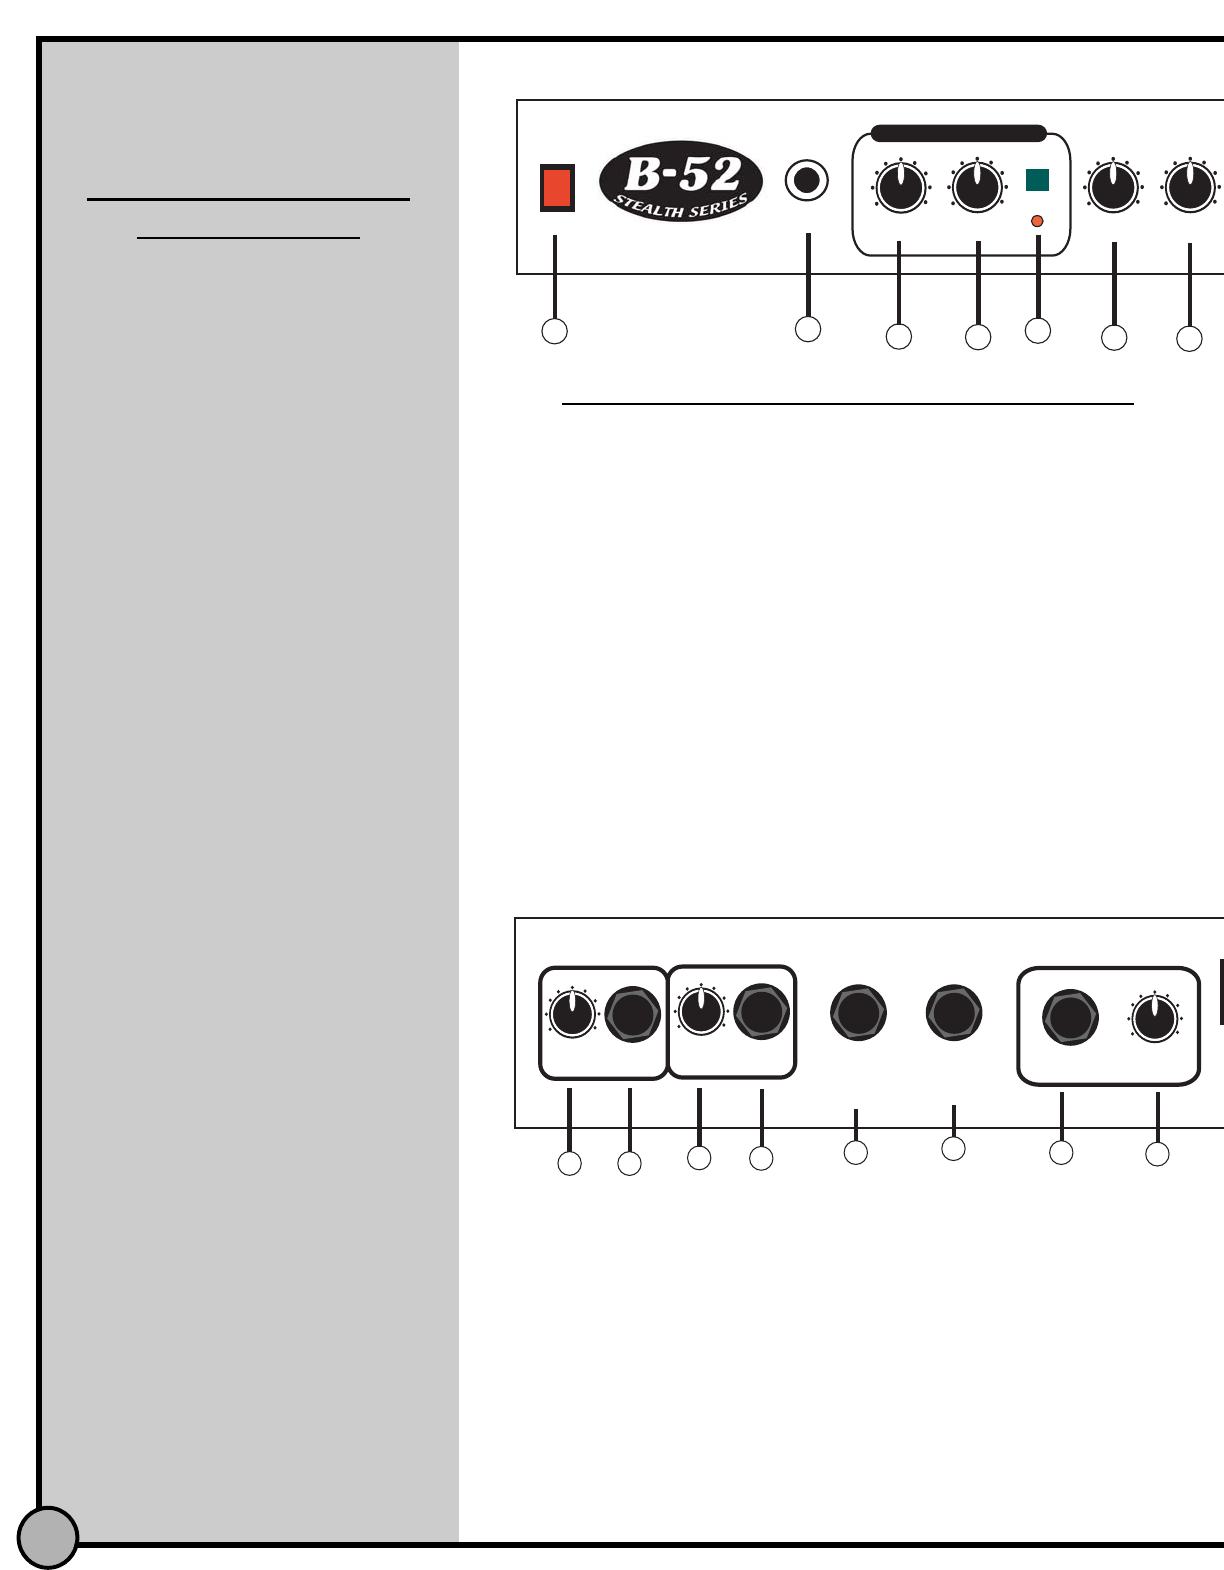
RREEAARR PPAANNEELL VVIIEEWW
2
(22) Send Level: Controls the sending signal level.
(23) Send Jack: Connects the guitar amplifier to input of an effects unit.
(24) Return Level: Controls the returning signal level.
(25) Return Jack: Connects the guitar amplifier to out put of an effects
unit.
(26) Footswitch Jack: Connects a footswitch to switch reverb ON
and OFF.
(27) Footswitch Jack: Connects a footswitch to select clean/overdrive
channel and gain1/gain2 channel.
(28) Line Out Jack: Connects a unit with line level input, e.g. mixer.
(29) Level Control: Controls the Line Out Level.