VM9510TS
13
submenu appears in a second row with the selected
option highlighted in light blue.
2. Select a new value by pressing the or buttons (14,
22) on the remote control or the or buttons (18, 19)
on the joystick.
3. Confirm your selection by pressing the , , or
buttons (14, 17, 19) on the remote control, or the or
button (16, 17) on the joystick. The new value is
highlighted in light blue and setup is complete.
Exiting the System Setup Menu
To exit setup mode and resume normal playback, press the
SYS SETUP button (31) on the remote control or the DISP
button (5) on the front panel.
MULTI-ZONE OPERATION
Independent sources can be played simultaneously on the
VM9510TS. For example, a video game console can be seen
on the front screen while DVD video is available to rear
passengers.
NOTE: If DVD is selected as the front source and SD
Card is selected for the rear source, then both sources
will switch to SD Card. If SD Card is selected as the front
source and DVD is selected for the rear source, then
both sources will switch to the DVD source. Since the
multimedia processor is shared between optical and SD
Card media, one of the other can be selected but not
both simultaneously.
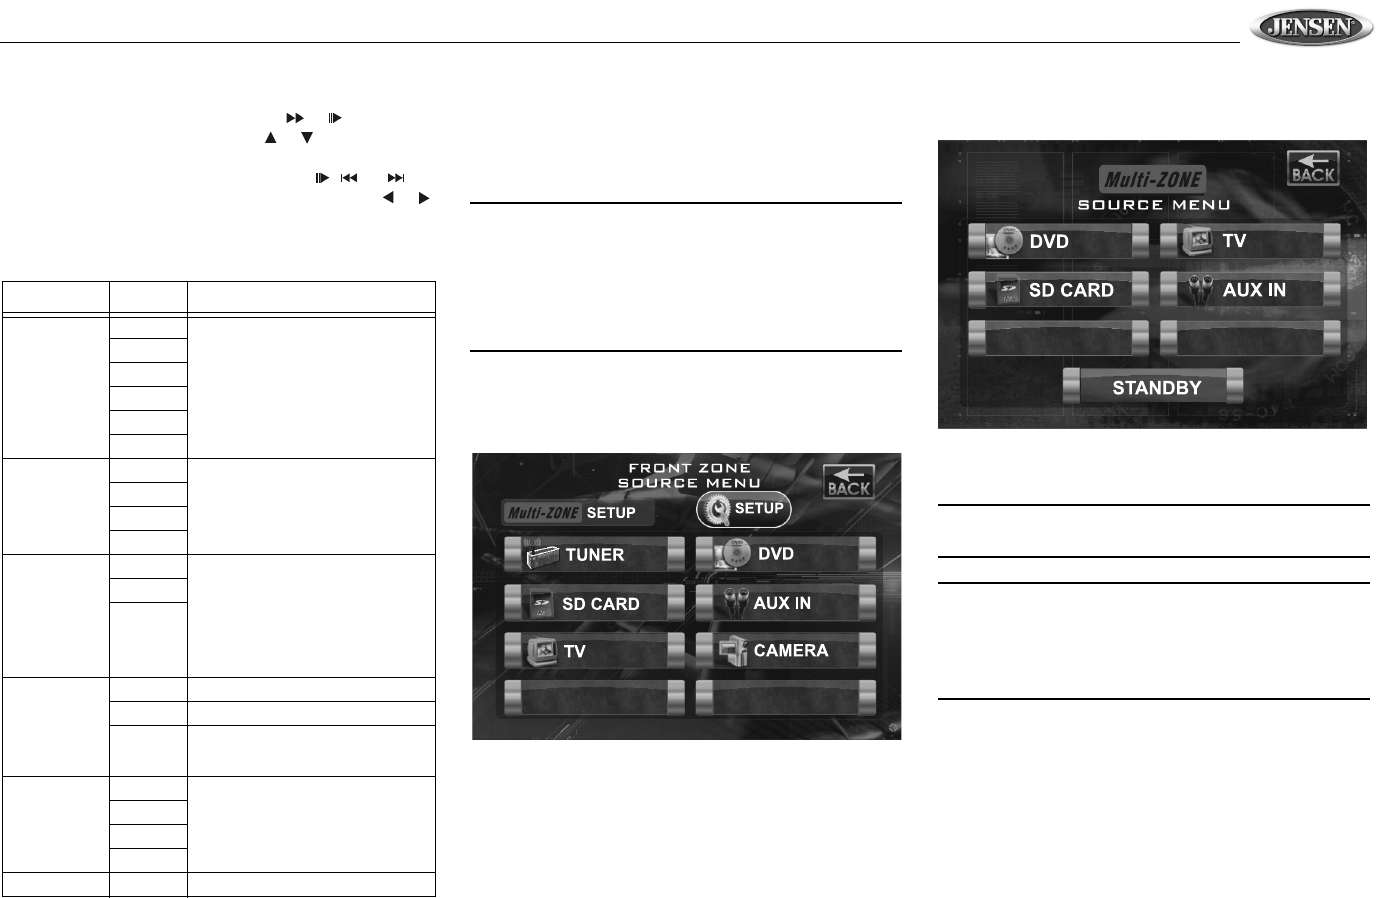
Selecting a Source for the Front Zone
To access the FRONT ZONE SOURCE MENU, touch the
TFT screen in the top left corner of the screen.
This menu allows you to select a source for the front zone.
Selecting a Source for the Rear Zone
To access the rear zone SOURCE MENU, touch the top right
corner of the screen, near the Multi-ZONE icon.
Select the source to be directed to the rear Multi-ZONE RCA
outputs.
NOTE: Optical media and an SD Card cannot be selected
from the Multi-ZONE Source Menu simultaneously.
NOTE: The AM/FM tuner graphics will change to a "blue
screen" background when any optical or SD Card media
is selected from the Multi-ZONE menu. In addition, only
the top left (Front Zone Source Menu) and right (Multi-
ZONE Source Menu) quadrants of the touch screen are
active during this mode of operation.
Table 7: ASP Config Menu Features
Setting Options Function
Bass Center
Freq
60Hz According to the audio source, select
the Bass Center Frequency to
achieve the best Bass effect.
80Hz
100Hz
130Hz
150Hz
200Hz
Treble Center
Freq
10KHz According to the audio source, select
the Treble Center Frequency to
achieve the best Treble effect.
12.5KHz
15KHz
17KHz
Sub.W Filter 80Hz Selecting a crossover frequency sets
a cut-off frequency of the subwoofer's
LPF (low-pass filter) and the
“SMALL” speakers' HPF (high-pass
filter). The Crossover frequency set-
ting has no effect if the subwoofer is
set to “OFF” and any other speaker is
set to “LARGE”.
120Hz
160Hz
Sub.W Phase 0D Subwoofer output IN phase
180D Subwoofer output OUT OF phase
NOTE: Depending on your installa-
tion, reversing the subwoofer phase
may increase Bass output.
Bass Q-Factor 1.0 When the Bass Center Frequency is
selected, adjusting the Bass Q-Fac-
tor alters the sharpness of the Bass
output.
1.25
1.5
2.0
BACK Return to previous menu.
