


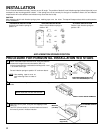
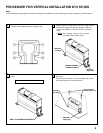
PROCEDURE FOR HORIZONTAL INSTALLATION W/O STUDS
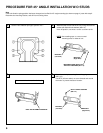
1
2
3
Attach a bracket to each side of the unit, using the machine
screws with integral flat and lock washers (M4 x 10).
In the horizontal position, use bracket mounting holes 1 and
1' as shown at the right.
Set anti-vibration springs to position "0" as shown above.
Determine unit mounting location, and drill four mounting
holes.
Secure the unit in place, using four self-tapping screws
(M5 x 12).
Use RTV (silicone sealer) on screw threads and around
the holes to prevent moisture intrusion.
4
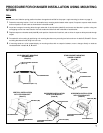
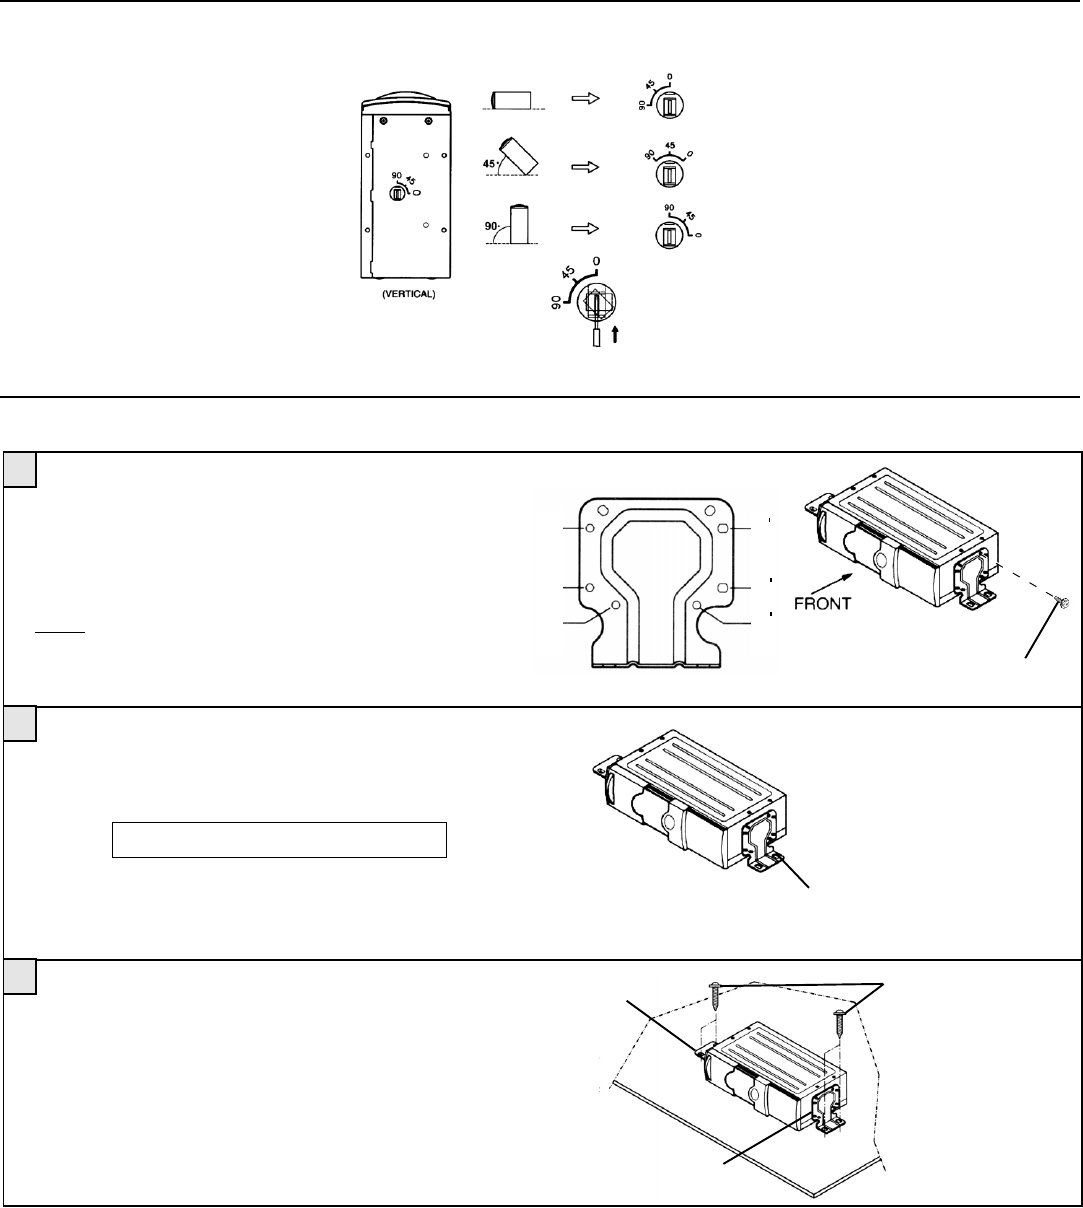
INSTALLATION
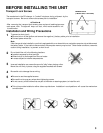
Never mount the unit near the fuel tank.
The unit can be installed horizontally, vertically or at a 45° angle. The position of the built-in anti-vibration springs (left and right side), must
correspond to the mounting position chosen. If the springs are not set correctly for the type of installation chosen, the anti-vibration
compensation will not be effective and vibration may cause the disc to skip.
CAUTION
After setting the built-in anti-vibration springs, place masking tape over the holes. The tape will keep out dust, which could cause the
unit to malfunction.
NOTE: Use masking tape to cover un-
used mounting holes on sides of
unit.
HORIZONTAL INSTALLATION
Set the 2 anti-vibration springs to
position "0".
VERTICAL INSTALLAITON
Set the 2 anti-vibration springs to
position "90".
45° ANGLE INSTALLATION
Set the 2 anti-vibration springs to
position "45°".
ANTI-VIBRATION SPRINGS POSITION
MACHINE SCREW WITH FLAT
AND LOCK WASHERS (M4 x 10)
DRILL HOLES 4MM IN DIAMETER
SELF-TAPPING SCREWS
(M5 x 12)
BRACKET
(Left Side)
BRACKET
(Right Side)
1
3
2
1
3
2