


66
66
6
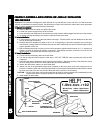
IMPORTANT
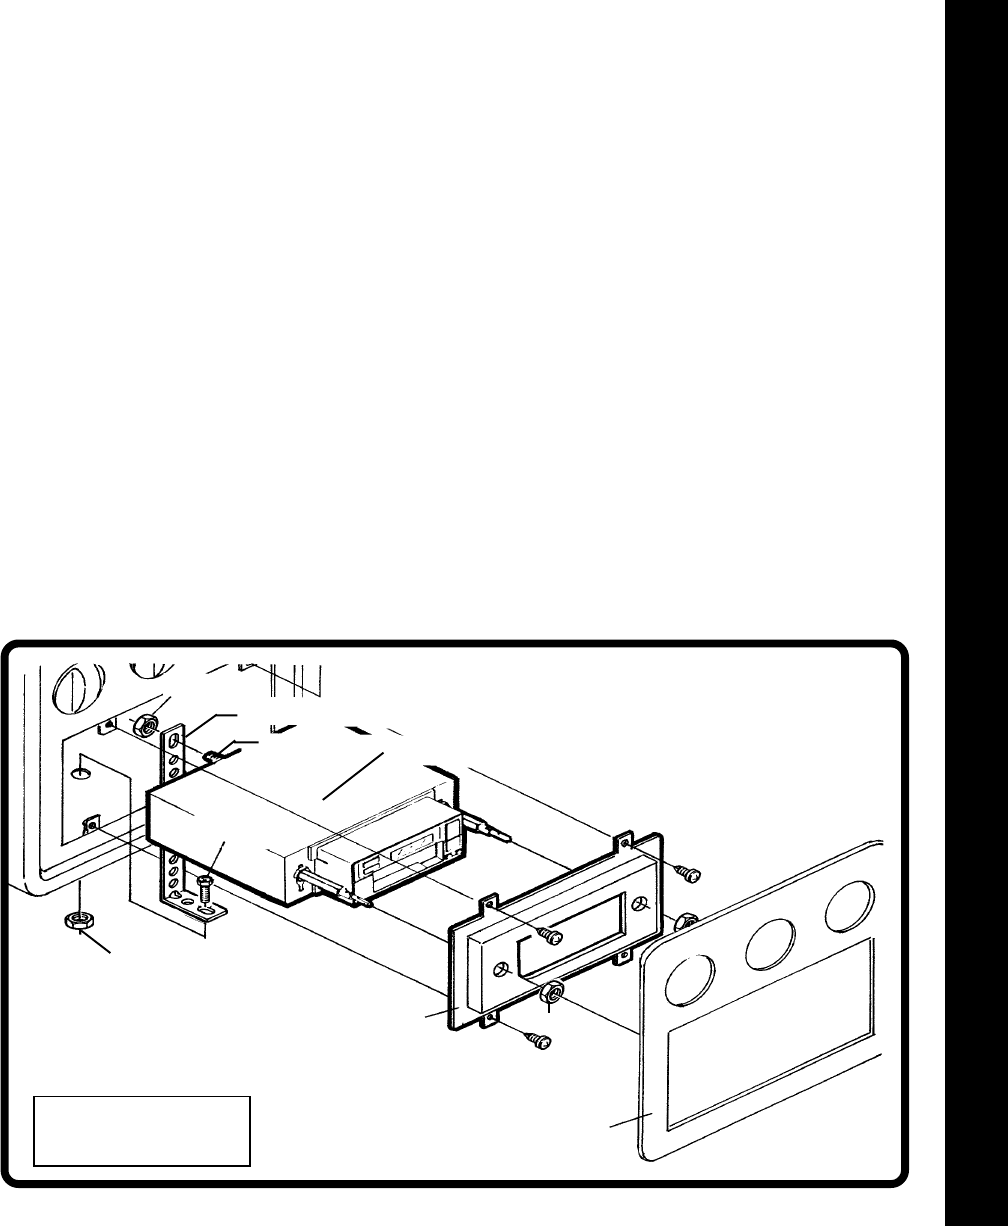
AMOUNTINGKITISREQUIRED
FORTHISINSTALLATION
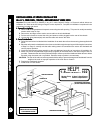
HEXNUT
PERFORATEDSTRAP
SCREWSTUD
SCREW
RADIO
MOUNTINGPLATEFROMKIT
(NOTINCLUDEDWITHRADIO)
EXISTINGDASHTRIMPANEL
HEXNUT
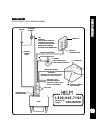
CHEVROLET-OLDSMOBILE-BUICK-PONTIAC-GMC-CADILLAC-SATURN INSTALLATIONCHEVROLET-OLDSMOBILE-BUICK-PONTIAC-GMC-CADILLAC-SATURN INSTALLATION
CHEVROLET-OLDSMOBILE-BUICK-PONTIAC-GMC-CADILLAC-SATURN INSTALLATIONCHEVROLET-OLDSMOBILE-BUICK-PONTIAC-GMC-CADILLAC-SATURN INSTALLATION
CHEVROLET-OLDSMOBILE-BUICK-PONTIAC-GMC-CADILLAC-SATURN INSTALLATION
1982 AND NEWER1982 AND NEWER
1982 AND NEWER1982 AND NEWER
1982 AND NEWER
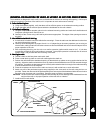
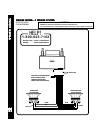
Important-This installation is designed for most 1982 and newer GM cars, trucks, and vans where an installation kit
is required. See Kit Listing on Page 2 of this manual or refer to the in-store application chart. If a kit is not required,
use the instructions on Page 5.
1. Remove ExistingRadio:1. Remove ExistingRadio:
1. Remove ExistingRadio:1. Remove ExistingRadio:
1. Remove ExistingRadio:
A. Remove the existing dashboard trimpanel surrounding the radio opening. This panel is usually secured by
screws and/or snap-in clips.
B. Remove the screws used to secure the radio to the sub-dashboard.
C. Pull the radio forward to access the wiring and antenna cables plugged into the rear of the chassis.
D. Un-plug the wiring harness(es) and antenna cable and remove the radio.
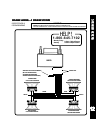
2. Installthe NewRadio:2. Installthe NewRadio:
2. Installthe NewRadio:2. Installthe NewRadio:
2. Installthe NewRadio:
A. Follow the instructions included with the installation kit to attach the radio to the mounting plate supplied with
the kit.
B. Place the radio near the dashboard so the wires can be led through the opening and following the instructions
of Step 2 on Page 5, carefully wirethe radio making certain all connections aresecure and insulated and confirm
proper operation.
C. Install the radio/mounting plate assembly to the sub-dashboard according to instructions of installation kit.
D. Attach one end of the perforated support strap (supplied) to the screw stud on the radio using the hex nut
provided. Fasten the other end of the perforated strap to a secure part of the dashboard either above or below
the radio using the screw and nut provided. Bend the strap to position it as necessary.
CAUTION: The rear of the radio must be supported with the strap to prevent damage to the dashboard from the
weight of the radio or improper operation of the radio due to vibration.
E. Replace the dashboard trimpanel.
F. Install knobs on radio shafts.
SHAFTNUT
CHEVROLET-OLDS-BUICK-PONTIAC-GMC-CADILLAC-SATURN INSTALLATIONCHEVROLET-OLDS-BUICK-PONTIAC-GMC-CADILLAC-SATURN INSTALLATION
CHEVROLET-OLDS-BUICK-PONTIAC-GMC-CADILLAC-SATURN INSTALLATIONCHEVROLET-OLDS-BUICK-PONTIAC-GMC-CADILLAC-SATURN INSTALLATION
CHEVROLET-OLDS-BUICK-PONTIAC-GMC-CADILLAC-SATURN INSTALLATION