128-5721128-5721
128-5721128-5721
128-5721
SHT. 7 OF 12SHT. 7 OF 12
SHT. 7 OF 12SHT. 7 OF 12
SHT. 7 OF 12
4. Speaker Connections4. Speaker Connections
4. Speaker Connections4. Speaker Connections
4. Speaker Connections
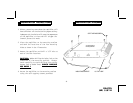
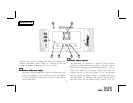
Depending on the type and number of speakers used with the amplifier, wire them to the speaker terminals as per the
appropriate wiring diagram. For most applications, #18 gauge wire should be used for the speaker leads but in no case
thinner than #20 gauge. For leads in excess of 10 feet, #16 gauge is recommended. When wiring the speakers, pay
careful attention to the polarity of the terminals on the speakers and make certain they correspond to the polarity of
the corresponding terminals on the amplifier.
DO NOTDO NOT
DO NOTDO NOT
D O N O T ground any speaker leads to the chassis of the vehicle.
5. Input Connections5. Input Connections
5. Input Connections5. Input Connections
5. Input Connections
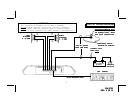
This amplifier features both high and low-level input capability. Use either the low-level or high-level inputs, not both.
If low-level outputs are provided from the car stereo, it is recommended that the low-level inputs be used for lowest
distortion and best performance. Use good quality shielded audio cables with RCA plugs at both ends to connect the
stereo to the amplifier and keep the cable lengths to a minimum to avoid noise.
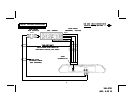
If the car stereo does not provide low-level outputs, the amplifier may be connected via the speaker (high-level) outputs
from the stereo. Wire the speaker leads from the car stereo to the 5-pin adaptor harness as shown in the diagram
(shielded cable is not required for this application) and plug the connector into the mating High-Level Input socket on
the amplifier. Carefully splice and insulate all wire connections.
CAUTIONCAUTION
CAUTIONCAUTION
CAUTION
::
::
: Use either the low-level or the high-level inputs on the amplifier.
DO NOTDO NOT
DO NOTDO NOT
D O N O T use both input levels at the same time.
WIRING INSTRUCTIONSWIRING INSTRUCTIONS
WIRING INSTRUCTIONSWIRING INSTRUCTIONS
WIRING INSTRUCTIONS
-5-


