• CUE POINT SETTING:
A. Playback starts from pause or skip to a new track during play or pause. The beginning play point will be
set to the cue point.
B. Or, Press the IN BUTTON (5a) button during playback to set the new cue point.
8. AUTO CUE
• When disk is loaded, the cue point is set to the first source of music. If track is changed before pressing play,
the CUE POINT is changed to the new starting point. If you pause during playback this also sets the new CUE
POINT.
9. FRAME SEARCH
• This is done by first pausing then using the jog wheel to set the starting point. (When you use the jog wheel the
monitor function allows you to hear what is playing. Once you have set starting point press PLAY then CUE to
again mute output.)
10. SCANNING (FAST FORWARD / FAST REVERSE)
• To do this rotate Shuttle wheel forward or reverse. You can scan or reverse in 6 different speeds depending on
how much you rotate the wheel.
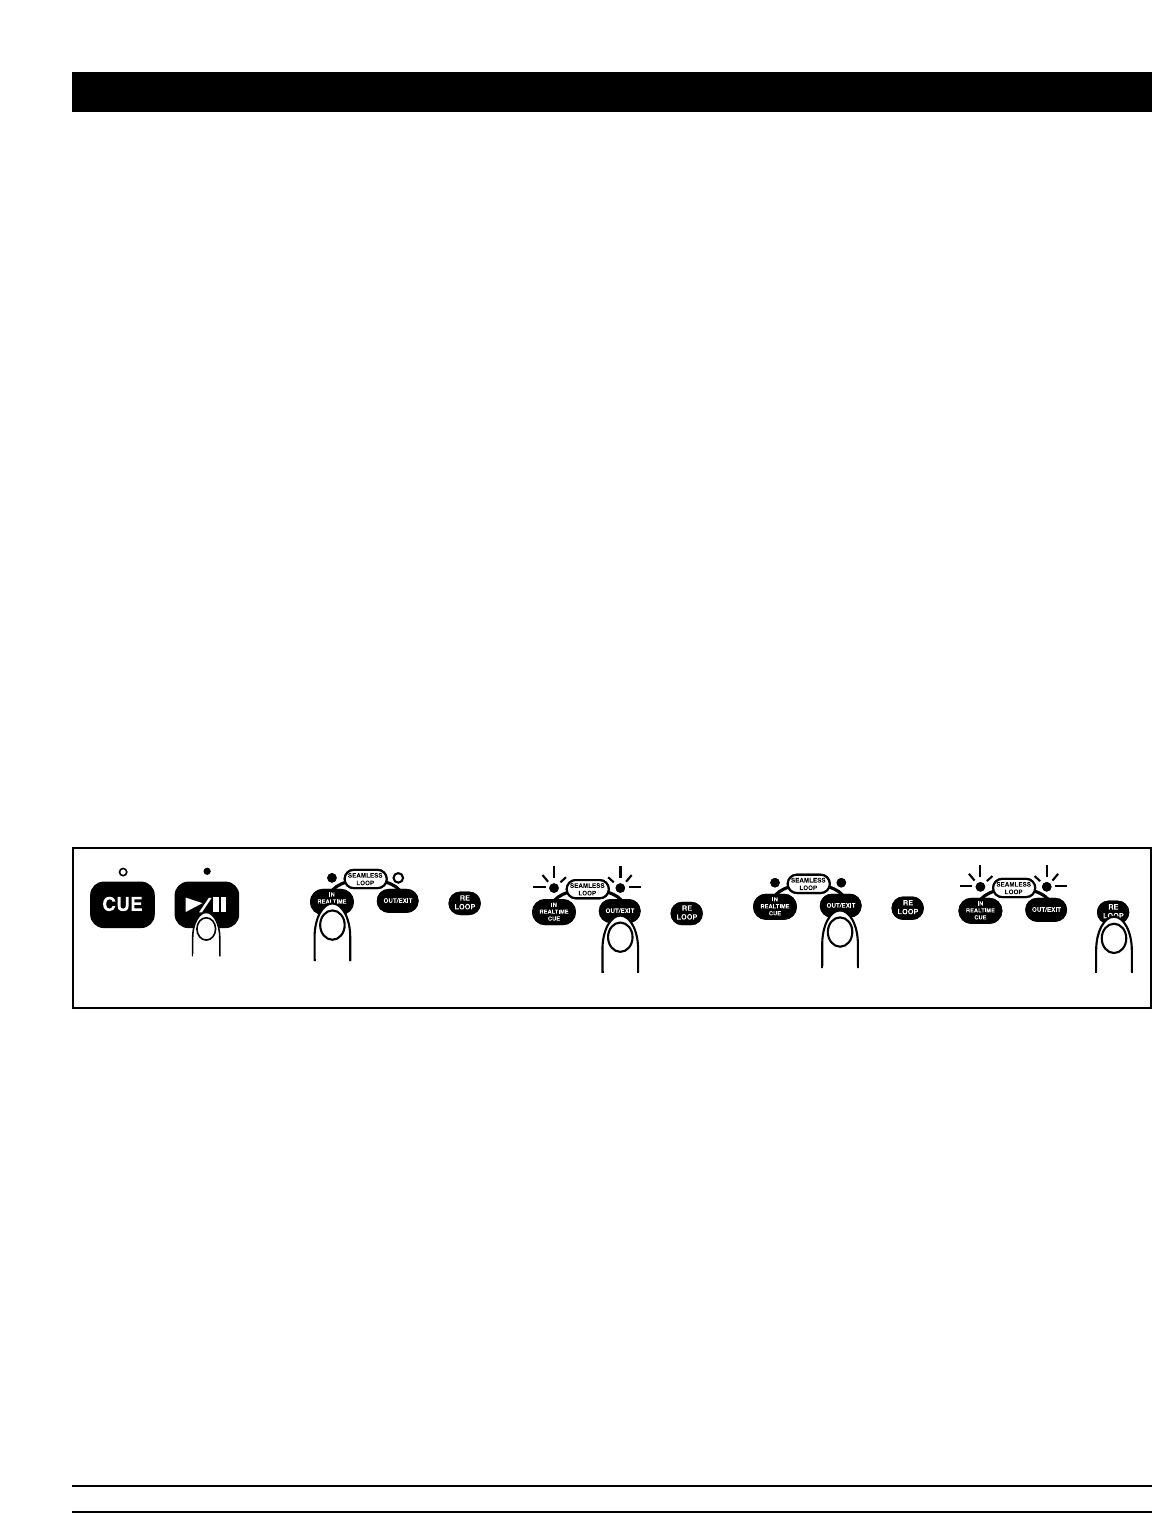
11. LOOP PLAY
• You can create a loop between two points.
(1) Press PLAY/PAUSE BUTTON (9) so a CD is playing. The PLAY/PAUSE BUTTON (9) LED lights
(figure 10).
(2) Press IN BUTTON (3). This sets the starting point of the LOOP. The IN BUTTON (3) LED will
light (figure 11).
(3) Press OUT BUTTON (2) to set desired ending point of the LOOP. You will know you are in
LOOP mode because IN BUTTON (3) and OUT BUTTON (2) LEDs will light and flash.
LOOP INDICATOR (29) in LCD DISPLAY (13) will also flash (see figure 14).
(4) To exit the LOOP, press the OUT BUTTON (2). LEDs will stay on but not flash. Music will
resume normal play (figure 13).
(5) To replay loop, press the RELOOP BUTTON (30).
NOTE: When play starts via pause or track skipping or scanning, the CUE POINT will change to the start point
automatically. LOOP INDICATOR (29) in LCD DISPLAY (13) will all begin flashing again (figure 14).
12. EDITING A LOOP: NOTE: YOU CAN ONLY EDIT THE ENDING PART OF THE LOOP.
(1) You must be in LOOP mode. If a LOOP has not been created, follow instructions in step 11 for creating a
LOOP. If a LOOP has already been created and you wish to edit it, press RELOOP BUTTON (12)
to reenter the LOOP mode (figure 14).
(2) Next, press OUT BUTTON (2) to return to normal play (figure 13). This disengages the LOOP mode.
(3) Press OUT BUTTON (2) again for new desired ending point of the loop (figure 13).
- FOR SHORTER LOOP: press OUT BUTTON (2) quickly.
- FOR LONGER LOOP: Wait until the song plays several frames, them press OUT BUTTON (2).
13. TIME DISPLAY
• During normal play, each time you press the TIME BUTTON (16), the display changes to give you the following
information (see figure 1, LCD screen).
(1) ELAPSED playing time
(2) REMAINING time of a track. If the current track number is over 34, “...................” is displayed.
(3) TOTAL remaining time of the disc.
American DJ® AUDIO • PRO-DJ1 INSTRUCTIONS MANUAL • PAGE 8
BASIC OPERATIONS CONT.
fig. 11 fig. 12 fig. 13 fig. 14fig. 10