©American Audio® - www.americanaudio.us - DCD-PRO310 MKII™ Instruction Manual Page 15
8. CHANGING THE TIME DISPLAY (36, 37, & 38)/TIME BAR (39):
The time may be displayed in three different modes; Elapsed, Remain, and Total Remain. During normal play-
back, pressing the TIME BUTTON (9), will change the time display information (36, 37, & 38) in the LCD (2). The
following is a break down of the time settings and their definitions:
1) TOTAL REMAIN (34) - This details the time in the LCD (30, 29, & 28) as the current cds’ total remaining
time.
2) REMAIN (39) - This details the time in the LCD (36, 37, & 38) as the current tracks’ remaining running time.
3) ELAPSED - This details the time in the LCD (36, 37, & 38) as the current tracks’ elapsed running time.
Note: The LCD will not display "ELAPSED", and neither the REMAIN or TOTAL REMAIN indicators will
be displayed in the LCD.
TIME BAR INDICATOR - The time bar in the LCD (2) visually details the time defined in the TIME METER (36,
37, & 38). This bar is also dependent on the selected time function REMAIN (35) or TOTAL REMAIN (34). This
bar will begin to flash when 15 seconds of a track remain and will begin to rapidly flash when three
seconds of a track remain. The flashing bar is a great visual reminder a track is about to end. The
flashing bar will function regardless of which time mode the unit is in.
BASIC OPERATIONS (CONT)
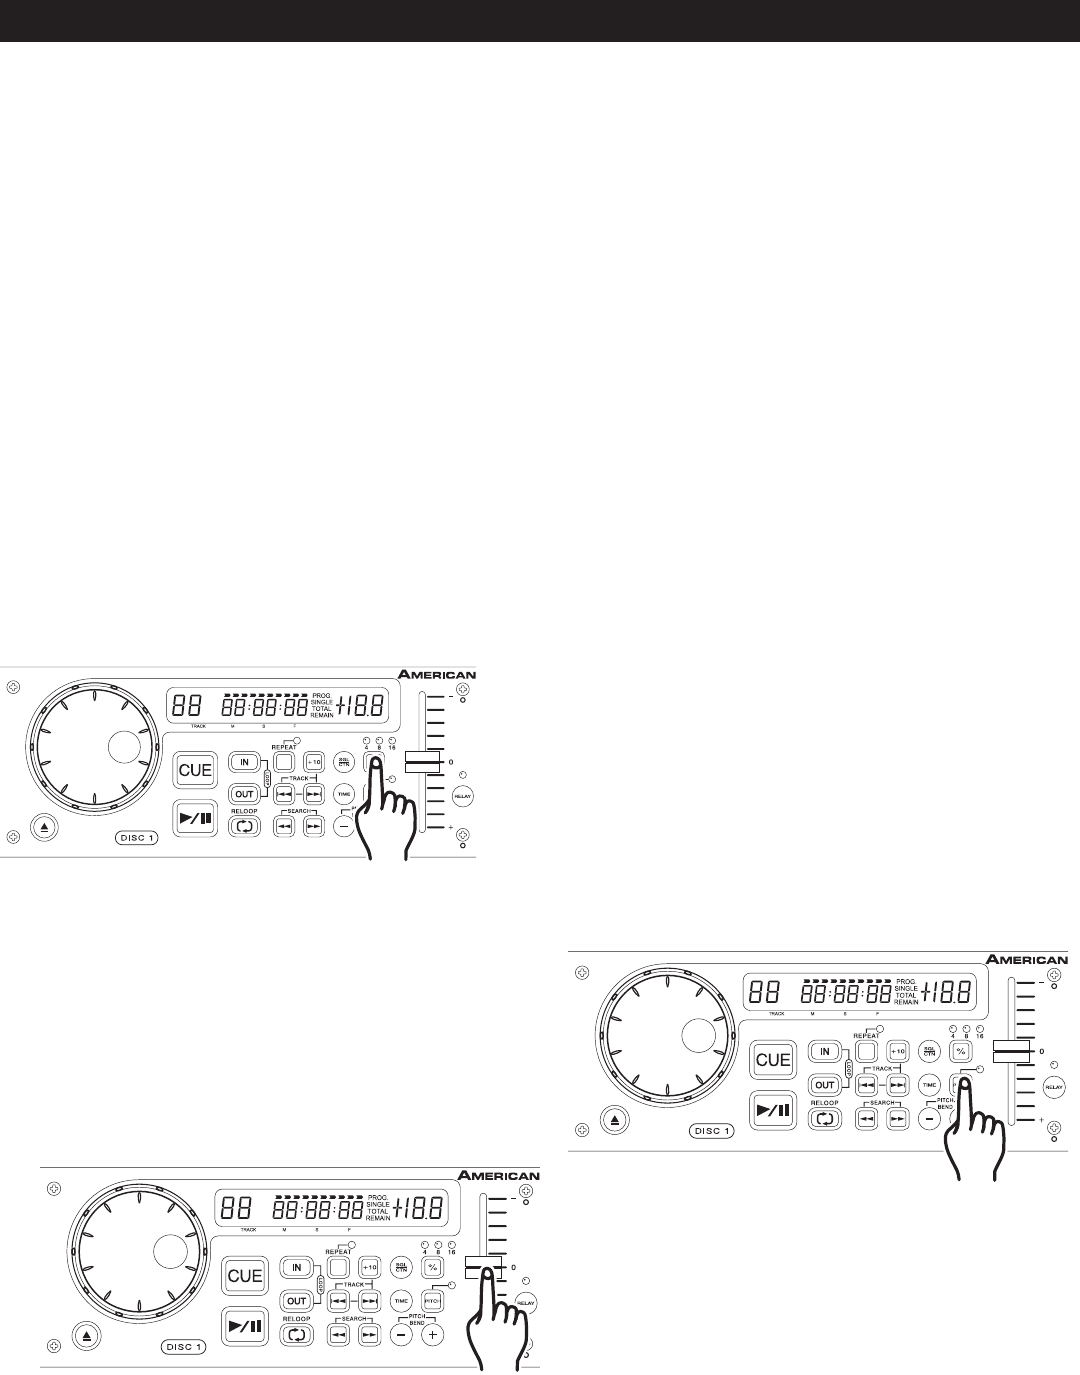
Activating the Pitch Slider (3): To activate the
PITCH SLIDER (3), turn the pitch function on. Press
the PITCH BUTTON (13) to turn on the pitch func-
tion, when the pitch function is activated a LED will
begin to glow. If the pitch function is not activated
neither the PITCH SLIDER (3) nor the PITCH BEND
BUTTONS (14) will function.
9. PITCH ADJUSTMENTS:
This function will increase or decrease a tracks playback speed or "PITCH," this is not a momentary change
as in "PITCH BENDING" (see page 16). The maximum pitch bend percentage of the PITCH SLIDER is +/-16%.
The PITCH SLIDER (3) is used to decrease or increase the playback pitch. If the slider is move up (towards the
top of the unit) the pitch will decrease, if the slider is moved down (towards the bottom of the unit) the pitch
will increase.
Using the Pitch Slider (3): To use the PITCH
SLIDER (3) slide the slider up and down. Down will
increase the pitch and up will decrease the pitch.
Figure 11
Figure 10
Using the Pitch Slider Percentage Selector (8): You
may choose a pitch operating range at any time. To change
the operating range be sure the pitch function is turned
on, see figure 10. The pitch percentage can be changed
between +/-4%, +/-8%, and +/-16%. 4% will allow the least
amount of pitch manipulation and 16% will allow the most
amount of pitch manipulation. To adjust the different values,
press the PITCh ON/Off BUTTON (13) and Tap on the %
BUTTON (8) until your desired value is reached. The L.E.D.
of the % BUTTON (8); glowing yellow for 4%, glowing green
for 8%, or glowing red for 16%.
Figure 12
