


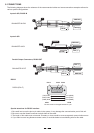


channel 1 or 2 will be output from both channel 1 and 2 simultaneously. Details refer to the chapter 9.
- Bridge Mode
In this mode, the signal input into channel 1 will be output from the bridged end, on the other hand, the
output level control of channel 2 should be turned down to smallest.Details refer to the chapter 9.
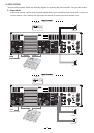
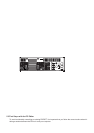
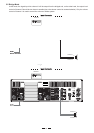
18. RS485 IN
The function of the RS485 IN is opposite to RS85 OUT. It allows incoming communication between a DPA2500
/4000 stereo amplifier and PC or another DPA6000 stereo amplifier. The RS485 port is very suitable for
remote control over long distances (Difficult with RS232 standard ports) and daisy-chaining several DPA2500
/4000 stereo amplifiers.
19. RS485 OUT
This is the standard serial communication interface. It allows outgoing communication between a DPA2500
/4000 stereo amplifier and PC or another DPA6000 stereo amplifier. The RS485 port is very suitable for
remote control over long distances (difficult with RS232 standard ports) and for daisy-chaining several DPA
2500/4000 stereo amplifiers.
20. RS232 Serial Communication Port
The RS232 port allows incoming and outgoing communication between the DPA6000 stereo amplifier and PC
via connecting the DPA6000 stereo amplifier to a PC, all the processor functions are possible to be controlled
remotely by ALTO editing software.
4. GETTING STARTED
Switching on the DPA6000, after an initialization procedure, the last selected preset and settings will be loaded, the
number of last preset will appear on the display:
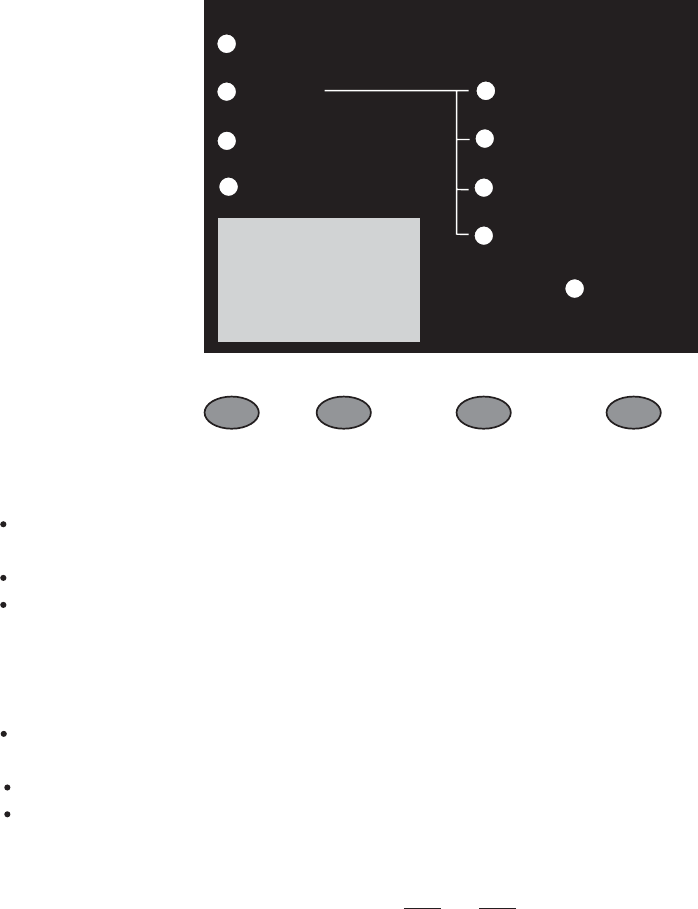
4.1 Preset Selection
There are total 33 presets available: (factory preset: 01, user preset 01.~32.)
Select "PRESET" using SELECT key, the "PRESET" indicator lights up and the last selected preset will
Use UP/DOWN keys to select a desired preset.
Press ENTER key to load the preset.
appear on the display.
4.2 EDIT Menu
This menu includes 4 items: VOLUME, HUM CANCEL, NOISE GATE, MULTICOMP.
- Volume Adjustment (-99~0dB)
Select "EDIT" menu using SELECT key, both the "EDIT" and "VOLUME" indicators will light up, and the last
selected volume level will be displayed.
""Press ENTER key till an additional appeared after the present volume value..
Use UP/DOWN keys to adjust the level of output signal.
Note: this adjustment of volume level effects only on the selected channels.
6
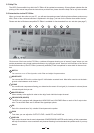
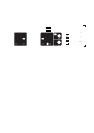
PRESET
EDIT
VOLUME
CHSEL
HUM CANCEL
COMM
NOISE GATE
MULTICOMP
SIG/LIMITER
UP DOWN SELECT ENTER
88