


32-EN
6
Repeat steps 3 to 5, and adjust each band level.
Frequency Adjustment (F0)
Band1 (63 Hz) / Band2 (150 Hz) / Band3 (400 Hz) /
Band4 (1 kHz) / Band5 (2.5 kHz) / Band6 (6.3 kHz) /
Band7 (17.5 kHz)
Level Adjustment (Gain)
Adjustable output level: -6 to +6 dB
• During adjustment, if you press in the outer ring and rotate the
Double Action encoder to the left or right, the band changes, and
you can adjust the adjacent band. If you press then rotate and hold
the Double Action encoder to the left or right, the band continuously
changes.
• The function is inoperable when Defeat is set to ON.
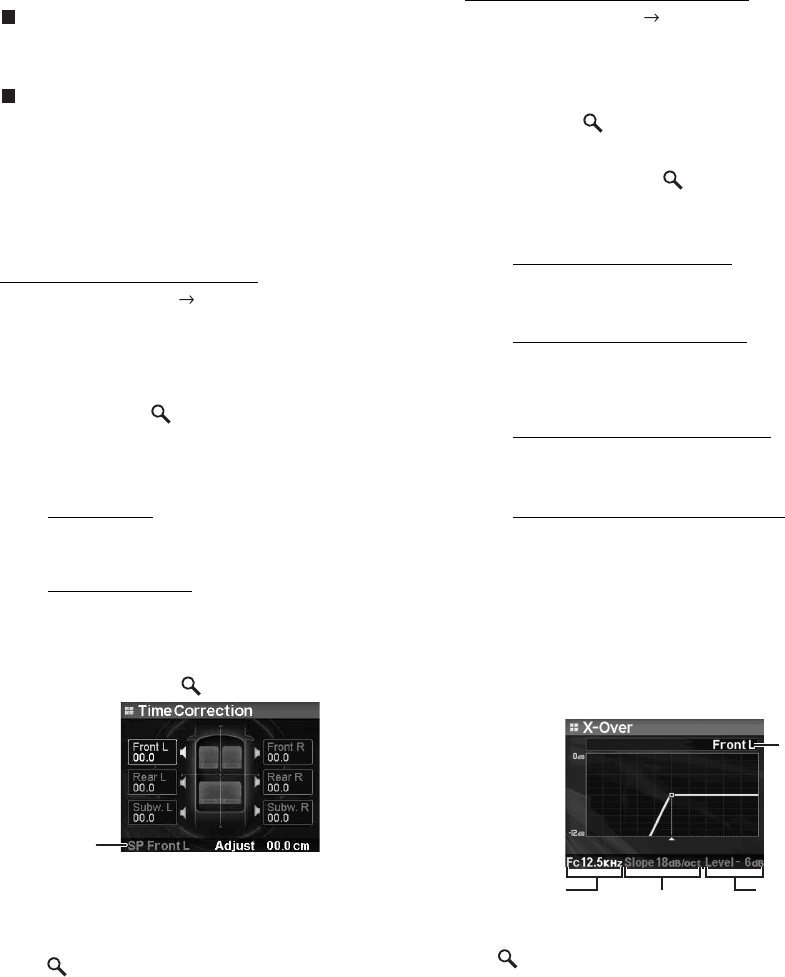
Adjusting the Time Correction
Sound Field Adjustment Time Correction
Before performing the following procedures, refer to “About Time
Correction” (page 34).
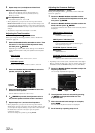
1
Rotate the Double Action encoder to select “Time
Correction” in the Sound Field adjustment mode,
and then press
/ENTER.
Depending on the X-OVER switch setting on the IMPRINT
audio processor (PXA-H100), the speaker to be adjusted
differs.
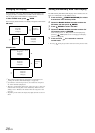
3WAY System
F/R/SUBW. System
2
Rotate the Double Action encoder to select the
speaker, and press
/ENTER.
3
Rotate the Double Action encoder to set to the
distance of each speaker.
0.0 cm~336.6 cm (0.0 inch~132.7 inch)
4
If /ENTER is pressed, the adjustment value is
set, and the speaker selection mode is activated.
5
Repeat steps 2 to 4, and set the all speakers.
• During adjustment, if you press in the outer ring and rotate the
Double Action encoder to the left or right, the speaker changes, and
you can adjust the adjacent band. If you press then rotate and hold
the Double Action encoder to the left or right, the speaker
continuously changes.
You can also change the speaker by pressing BAND.
Adjusting the Crossover Settings
Sound Field Adjustment X-Over
Before performing the following procedures, refer to “About the
Crossover” (page 35).
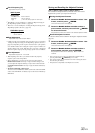
1
Rotate the Double Action encoder to select
“X-Over” in the Sound Field adjustment mode, and
then press
/ENTER.
2
Rotate the Double Action encoder to select the
band, and then press
/ENTER.
If a band is selected, each band screen to be adjusted is
displayed.
3WAY System / Normal (L=R)
Setting items:
Low/Mid-Low/Mid-High/High
3WAY System / Individual (L/R)
Setting items:
Low L/Low R/Mid-Low L/Mid-Low R/Mid-High L/
Mid-High R/High L/High R
F/R/SUBW. System / Normal (L=R)
Setting items:
Subw./Rear/Front
F/R/SUBW. System / Individual (L/R)
Setting items:
Subw. L/Subw. R/Rear L/Rear R/Front L/Front R
• Depending on the current system, selectable band content differs.
Refer to
“Setting the Filter type” (page 31) and the setting of the
X-OVER switch on the IMPRINT audio processor (PXA-H100).
3
Rotate the Double Action encoder to adjust the
frequency/slope/level.
The currently adjusted item lights up.
4
The adjustment content is selected by pressing
/ENTER, and operation shifts to a next
adjustment item.
5
When the selected band settings are complete,
press BAND.
The next band adjustment screen is displayed.
6
Set all bands by repeating steps 3 to 5.
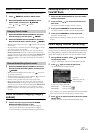
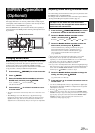
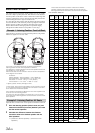
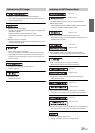
High L
/
High R
/
Mid L
/
Mid R
/
Low L
/
Low R
Front L / Front R / Rear L / Rear R / Subw. L / Subw. R
Selected
speakers
Level
Cut-off
frequency
Slope
Band