


English
English
Important: Only use the ProActive 5.1 satellites with the ProActive 5.1subwoofer. The system
is not designed to be used with any other speakers.
Connecting the Digital SoundTouch
™
Control Center:
Attach the D-sub cable from the Digital SoundTouch
™
Control Center to the subwoofer and tighten the
thumbscrews on each side of the connector. To extend the cable to the control center, use only
a Alesis approved extension cable. Contact Alesis for more information and availability.
Important: Do not use an extension cable designed for computer monitors. Computer monitor
cables may damage your ProActive 5.1 system.
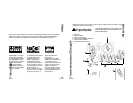
Connecting your Audio Sources:
The ProActive 5.1 speaker system can connect to as many as 4 different audio sources
simultaneously. These sources can be connected in a variety of different configurations, depending
on the type of equipment you have.
Instructions are provided below for each type of equipment.
A common configuration might be:
• PC Audio Sound card to 6-channel direct using multiple RCA phono connectors
• Mixer console using 1/4” TR jack outouts
• Multi-channel Recorder with AES/EBU output (optical or coax)
• Analog audio into standard mini-jack
NOTE: These represent only some of the possible configurations
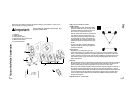
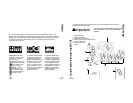
PCs
Digital Connection
If your sound card has a digital output jack, you can use it to connect to the Digital SoundTouch
™
Control Center. The control center supports either an optical or a coaxial connection. Check your
source device documentation for instructions on how to enable it’s digital output.
Analog Connection
Use the 6-channel direct input cables to connect the Digital SoundTouch
™
Control Center to the
analog jacks on your sound card, mixer, recorder, etc. There are 3 types of analog inputs to the
system: mono 1/4” TR jack, mono RCA phono and 3.5mm 2-channel mini-jack. For optimal
sound, connect only those cables necessary for your sound card and leave the other cables
unattached at both ends:
Position the Digital SoundTouch
™
Control Center where it is easy to reach.
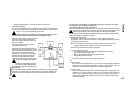
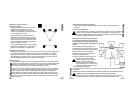
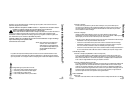
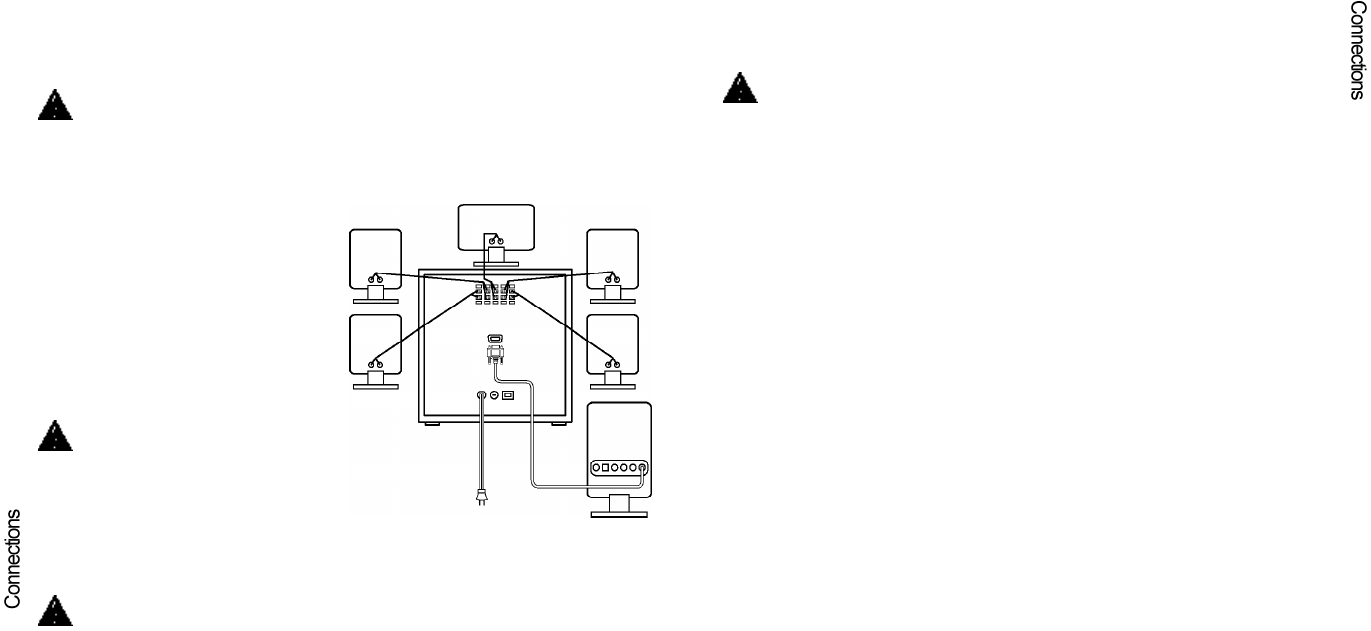
Connecting the speakers:
Once you have positioned the speakers, connect them to the subwoofer. Two 6’ lengths and
three 15’ lengths of speaker cable are included. If you want to position your speakers further
away, you can use commercially available speaker cable.
Important: Do not plug the subwoofer into AC power until all connections have been
made. Improperly connected or shorted speaker wires will damage the system.
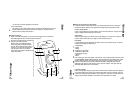
On the back of each speaker, unscrew the terminal
connectors until you see the holes through the
center posts. Insert the cable into the holes, and
tighten the connectors.
Connect the speaker end of each wire before
connecting the subwoofer end.
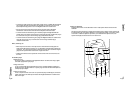
On the back of the subwoofer, press the lever on
the terminal and insert the cable. Release the lever
and the cable will be locked into position. To avoid
wiring confusion, connect the speakers to the
subwoofer one at a time. Be sure to connect the
cables from the red and black terminals on the
speakers to the corresponding red and black
terminals on the subwoofer. The cable has a white
stripe to aid in maintaining proper polarity.
Important: To avoid shorting out the sys-
tem, make sure that no exposed wires
touch each other and that no stray wires touch
other terminals.
When properly connected, the speakers will operate “in phase” and your sound quality will be
optimized. If not connected properly, the system will operate “out of phase.” While this won’t
damage the system, the sound will be less clear and the bass sounds will be diminished.
65
NOTE: To use the optical or coax jacks, you will need to purchase an optical or coax cable
separately. These are readily available at most consumer electronics retailers.