


7
ENGLISH
4 Unpacking
Your headphones system package contains the following
components:
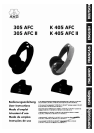
K 305 AFC or K 405 AFC headphones
T 305 AFC or T 405 AFC transmitter
Connecting cable with stereo mini
jack plug and L/R RCA plugs for con-
necting the transmitter to your audio source
Stereo mini jack to 1/4” adapter jack
AC adapter for powering the transmitter
Two 1.2 V AAA size NiCd recharge-
able batteries for powering the headphones
(inside the headphones)
If anything is missing, contact your AKG dealer immediately.
5 Controls
5.1 Headphones (Fig. 1)
1. POWER switch
2. Green POWER indicator LED
3. Charging contacts
4. Battery compartment (beneath the ear pad)
5. AUTOTUNING switch: activates the automatic tuning
function
6. VOLUME control
5.2 Transmitter (Fig. 2)
7. AUDIO IN L/R, : audio input sockets
8. DC 12 V: DC input jack for AC adapter
9. FREQ ADJUST: frequency tuning control
10. Charging pins
11. POWER ON/CHARGE: tri-color LED indicating charging
and operating modes
6 Operating Notes
6.1 Connecting the Transmitter to AC Power
1. Connect the cable on the supplied AC adapter to the DC 12 V
jack (8) on the transmitter rear panel as shown in fig. 3.
2. Check that the AC voltage stated on the AC
adapter is the same as that available in your
country. If it is, connect the AC adapter to a convenient
AC outlet (see fig. 4). The transmitter will automatically be
ready to operate.
Note that the transmitter will switch on as soon as it de-
tects an audio signal at the AUDIO IN jacks or the
jack.
6.2 Connecting the Transmitter to Your Audio
Source
You may connect the transmitter to a headphones output (mini
jack or 1/4” jack), LINE, or REC outputs.
6.2.1 Connecting to a Headphones Output
1. Before connecting the transmitter to your audio source,
switch the audio source OFF.
2. Referring to fig. 5, plug the red RCA connector (right
channel) on the supplied connecting cable into the red
AUDIO IN R socket (7) and the white RCA connector (left
channel) into the white AUDIO IN L socket (7) on the trans-
mitter rear panel.
3. Connect the stereo mini jack plug on the connecting cable to
the headphones output of your audio source (refer to fig. 6).
4. If the headphones output on your equipment is a 1/4”
jack, plug the supplied mini jack to 1/4” adapter jack onto
the connecting cable. Connect the adapter jack to the
headphones output.
6.2.2 Connecting to a LINE or REC Output
1. Before connecting the transmitter to your audio source,
switch the audio source OFF.
2. Referring to fig. 7, plug the red RCA connector (right
channel) on the supplied connecting cable into the red
LINE OUT R or REC OUT R socket and the white RCA
connector (left channel) into the white LINE OUT L or
REC OUT L socket on your audio source.
3. Connect the stereo mini jack plug on the connecting
cable to the jack (7) on the transmitter rear panel
(see fig. 8).
6.3 Charging the Batteries in the Headphones
In order to ensure the longest possible service life for the re-
chargeable batteries, we deliver them uncharged. Therefore,
charge the supplied batteries before first operat-
ing your headphones system.
The supplied batteries have been inserted into the headphones
for your convenience.
WARNING: If you operate the headphones on dry
batteries (see section 6.4), never try to charge
the batteries using the transmitter’s charging
feature. This would cause serious damage to
your headphone system. Dispose of spent
batteries conforming to local waste disposal
rules.
1. Use the POWER switch (1) to switch the headphones off.
When the power is off, the POWER LED (2) will be dark.
2. Referring to fig. 11, place the headphones on the trans-
mitter such that the charging pins (10) on the transmitter will
engage the charging contacts (3) on the bottom of the left-
hand earphone.
The POWER ON/CHARGE LED (11) on the transmitter will