


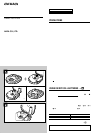


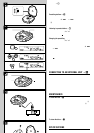
AM steps → O
Radio broadcasts have different frequency ranges and changes in different
steps in different countries.
This unit is factory-set to 10 kHz steps on AM. When using the unit where
the AM step changes to 9 kHz, set the AM STEP switch on the inner side of
the disc compartment to 9 kHz.
• When the AM step is changed, stations that you preset are erased.
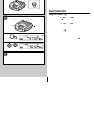
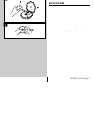
Presetting stations → P
You can preset up to total of 30 stations on AM and FM.
1Press TUNER ON/BAND repeatedly to select AM or FM.
2Press TUNING + (t) or - (r) to tune in to a station.
3Press ENTER to preset the station.
aPreset number
To preset more stations, repeat steps 2 and 3.
Listening to preset stations → Q
1Press TUNER ON/BAND repeatedly to select AM or FM.
2Press PRESET CALL N/M repeatedly to select the preset
number.
After listening, press sSTOP/OFF/CHARGE to turn off the radio.
Changing the presetting
1Press PRESET CALL N/M repeatedly to select the preset
number you wish to change.
2Keep ENTER pressed for 1 or more seconds until the preset
number and the frequency flash.
3While the preset number is flashing, press TUNING + (t)
or - (r) to tune in to a station.
4 Press ENTER to preset the station on the selected preset
number.
If the flashing stops, repeat the procedure from step 2.
Erasing the presettings one by one
Press sSTOP/OFF/CHARGE after step 2 in “Changing the presetting”
above. Each preset station is erased. All the settings move up by one and
the preset numbers are refreshed.
Erasing all of the presetting
Keep ENTER pressed, then press TUNER ON/BAND when the frequency
and preset number starts flashing.
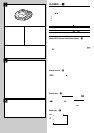
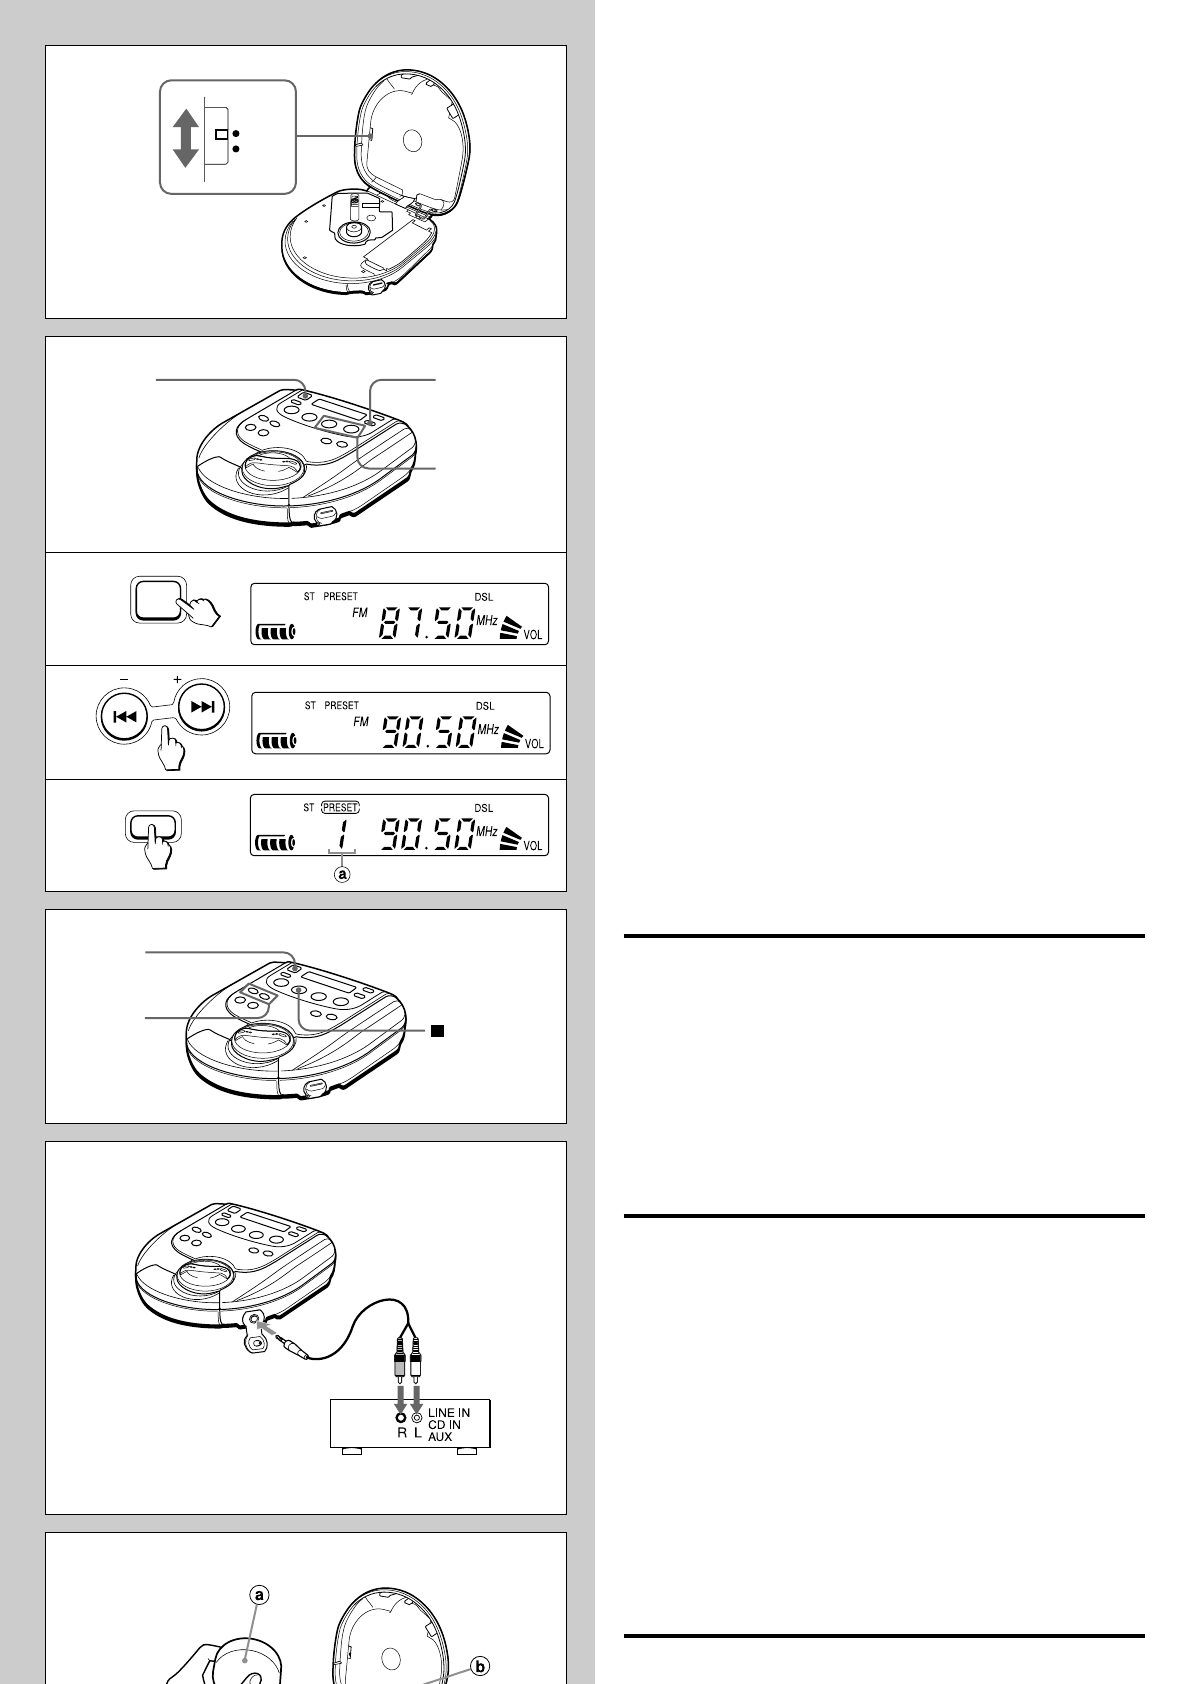
CONNECTING TO AN EXTERNAL UNIT → R
Use a commercially available connection cord which has a 3.5ø stereo mini-
plug at one end and two phono plugs at the other end.
Connect the stereo mini-plug to the PHONES/LINE OUT jack of the unit
and connect the phono plugs to the analog input terminals of the external
unit.
Note
• Turn off the power of both units before connection.
• DO NOT connect to the PHONO inputs of an amplifier (with a built-in
phonoequalizer-amplifier).
• Adjust the volume and DSL on this unit.
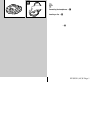
MAINTENANCE
To clean the lens → S
If the lens becomes dirty, the player will skip or not play. If this occurs, clean
the lens in the following manner.
To remove dust or dry particles, first use a camera lens blower/brush a to
blow a few times to loosen particles, then gently brush the lens b clean.
Finish by blowing the lens again.
To remove fingerprints, use a cotton swab dipped in lens cleaning solution.
Wipe gently from the center to the edge. Lens cleaning solution is
commercially available.
Note
Take care not to get too much solution on the swab, which could flow into
the unit and cause damage.
Pressing too strongly with the swab could scratch or break the lens.
To clean the discs → T
Before playing, wipe the disc from the center outward with a cleaning cloth.
After playing, store the disc in its case.
SPECIFICATIONS
Tracking system 3-beam laser
Laser pickup Semiconductor laser
R
S
PHONES/
LINE OUT
O
P
1
2
3
Q
3
2
1
ENTER
1
2
STOP/OFF/
CHARGE
AM STEP
9kHz
10kHz
TUNER ON
BAND
TUNING