


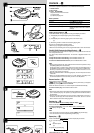
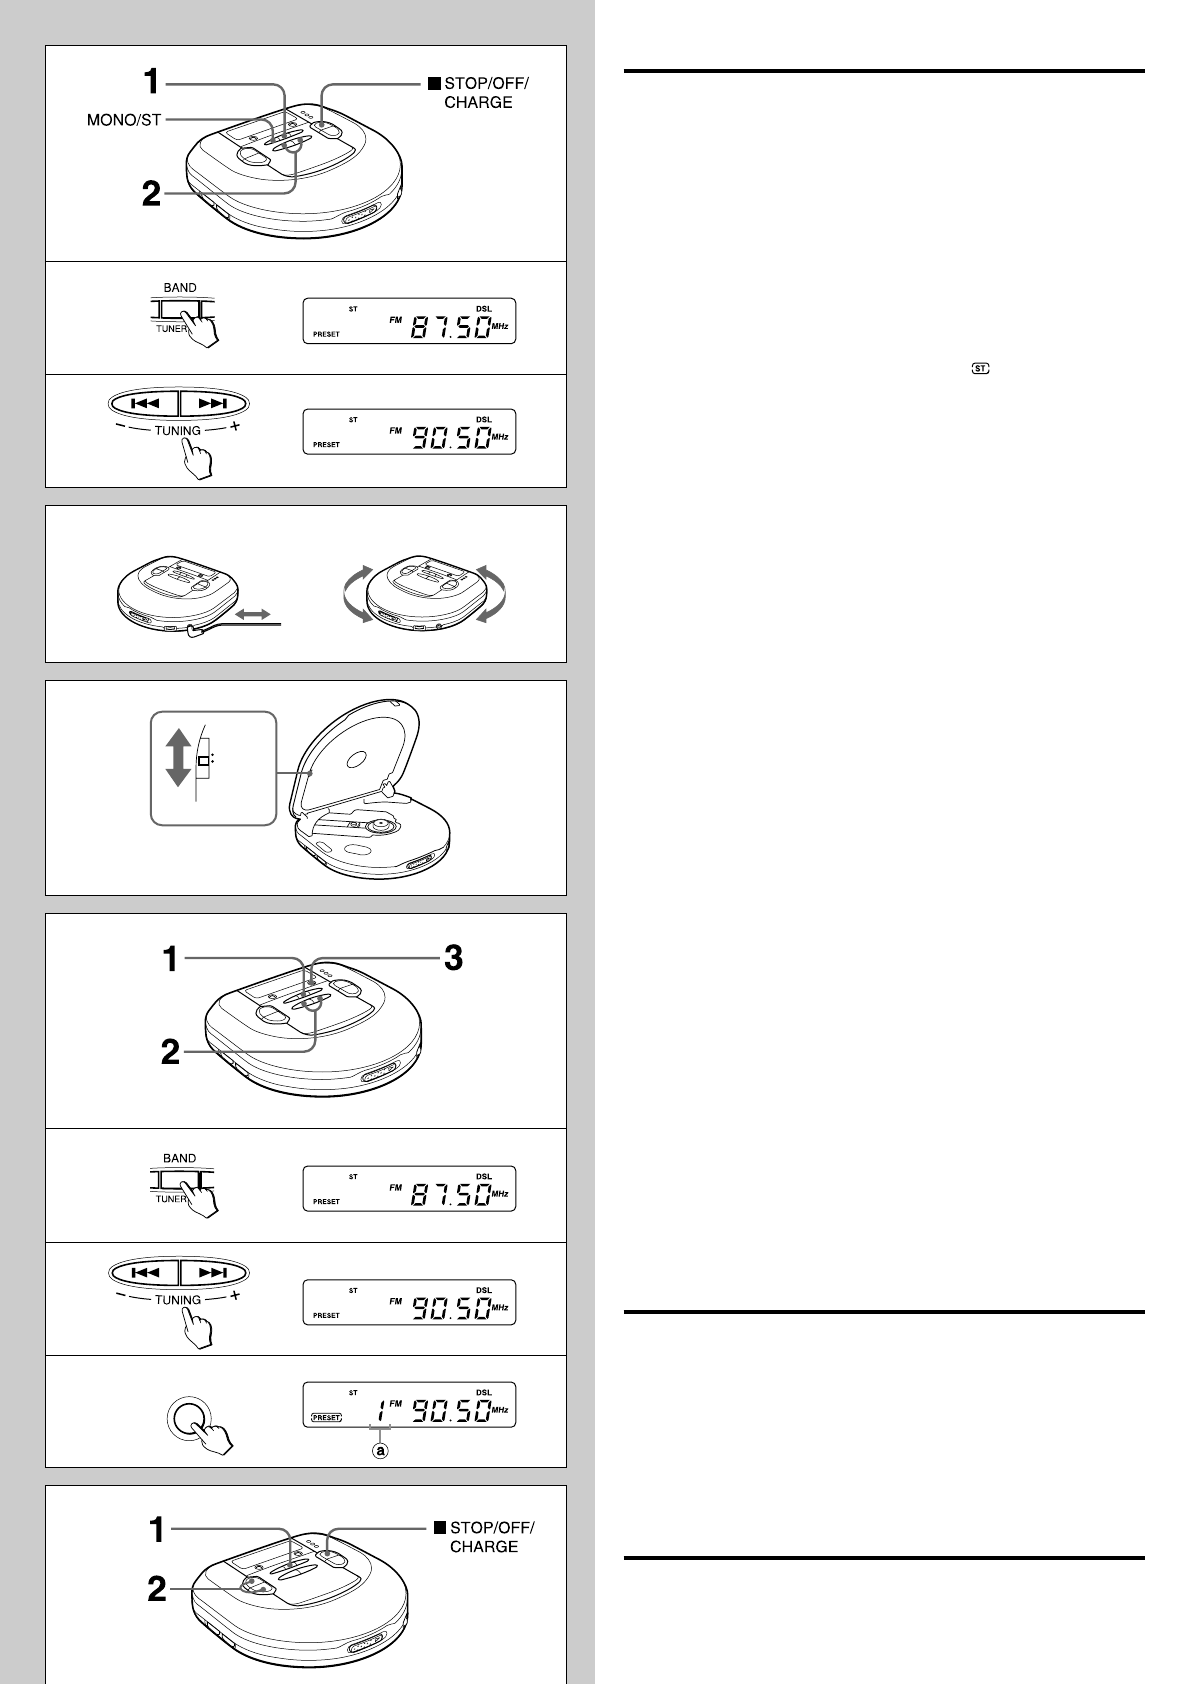
RADIO RECEPTION
Tuning in to a station → M
1 Press TUNER ON/BAND repeatedly to select AM or FM.
2 Press TUNING + (t) or - (r) to tune in to a station.
After listening, press sSTOP/OFF/CHARGE to turn off the radio.
For quick tuning
Keep either TUNING + (t) or - (r) pressed for about 1 second. When a
station is tuned in to, the frequency stops automatically. However, it does not
stop if the broadcast signal is weak.
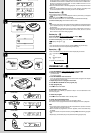
For better reception → N
FM: The headphone cord functions as the FM antenna. Keep it extended.
AM: Turn the unit to find the position which gives the best reception.
To listen to an FM stereo broadcasting
When a tuned in station is in stereo, ST changes to .
When the FM stereo signal is weak and distorted, press MONO/ST. ST goes out
and the sound will be heard in monaural but distortion will be reduced.
Note
• Do not open the disc compartment during radio reception. The buttons will be
deactivated.
• The power is turned off automatically if no operation is made after 180 minutes
from the last operation during radio reception.
AM steps → O
Radio broadcasts have different frequency ranges and changes in different steps
in different countries.
This unit is factory-set to 10 kHz steps on AM. When using the unit where the AM
step changes to 9 kHz, set the AM STEP switch on the inner side of the disc
compartment to 9 kHz.
• When the AM step is changed, stations that you preset are erased.
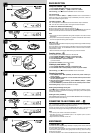
Presetting stations → P
You can preset up to total of 30 stations on AM and FM.
1 Press TUNER ON/BAND repeatedly to select AM or FM.
2 Press TUNING + (t) or - (r) to tune in to a station.
3 Press ENTER/DISP to preset the station.
a Preset number
To preset more stations, repeat steps 2 and 3.
Listening to preset stations → Q
1 Press TUNER ON/BAND repeatedly to select AM or FM.
2 Press PRESET CALL
i
/
k
repeatedly to select the preset number.
After listening, press sSTOP/OFF/CHARGE to turn off the radio.
Changing the presetting
1 Press PRESET CALL
i
/
k
repeatedly to select the preset number you
wish to change.
2 Keep ENTER/DISP pressed for 1 or more seconds until the preset number
and the frequency flash.
3 While the preset number is flashing, press TUNING + (t) or - (r)
to tune in to a station.
4 Press ENTER/DISP to preset the station on the selected preset number.
If the flashing stops, repeat the procedure from step 2.
Erasing the presettings one by one
Press sSTOP/OFF/CHARGE after step 2 in “Changing the presetting” above.
Each preset station is erased. All the settings move up by one and the preset
numbers are refreshed.
Erasing all of the presetting
Keep ENTER/DISP pressed, then press TUNER ON/BAND when the frequency
and preset number starts flashing.
CONNECTING TO AN EXTERNAL UNIT → R
Use a commercially available connection cord which has a 3.5 ø stereo mini-
plug at one end and two phono plugs at the other end.
Connect the stereo mini-plug to the PHONES/LINE OUT jack of the unit and
connect the phono plugs to the analog input terminals of the external unit.
Note
• Turn off the power of both units before connection.
• DO NOT connect to the PHONO inputs of an amplifier (with a built-in
phonoequalizer-amplifier).
• Adjust the volume and DSL on this unit.
MAINTENANCE
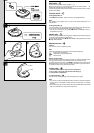
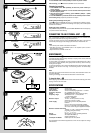
To clean the lens → S
If the lens becomes dirty, the player will skip or not play. If this occurs, clean the
lens in the following manner.
To remove dust or dry particles, first use a camera lens blower/brush a to blow
a few times to loosen particles, then gently brush the lens b clean. Finish by
blowing the lens again.
Toremovefingerprints usea cottonswabdipped inlenscleaningsolution Wipe
M
1
2
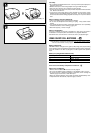
N
O
P
1
2
3
Q
FM AM
ENTER/DISP
AM STEP
9kHz
10kHz