


Connecting
the
Headphone System
i. Setup:
Place the Transmitter in a location with enough clearance so that you can
store the Headphones on the Transmitter. This is important, because the
Transmitter charges the Rechargeable Batteries (P) inside the headphones so
they are always ready for use. See
Charging the Batteries on page 5.
You can use the Surround Sound Headphones with up to three different
audio/video components. The three inputs on the transmitter – two digital
and one analog – allow quick and easy connections for maximum versatility.
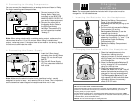
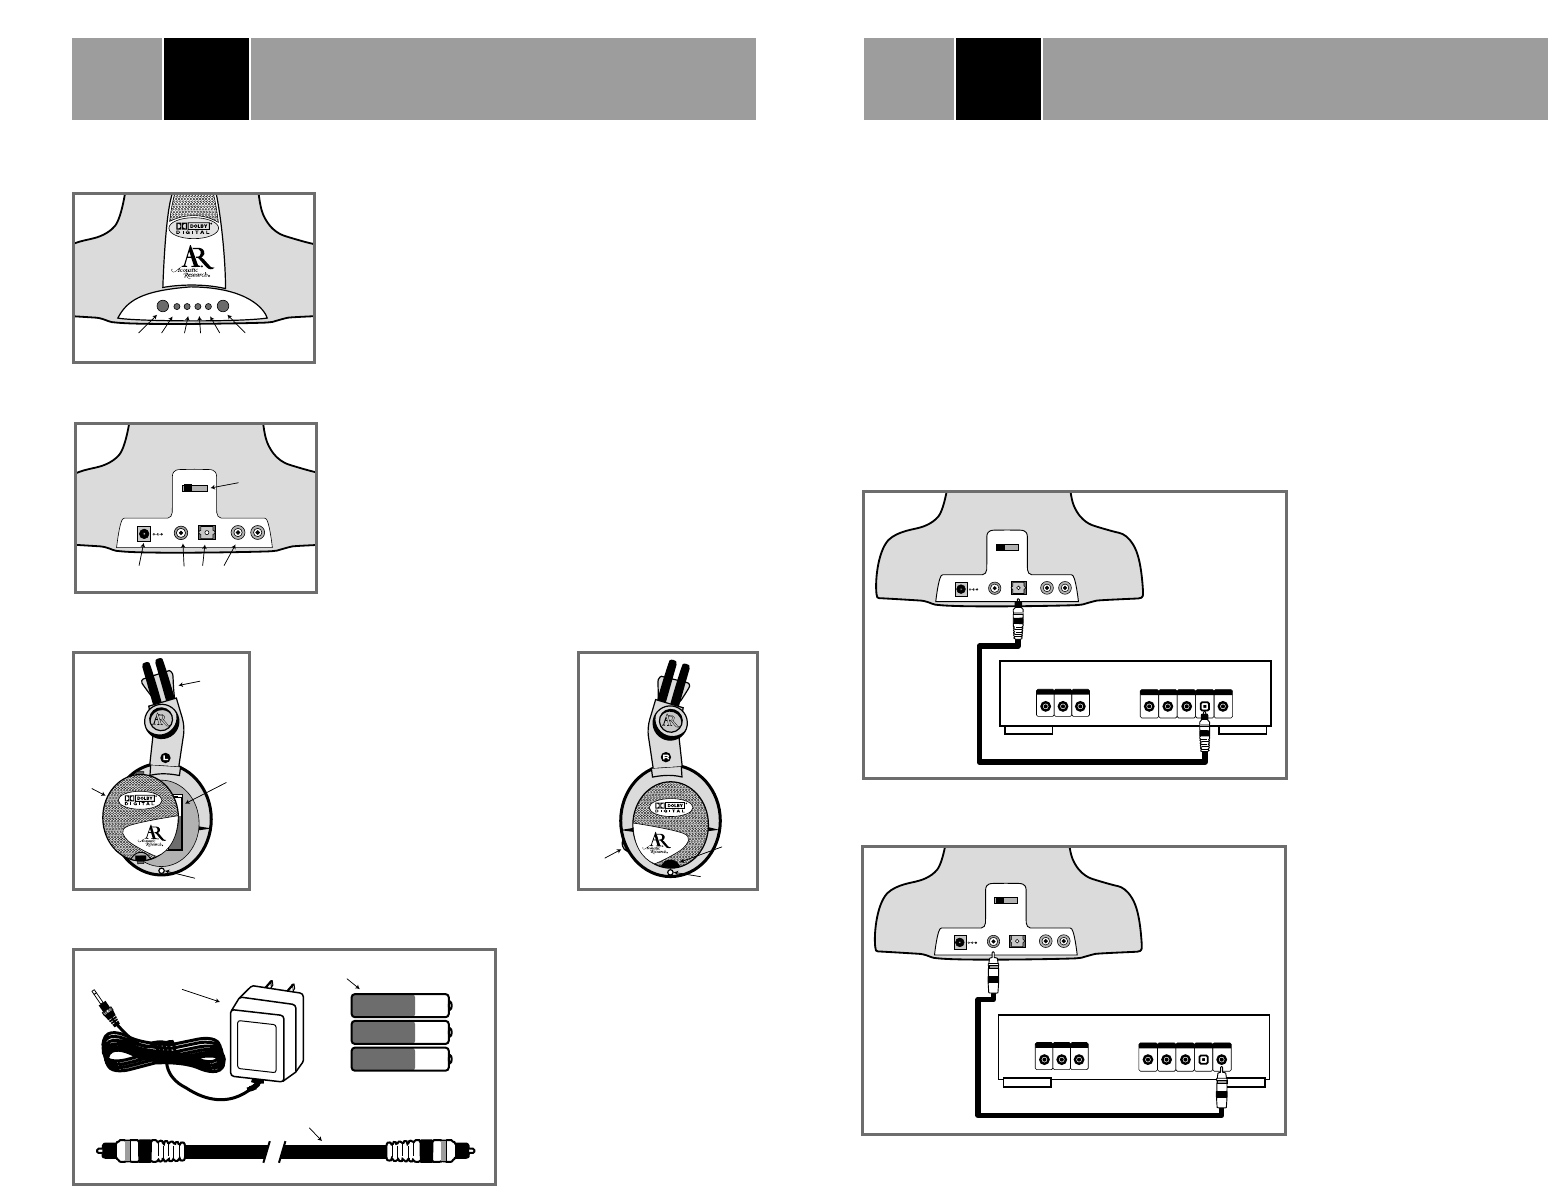
ii. Connecting to Digital Components:
a. Connecting Using the Supplied Toslink
®
Digital Optical Cable:
1. Connect one end of the
Toslink
®
Digital Optical
Cable (Q) to the
DIGITAL OPTICAL
OUTPUT of your
audio/video equipment.
2. Connect the other end
of the Toslink
®
Digital
Optical Cable (Q) to the
Toslink
®
Digital Optical
Connector (F2) on the
transmitter marked
“Digital 2”.
b. Connecting Using a Digital Coaxial Cable:
1. Connect one end of the
Digital Coaxial Cable
(not included) to the
DIGITAL COAXIAL
OUTPUT of your
audio/video equipment.
2. Connect the other end of
the Digital Coaxial Cable
to the RCA-type Digital
Coaxial Connector (F1)
on the transmitter
marked “Digital 1”.
COMPONENT VIDEO
RIGHT LEFT VIDEO OPTICALD-COAX
OUTPUT
DVD PLAYER
RED GREEN BLUE
A B C
A B C
CHANNEL
CHANNEL
DIGITAL 1
DIGITAL 1
DIGITAL 2
DIGITAL 2
ANALOG 3
ANALOG 3
AC 7V
AC 7V
TRANSMITTER
II
COMPONENT VIDEO
RIGHT LEFT VIDEO OPTICALD-COAX
OUTPUT
DVD PLAYER
RED GREEN BLUE
A B C
A B C
CHANNEL
CHANNEL
DIGITAL 1
DIGITAL 1
DIGITAL 2
DIGITAL 2
ANALOG 3
ANALOG 3
AC 7V
AC 7V
TRANSMITTER
- 3 -
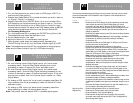
Location
of
Functions
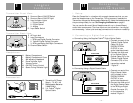
Transmitter Front View:
A. Surround Sound ON/OFF Switch
B. Surround Sound ON/OFF Light
C. Input Indicator Lights
1. Digital Coaxial
2. Digital Optical
3. Analog
D. Input Select Switch
Transmitter Back View:
E. AC Input Jack
F. Input Connectors
1. RCA-type Digital Coaxial Connector
2. Toslink
®
Digital Optical Connector
3. RCA-type Analog Left/Right Connectors
G. Channel Select Switch
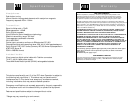
Headphones:
H. Battery Compartment
I. Battery Compartment Cover
J. Self-adjusting Headband
K. Power Indicator Light
L. Volume Control
M. ON/OFF/Tuning Control
N. Stereo Tuning Indicator Light
Accessories:
O. Transmitter AC Power
Supply - 7V AC 1.4A
P. Rechargeable Batteries
3 AAA Ni-MH
Q. 3 ft. Toslink
®
Digital
Optical Cable
SS 1 2 3
A B C1 C2 C3 D
I
A B C
A B C
CHANNEL
CHANNEL
DIGITAL 1
DIGITAL 1
DIGITAL 2
DIGITAL 2
ANALOG 3
ANALOG 3
AC 7V
AC 7V
EF1F2F3
G
I
J
K
H
L
N
M
---
+++
O
Q
P
- 2 -