6-7
• If belt switch is okay and there is still an
open circuit, check and repair the wir-
ing harness.
• If the Start winding is in question and
the resistance is much greater than
4 ohms, replace the motor.
9. Door switch problems can be found using
the Diagnostic Tests on page 6-2; how-
ever, if this was not done, the following
(step 10) can be done without applying
power to the dryer.
10. Connect the ohmmeter test leads to the
electronic control board at P1-2, (neutral,
white wire), and P1-3 (door, blue wire).
With the door closed, the ohmmeter should
indicate a closed circuit (0 to 2 Ω). If not,
replace the door switch assembly.
TEST #3: HEATER TEST
This test is performed when either of the fol-
lowing situations occur:
• Dryer does not heat
• Heat will not shut off
This test checks the components making up
the heating circuit. The following items are part
of this system:
• Harness/connection
• Heater relay
• Thermal fuse (gas dryer only)
• Thermal cutoff (electric dryer only)
• High-limit thermostat
• Gas burner assembly (gas dryer only)
• Heat element assembly (electric dryer
only)
• Centrifugal switch
• Thermistor
• Electronic control board
• Console electronics & housing
• Gas supply (gas dryer only)
Dryer does not heat:
1. Unplug dryer or disconnect power.
2. Remove the toe panel to access the ther-
mal components.
3. Gas Dryers Only:
a)Perform TEST #3b (Thermal Fuse Test).
If the thermal fuse is okay, proceed to
step b.
b)Connect the ohmmeter test leads to the
red wire and the blue wire of the high-
limit thermostat.
• If there is an open circuit, replace the
high-limit thermostat.
• Otherwise, proceed to step c.
c) Perform TEST #3c (Gas Valve Test). If
this is okay, replace the electronic con-
trol board.
Continued on the next page.
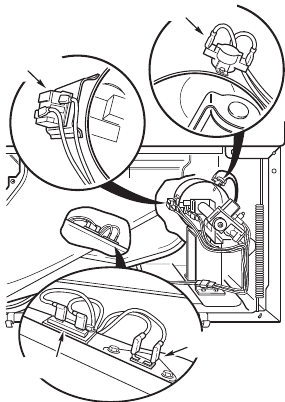
lame Sensor
Thermistor
Thermal Fuse


